
We’ve all heard that we need to have a presence on Facebook for our businesses, but what does it actually look like? Over the years, Facebook has turned from a free marketing platform that was easy to grow to, to one where only about 16% of your Likes will see any give post.
Recently, we’ve seen a lot of businesses turn away from even wanting to market on Facebook, but it still is an essential network for your business big or small. In this blog, I’m going to take a look at the important steps to build a viable Facebook marketing strategy, dos and don’ts of Facebook for business, and little-known tips to make sure your business sees a return on your investment in Facebook marketing.
Building your Facebook Strategy
Facebook, just like any modern marketing avenues, is much more than just sharing a piece of content. Our tribes are composed of smart individuals who no longer want to be told what to do, but appreciate brands that help them to discover new, meaningful things. Facebook, luckily, is the perfect avenue to increase our presence and set ourselves apart from competition.
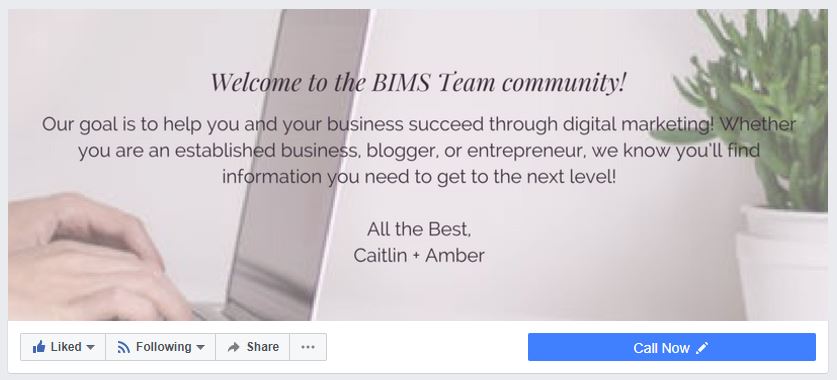
Step 1: Complete your Business Page Profile
Your profile picture, cover photo (or cover video), and about section of your business profile create the first impression your business gives to your Tribe on Facebook. It is very important that these elements are all completed mindfully, rather than just putting up the first thing you see or think of.
Let’s start with your profile picture.
Your business profile picture should be an easily recognizable image that conveys who you are as a brand or company. Many solopreneurs, freelancers, or businesses with an individual as the face of the company should and can get away with using your headshot as the profile picture. On the other hand, businesses that have a brand identity should use their business logo as the main profile image. The Facebook Profile picture is the thumbnail image that appears next to all of your social media posts, comments, and messages, so it is important to take your time and choose this image wisely.
A little later in this post, I’ve included an infographic from TechWyse with the exact dimensions of each type of image you can use on Facebook so you can be sure your pictures always appear crisp and clean. A profile picture should be 170px by 170px.
Next we have your Cover Image.
Facebook just recently changed the cover image so you now can also include Videos! This exciting change can really help your Facebook Business Page stand out among competition. Your cover image is prime real estate on your Facebook page. It is wonderful space to highlight a marketing campaign, seasonal offering, or exciting news for your brand.
In this image or video, you can include a call to action, and even entice individuals to use the buttons directly below the image to Contact you, Claim an Offer and more!
Businesses that coordinate their cover image, profile picture, and pinned or promoted posts see a much greater return from their Facebook pages than those who don’t.
Your About Section
All too often, we see businesses with incomplete About sections that link to old websites and don’t fully explain their business service offerings or their brand promise. The good news is, once you have this written correctly the first time, you can reuse it or similar content for other social media networks.
A preview of your About section appears below your profile picture, so it is important to make sure this information is relevant accurately conveys your brand. Companies with ill-planned About Sections on Facebook are doing themselves a disservice. Try playing around with the language you use and measure the responses to those changes.
In your About section of your Facebook Business Page, be sure to describe your business, use keywords, and include a call to action to get people liking your page or heading to your website.
[clickToTweet tweet=”Three steps to creating a income-generating Facebook marketing strategy #FacebookMarketing #TheBIMSTeam” quote=”Three steps to creating a income-generating Facebook marketing strategy #FacebookMarketing #TheBIMSTeam”]
Step 2: Posting to your Facebook Business Page
As you begin posting to your Facebook Business Page, it is important that you follow a strategy to remain on point and brand. It always surprises me when some business owners still want to post only about their business. The truth of the matter is that 80% of your Facebook posts should be about something other than linking directly back to your website. The other 20% can be blogs, promotions, and information about your company and business.
By sharing information that is not directly linking back to your website, you are helping to show your authority in your niche. You are sharing resources that your market can benefit from, quotes and images that can engage your tribe, and more generally, information that will interest your followers.
When you are posting, think about:
- What other businesses are in your space
- The information that will appeal to your market
- Things you are passionate about in your business
- Other influencers with whom you could engage
Then, create a plan for how you will share your content. Make sure you include:
- Videos
- Images
- Tips
- Quotes
- Questions
- Calls to Action
- Throw back posts
- Educational Articles
- Your blog posts
Lastly, use this infographic to make sure all of your images display properly in your Facebook Business Page posts.

[ Source TechWyse Internet Marketing ]
Step 3: Growing your Likes and Engagement on your Facebook Business Page
It is great that you are now posting on your Facebook business page and following a strategy, but how do you actually grow your Likes and Engagement? These tips will help you to make sure that your business is on its way to a profitable Facebook presence.
Invite your Email List and Personal Friends to Like your Business Page
Many business owners with whom we work are nervous about sending an email to their email list or inviting their personal friends to Like their business page. You’ll be surprised, however, to see how many people respond to your request! As someone who often keeps my personal life and business life separate, I forget that many of my personal connections may actually be interested in learning more about digital marketing or may be starting their own business.
Facebook makes it very easy to invite people to Like your page. If you go to your Page and scroll down, on the right side of the screen you will see a box that says “Community”. In this box, there is an option to “Invite your friends to like this Page.”
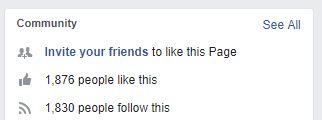
When you click this link, Facebook will prompt you to select the friends you would like to invite to Like your Facebook page.
With your email list, I recommend sending an email rather than utilizing Facebook. In the email you can explain some of the perks of Liking the Facebook page and what people can expect from following your account.
Share your posts to your personal profile
Another way to increase your page Likes and to gain more engagement is by sharing your business posts to your personal profile. While I don’t recommend sharing every post, consider sharing your blog posts, videos, and images that represent your brand and personal values. These posts won’t come across as you trying to sell to your personal relations, but that your goal is to better educate them on what you do and your industry.
If you work with a team, you can even ask your employees and contractors to Like, Comment, and Share posts that relate to them, as well.
Boost Posts and Run Facebook Ads
I won’t go into much detail here, as this would create another LONG blog post, but using Facebook ads and boosting your Facebook posts is a great way to increase engagement. Here I recommend playing around with boosting the post to:
- Your current page Likes
- A custom audience made of your email list
- Specific targeting of your tribe’s demographics.
Facebook’s targeting options are incredibly advanced, so just like with any sort of marketing, I recommend testing very specific niche’s rather than typing in everything demographic or psychographic identifier you can think of. This way, over time you will be able to more easily tell which interests or job titles, for example, lead to the highest number of new likes, follows, shares, and comments.
Post share-worthy content
Of course this needs to be listed. I’ll go into more detail below, but one of the most important pieces of your strategy to gain traction on Facebook is to post content that people want to read and share. This means that in addition to finding other articles and resources, you need to be making these for your own website, too. Take your time and really come up with pieces of content that will WOW your tribe!
Not sure how to create a content calendar for your business? Take a look at our Free Master Class on Finding Topics your Tribe will Love!
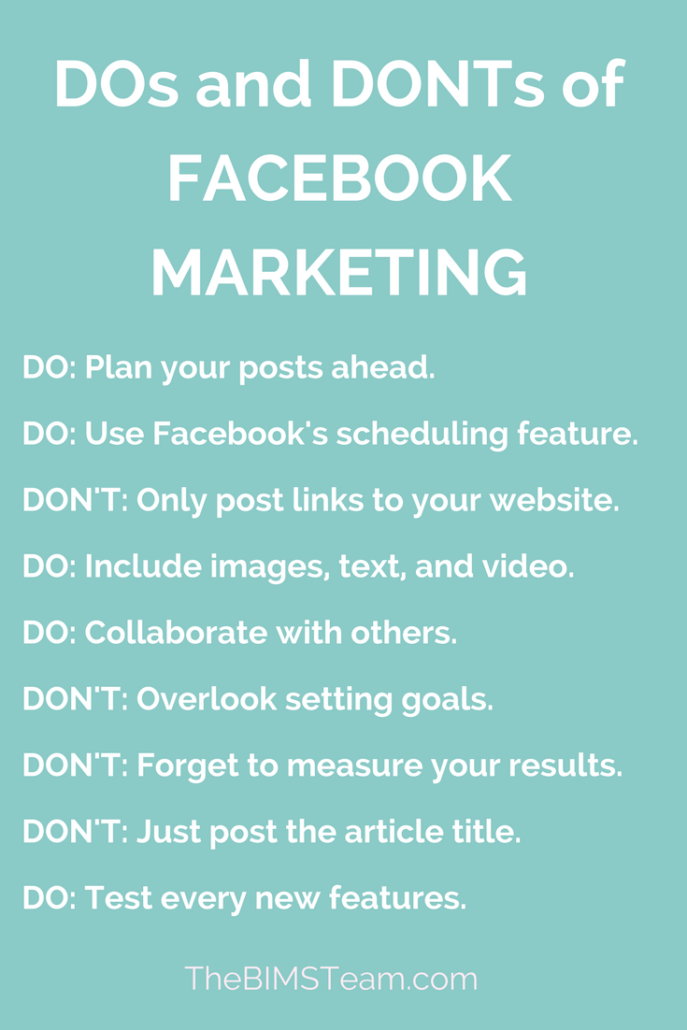
Dos and Don’ts of your Facebook Marketing Strategy
Your Facebook Marketing strategy needs to change as Facebook makes changes to it’s algorithms and adds new features for business owners to take advantage of. Regardless of the nuances of Facebook’s algorithms, there are some items that you need to be sure to include in your Facebook marketing strategy. Above, I reviewed some of the steps to create a Facebook marketing strategy for your business, but here I will be highlighting those items you must include and the common pitfalls of business owners as they jump into Facebook marketing.
DO: Plan your posts ahead. Just as with other marketing strategies, you never want to be stuck wondering what you will post the day something needs to go out. It is better to plan ahead, even if it is for the entire month, rather than coming up with posts on the fly. This way, you will be sure your Facebook posts align with promotions, holidays, and other important events in your business. One way to do this is by using this free editorial calendar to manage your calendar!
DO: Use Facebook’s scheduling feature. I absolutely swear by tools like Buffer.com and Hootsuite.com for scheduling social media posts, but on Facebook, it is more advantageous to schedule your posts out directly through their publishing tool rather than a third party. Yes, you can still incorporate some posts scheduled with Buffer, but a majority of your posts, especially those specifically about your business or from your blog, should be published directly through Facebook. Why? These posts have been proven to reach a wider audience than those that are scheduled through a third party.
To schedule a post on Facebook, write the post as you normally would, but rather than clicking “Publish”, select the drop down carrot to its right and select “Schedule”. One perk of doing this is you can play around with the different types of posts you use from multiple images to galleries, slideshows, and carousels.
DON’T: Only post links to your own content. Talk about boring, right? Our tribes are too smart to follow businesses on Facebook that only talk about themselves. Marketing is no longer a one-way street. It is about building a community around your brand. And to build a community, you need to set the example by listening and sharing rather than just pushing information.
DO: Include images, text, and video in your posts. The more diverse your posts, the more likely you are to capture your audience’s attention. You can use Facebook’s slideshow creator to build short videos with music and captions for your Facebook posts if you don’t have software on your computer to create your own from scratch.
Better yet, try a Facebook Live event and put yourself out there as the face of your brand every week as a way to engage your audience in a whole new way!
DO: Collaborate with other businesses on Facebook. Start reaching out to businesses that are similar to yours or who work with the same individuals you do. By commenting, sharing, and collaborating with them, you are introducing yourself to their audience and helping to boost both of your businesses in the process.
DON’T: Overlook the importance of setting goals. When we set goals for our business, we have a very clear sense of how to understand what is working and what is not working with our strategy. It allows us to aim for something rather than just taking successes and failures in step.
DON’T: Forget to measure your results. You can’t set goals without the following step of measuring your results! Luckily there are incredible, and free, tracking services available for you online. The top ones we use are Google Analytics, Facebook Insights, and Pinterest Insights. The rational here is to see how your efforts have effected your movement towards achieving your marketing (and Facebook) goals.
DON’T: Just post the article title as your post. Say something meaningful about what readers will find if they click the link or take a quote from the article that highlights your main takeaway. Though titles should be descriptive, the same content will appear directly below your post in the link display.
DO: Test the effectiveness of Albums, Slideshows, Carousels, and single Thumbnail images if you are linking to something with many images. Each of these different types of posts will lead to a different response from your followers. We have a photographer, for example, who posts a link with a thumbnail when she first edits a wedding album and creates a blog post as a first peak. Then, she creates a slideshow to reengage the couple and their networks once all of her edits are complete and the couple has access to the images.
Little-known tips to make sure your business sees a return on your investment in Facebook marketing
Facebook is always changing, so it is necessary to take a look at some of the lesser-known strategies on Facebook that maybe you haven’t considered for your business. Some of the strategies below are ones you have seen others implement, while others may be brand new!
Facebook Groups for you Clients and Prospecting
Most users on Facebook are a part of numerous Facebook Groups. These groups are great for your business for a few different reasons. One point to emphasize here is that the groups run through your personal profile rather than your business page. Make sure your personal profile on Facebook links to your business page, is branded with a professional picture, and has the proper security settings.
- Joining other groups in your niche provide an avenue to position yourself as an expert and to meet new prospects for your business. I recommend finding 1-3 groups that are active on Facebook and seeing if you can share information that the members will benefit from. Many groups have guidelines about selling to members, but providing valuable information is always appreciated.
- Creating a Facebook group or groups for your clients. This can be a great add-on to your services or courses that you run online. Because only paying customers have access to the group(s), you will be more motivated to participate and engage.
- Think twice about creating a group for your email list. Recently, many very successful Facebook group managers have been shutting down their ‘public’ Facebook groups. They find themselves spread too thin to really focus on the public group and the specific groups for their clients. I recommend starting small and being engaged with your paying customers rather than trying to create a huge group to prospect from.
Create Custom Audiences when your run Facebook Ads and Segment!
Running ads on Facebook can transform your business or they can be a waste of money. One of the most successful ways to see an ROI from your Facebook ads is by being very niche focused and targeting specific people. By this I mean:
- Upload your email list and promote posts or specials directly to the list
- Add a PIXEL to your website and integrate retargeting to your website visitors. You can set the campaigns up to only target people who are been to specific pages on your website. For example, you can show ads only to people who viewed a specific landing page or who downloaded an ebook.
- Use look-alike audiences to find other individuals who are similar to the people who have responded to your ads.
When you create the audiences and run the Facebook ads, make sure your offer, image, and landing page all are in alignment. Your tribe will pick up if things seem disjoint or like you are targeting too wide of a net.
Add a Video to your Facebook Page Cover Image
This new feature can transform your engagement on your Facebook business page. Guidelines for Facebook Cover Videos are below:
- Video Dimensions: 820 x 312 pixels
- Length: 20-90 seconds and can look
- Sound: Though you can include sound, Facebook automatically mutes the video for user experience
So, what should you do now that you can have a video as your Facebook Cover? Try creating a slideshow video or a quick iphone video that captures your brand. This can be simple to start, but the movement when someone first goes to your business page is sure to keep folks on the page for longer and be more engaging. You can also test out interview style videos or webinar style videos are your cover video.
Wait to Boost a Post
As you can tell, I am all for businesses using Facebook ads to increase the engagement on posts and the traffic to your blog or landing pages. When you plan to boost a post, hold off on pressing the Boost button until the post has had a chance to gain organic exposure first. This organic exposure can really help with gaining more traction and keep your costs down.
Test out Lead Ads
These ads are incredible! If you have a content upgrade on your site or can automatically register people to a webinar, the Lead Ads may work well for your business. Basically, when you create the ad, you also create a form. The form can then be set up to capture someones name, email, and other information. When a user fills out their information, they will be redirected to a page of your choice. For example, you can direct someone to the ebook download page on your site, or to a webinar sign up thank you page. These ads can also be to build your email list.
We’ve found these ads to have a much lower cost per conversion than a lot of other marketing efforts.
Schedule your Facebook Posts
Now you shouldn’t always schedule your Facebook posts, but if you are like most business owners, you are pulled in many directions and hoping on Facebook every day may not be realistic. I recommend using Facebook’s scheduling functionality for most of your Facebook posts as a way to batch your efforts. Take one day a month and find all the relevant articles, make all of your custom images, and schedule your promotions to be published in advance. Then, as you write blog posts over the course of the month and have other items to share on a daily basis, you can log in and specifically share that content.
We used to always use Buffer for scheduling content for clients, but have found a higher level of engagement when posts are created directly through Facebook.
Add a Call to Action Button to your Page
This is fairly easy to implement! Most of the time we see our clients create their CTA when they first set up their business page. If you haven’t already, however, go to your Facebook business page and click the blue button that states “Add a Button”. Here you can select your CTA and a landing page for any user who clicks the button. Tracking is available through Facebook Insights.
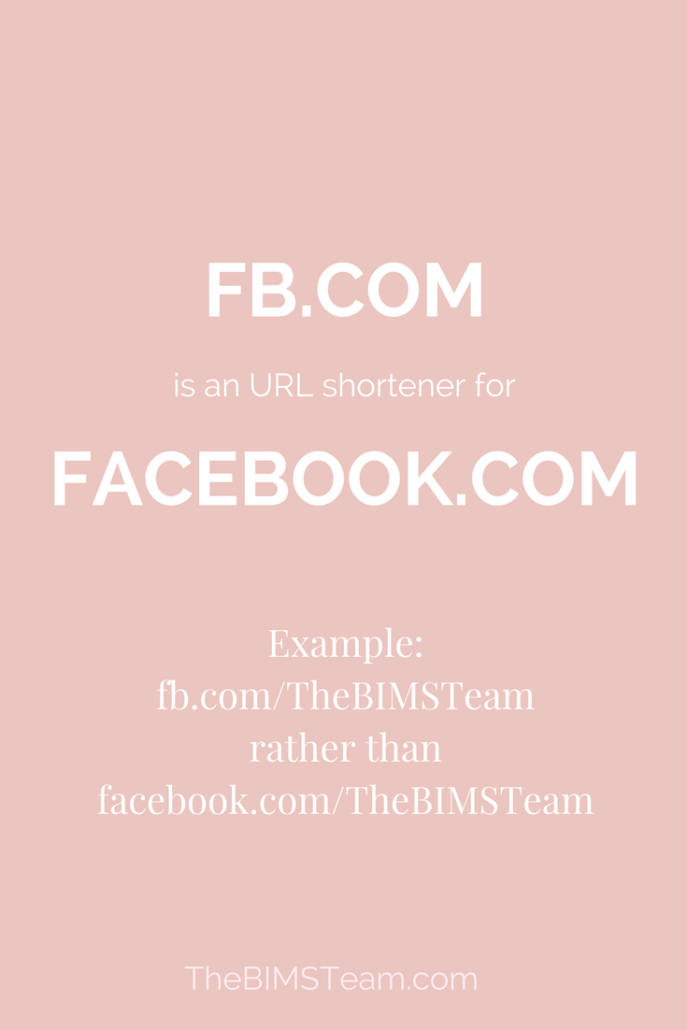
Use fb.com as a URL shortener rather than typing facebook.com
Surprise! fb.com is a URL shortener for all facebook.com addresses.


![9 Steps to Create a Sales Page that Converts. Incredibly easy guide for your sales pages [Sales Pages for Online Course]](http://thebimsteam.com/wp-content/uploads/2017/05/9-steps-to-create-sales-page-that-converts.png)


