In 2018 there are hundreds of different hosts you can turn to for your wordpress website. Some are more difficult to create than others, but we’ve decided after working with many of these hosting companies that Bluehost is the solution you should consider for your small business website in 2018.
This post covers the steps to easily set up your website and hosting on Bluehost.
What is hosting and why does hosting matter?
You can think of hosting as the house for your website files. It is what ensures your site is seen by visitors. Choosing your hosting company wisely can reduce potential headaches as some hosting companies provide more:
- Customer Service
- Easy to adjust memory limits
- Backups
- Minimal downtime.
After years of working with many different website hosts, we have experienced the best service with Bluehost for small business websites.
Why Bluehost for your WordPress Website?
Bluehost makes each step in your website journey easy. Without hidden fees, you know exactly what to budget and the support is incredible both with chat and phone service. Some additional features we love about Bluehost include:
- Free SSL Certificate for the main domain in the account
- Free email that you can set up with a variety of services (or just link it to your gmail account with Imap or POP3).
- One click install of WordPress files
- Easy to schedule backups
- FTP access (which GoDaddy WordPress hosting, for example, does not allow)
- Only costs $3.95 per month when you sign up for a 36 month hosting plan.
Setting up your Hosting account on Bluehost for WordPress is simple. In fact, you can get everything all set up 5 minutes for only $3.95 per month!
How to set up your Bluehost Hosting Account for Only $3.95 per month
First step first, head on over to Bluehost.com*.
Step 1: Get Started on Bluehost Hosting
Click the Green Button that says “get started now” at Bluehost.com.
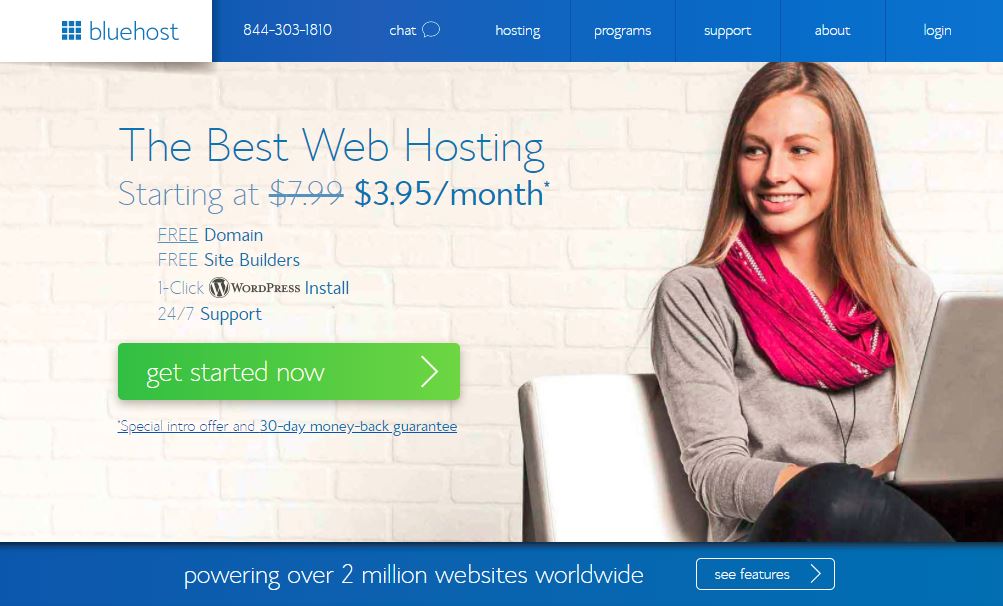
You will be redirected to a page where you can select your hosting level. For most small businesses, the Basic Level at $3.95/mo will work to fit all of your needs.
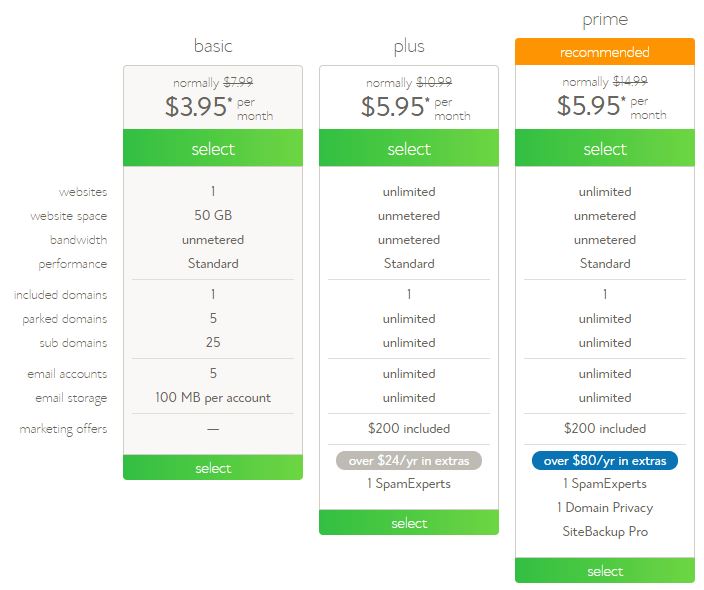
I selected the Basic option.
Step 2: Choose your Free Domain
I love how Bluehost allows you to select your free dom
ain, use an existing domain, or even, choose to select a domain in the future. For many hosting companies, you need to select a new domain immediately or else you lose the credit, but with Bluehost, they understand that you may not have found the perfect domain yet.
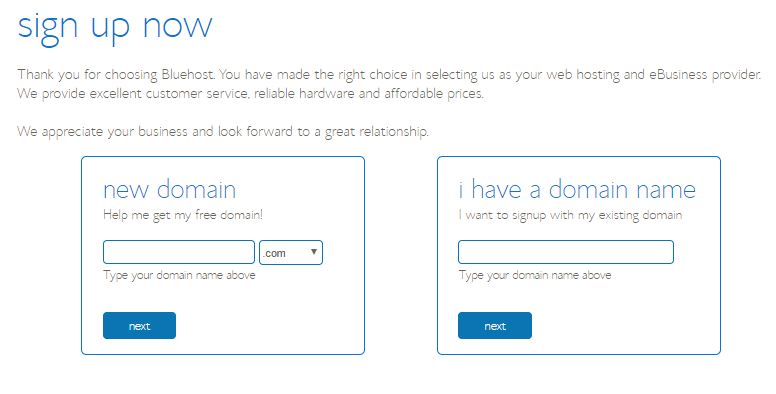
If you have already purchased a domain at Network Solutions or GoDaddy, for example, you can tryp your domain name into the “i have a domain name field” and Bluehost will set you up with a temporary domain as your build your website until the domain name has been transferred.
Again, this is super user friendly for website redesigns and if you are just getting started. PLUS, there is no additional fee from Bluehost to transfer a domain into the account.
One downside of using Bluehost to find your domain is that it doesn’t offer selections for similar domains from this page like GoDaddy does with it’s domain selection service. I would recommend checking that your desired domain is available on GoDaddy before trying to purchase it on Bluehost.
Step 3: Purchase your hosting
The first part here is to enter your contact and business details on Bluehost
This includes adding your name, email, business name, address, and phone number into the fields listed.
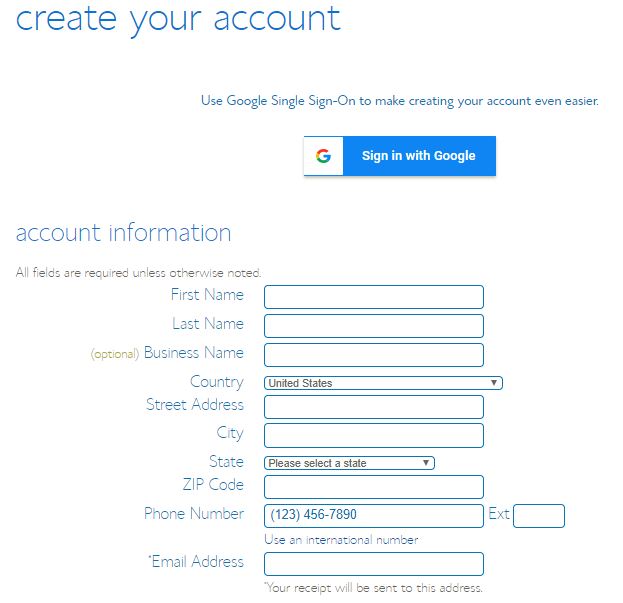
When you enter your contact information, you can also use Google Single Sign-On if you prefer.
The second part of purchasing your hosting from Bluehost is to review your purchase information
In this part of the page your can select or deselect different add-ons. I honestly unselect all of these except the Domain Privacy Protection. This selection hides your personal/business details from being available online. Especially if your business is located at a home office, this is important to protect your privacy.
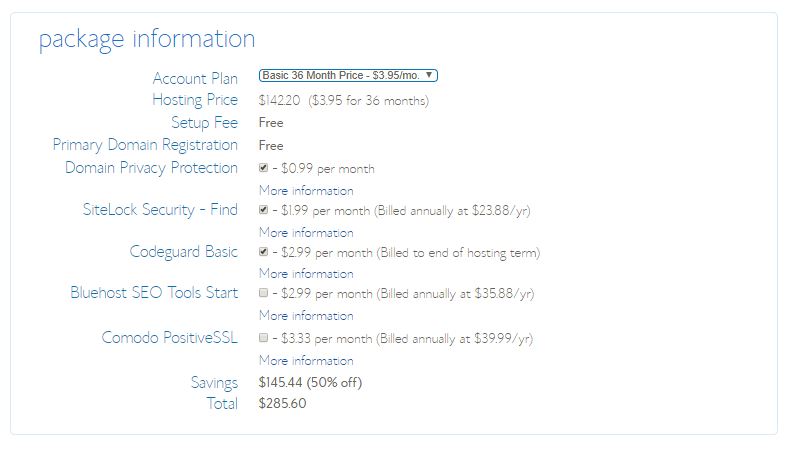
As for SiteLock security in your BlueHost account, I’ve found that if you keep your website files up to date, you don’t really need this. Should you get malware installed on your website, go ahead and add it later. If you are worried about site security and not knowing what to do if malware does appear on the site, please keep SiteLock checked.
The same is true for Codeguard.
Lastly, you will enter in your credit card details
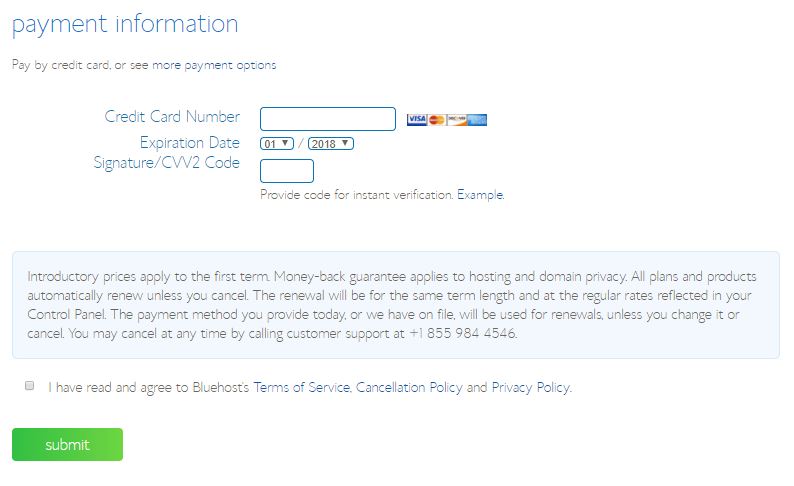
Now click “submit” – pretty straightforward, right?
Now, here is actually a tip. You can get hosting on Bluehost for your WordPress website for as low as $2.65/mo!
What!!?!? That’s less than $100 for three years of hosting!

Now this doesn’t always work, but if you keep the window open without clicking submit for your credit card information, a new popup will appear with your exclusive discount offer.
Sometimes you don’t need to even enter in any details and the popup will appear with the Bluehost offer for hosting for $2.65/mo.
Again, the trick is to be patient! Don’t click submit right away 🙂
Step 4: Installing WordPress
Guess what, the first prompt you see when you purchase the wordpress hosting is to Install WordPress!
Before you get to building your website, be sure to have a clear understanding of your brand, values, and unique selling proposition (what sets you apart from your competition). To help with this process, we’ve created the Your Business Your Brand Workbook that guides you through your target market, finding brand fonts, colors, and writing the content for your product and services pages. It is the go-to guide for getting your business off the ground.
Interested in learning more? Take a look at these articles:
2018 Social Media Marketing Planning Guide [Curated Content]
Cost-Effective Ways to Market Your Local Business Online
Search Engine Optimization, Keyword Research, and Blogging for your Business [April Overview]


