At the end of 2017 we, Caitlin & Amber, said that 2018 was going to be a year of change. Sometimes you just know in your gut that something is going to change. We knew this change was going to be for the better, we just didn’t know what the “change” would be!
For 7 years of being in business together and on our own for 10 years, we have worked hard at building our client’s brands, products, online communities, and businesses.
We are really good at what we do! The only problem with building everyone else’s businesses is you tend to put yours on the back burner.
Oh, we will make those videos later, we will write those blogs next week, oh, yeah that’s a good idea to have a coaching program – maybe next year . . . .
Long story short that “next year” came it’s called 2018!
We LOVE, LOVE, LOVE working with our clients and most of our clients have been with us since the beginning.
In December, Caitlin and myself had a talk about what we wanted to do differently in 2018.
How could we take our business to the next level?
We love being a resource to our communities and we both know so much about social media and digital marketing. We wanted to up our game and be able to provide MORE to our tribe!
Um, LIGHTBULB moment, it clicked for us.
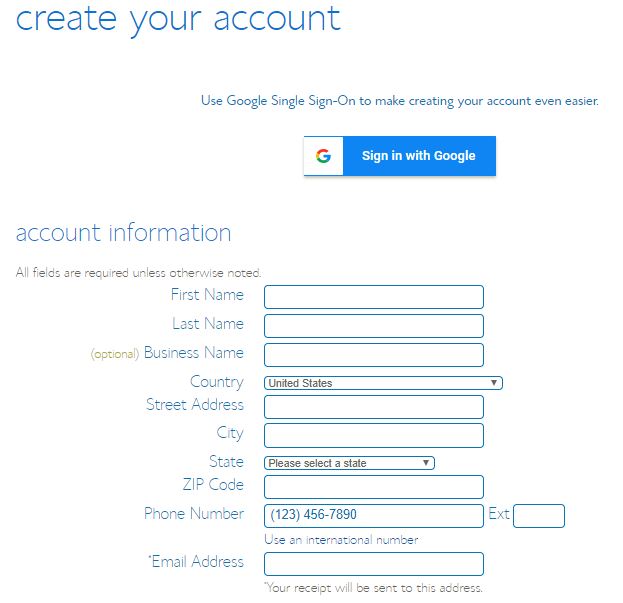
What about if we create a website, a new educational platform, where our tribe can go for FREE, YES FREE, to search and find all the information they wanted to learn about social media and digital marketing . . .
Sounds great right?
Caitlin and I like to jump in feet first and not look back. When we have an idea, we are set on it we are making it happen!
We created a new website called Social Speak Network with a TON of information for our peeps, but we wanted to take it one step further . . . with all this awesome content, videos, and downloads, people were still asking on the “How-to.”
They love all the content but wanted to learn more hands-on how to implement it into their business and be held accountable for their digital marketing strategy.
That’s why we created our “Small Group Online Coaching Program” – a 6-month program for 3-5 business owners to really dive deep into their social media and digital marketing strategy, learn how to be successful online, grow their tribe, and learn new things!
Now, this is something that totally feeds our soul!
We are so very passionate about teaching others about social media and digital marketing and all the fun and cool things you can do! Isn’t awesome when you find your true meaning, your purpose, what you are supposed to be doing?
We want to help you create that too!
So, what does this mean for you??? What are we looking for?
-> We want to invite you to our Facebook Group, this is the starting point, we post great information every day, you can ask questions, engage with other business owners and grow your tribe through this group!
-> We would also love your support if you would subscribe to our YouTube Channel
-> We would LOVE to offer you is a FREE 30-minute consultation to answer any social media or digital marketing struggles you have been facing. You can email us at SocialSpeakNetwork@gmail.com to set up a time!
Interested in learning more? Take a look at these articles:
A day in the life of an Entrepreneur