Have you been thinking about starting a freelancing business or going into business with a partner?
Being your own boss is an exciting and frightening feeling. It is something you want so bad and yet are afraid to chase that dream or leave your comfort zone.
I think at some point every person dreams of owning their own business, making money doing something they love to do.
Unfortunately, very few actually take that leap of faith and follow their passion and dreams.
In today’s world with this awesome tool called the internet, we truly can create a freelance business and work from anywhere.
For example, I am writing this blog from a beach by my house in Florida! 🙂
In this blog we will be covering:
Our Story of How We Became Partners
How to Know if Having a Partner is Right for You
Tips for Running a Successful Freelance Business with a Partner
Our Story
I remember when I started my business, I had set out to do my own thing, my own way and I was committed to making it work!
The day I started my business I already had 6 clients who had signed up for my services, so I was already making the same monthly income I was making at my corporate job!
See, the backstory on that is I told my husband (boyfriend at the time) when I left corporate to give me 6 months to replace my corporate income or I would go back!
The fact I was able to do that right away gave me even more drive and desire!
When I started my business I had offered a couple different services, social media management, networking, virtual assistant help and for a couple of my higher-end clients, I went to their office a couple days a week to help get them organized and some assistant work.
Things were moving and shaking.
I had my business for almost three years before I met Caitlin. We worked at a Marketing Firm in Northern Colorado together. We managed about 5-10 accounts for this company and really worked well together.
After a few months we had found out that owner was embezzling money from some of the clients, so we both left.
Caitlin and I both knew we liked each other and thought we should explore more about what we each do. We grabbed coffee one day and 4 hours later we had figured out that we could really complement each other.
My business had been successful for the first three years and I knew it would continue to grow if Caitlin and I could work together. We could really take our businesses to the next level, and help all sorts of businesses with their digital marketing.
Caitlin had a different skill set than me and vice versa. We both had been managing digital marketing from two different angles.
I worked on social media management and she worked on analytics and AdWords, so we really complemented each other.
We each had our own businesses with our own clients that would benefit from each other’s skills and services.
We decided to work together, we thought it would be best to keep our own businesses but incorporate each other’s services by offering them to our own clients. Just to test the water, we wanted to make sure we would really work well together before we said: “I do, want to be your business partner.”
This worked extremely well, we were each bringing in more clients and happy with the results they were getting.
We worked together for over a year when we hired our second intern. It had started to get a little confusing for our intern trying to keep track of what clients were Caitlin’s, what clients were mine and which were ours together!
We really had to work on our systems at this point!
The TALK
We had a long talk about how we both managed our own businesses, what systems we had in place, price points, income, how we each managed our own clients and where we needed help, etc.
There were a few things we would both have to adjust if we joined forces, but we were both committed to doing so.
My grandmother was a CFP and owned three H&R Blocks in Michigan for over 25 years, so we had a conversation with her about moving forward with becoming partners and combining our businesses.
Our question was “how do we partner and join forces and what is the best way to do this?”.
I have to be honest, my grandmother was not very excited about the thought of us being “Business Partners.” She had told us that almost every business tax return she had done with partnerships never ended well.
They couldn’t agree on finances, roles, services, prices, or one would think they were doing more work than the other, lack of communication, the list went on.
We both knew that by working together we would be able to reach new goals and grow our business.
We both have exceptional work ethics. Our core values are in alignment. We compliment each other nicely.
A few things needed to happen before we moved forward, the biggest thing was roles!
Roles in the Business:
– Who was going to manage the money
– Accounts Payable and Receivable
– Sales
– Marketing of our own business
– Client Interaction
– Managing our Interns
– Day to day tasks
We both were able to express what our goals were, where we wanted to be, how we wanted to grow the business. We both were able to play off of our strengths and weaknesses.
We had written out what each of our responsibilities would be and what our expectations were for each other. This helped set the foundation for our successful business. We got those uneasy conversations out in the open first thing.
Still, to this day we have our own roles and have had very clear conversations about money and expectations.
Long story short, we decided to go for it and we created Boundless Internet Marketing Solutions (The BIMS Team). We both kept our own LLC’s and formed an S-Corp together. We decided that any client that had to do with marketing would go through The BIMS Team. We also agreed if we had a client or project that was outside the scope of BIMS we could run it through our own LLC as long as we communicated. This included side projects like I made soaps and sold them for fun, Caitlin refinished furniture and has an online store where she sells apparel.
How to know if Partnership is Right for You
I have always loved the idea of co-creating. I also know I am a control freak and like things done my way! As much as I like things to go my way and have the control I also knew that I could learn a lot from Caitlin. We could really go far with our business together.
Teamwork+Trust = Success
I liked the idea of shared responsibilities, someone to hold me accountable, someone to bounce ideas off of and feedback on projects.
I think before you decide to have a business partner you need to have a self-talk.
Really understand the type of person you are and who you want to be. You have to be honest with yourself and understand the areas where you can grow and change your ways.
You also have to be ok with taking direction or constructive criticism from someone else.
For example, there are times where Caitlin has an idea to change a system or process that we have had in place and I usually have resistance towards that change. She talks me through the new process and how it is going to help us, I let my guard down and allow the change to take place.
9 out of 10 times it works out for the better!
Just remember it is ok for things to grow, adjust and change. I have to remind myself that this is why we started our own business to have that freedom and flexibility.
Having a partner in a freelance business can really be a powerful tool. Time to time, I think where would I be in my business if I didn’t meet Caitlin, or if we didn’t join forces. I know for a fact that I wouldn’t be the person I am today if we hadn’t joined forces.
I am a type of person that LOVES my comfort zone! Caitlin helps me grow and pushes me. (In a good way)
It has been a great journey so far learning from each other, and for each of us to allow another to grow in their our own ways. To also collaborate on new business goals and techniques. You can set yourself up for personal and business success with a partner.
This past year, we both took the ‘What’s Your WHY?’ test and that was a huge eye-opener for us. You have to trust each other and know that both of your end goals is the same. You may both take different roads to complete a task or project, but as long as neither one of you are hurting the business or brand, allow each other to flow.
Tips for Running a Successful Freelance Business with a Partner
Like I said above, having a partner is a great idea if both of your personalities mesh together and you can work well together. Ove the past 7 years of running a successful freelance business with a business partner where everything is 50/50. I have learned a few things about having a business partner.
Here are 10 Tips for you:
1.Have a Successful History Together Before Forming the Company
It is important to form a relationship/friendship outside of work, this piece can be tricky. You want to find that right balance, of friendship and work relationship. You want to feel comfortable with this person. Someone you can go grab a beer with or call if you need something. You have to be yourself!
2. Agree on a Vision
In the beginning “Talk” you need to both express your vision for what each of you is thinking for the company. Outline a one-year plan, three-year plan, five-year plan, and long-term plan.
Where do you both see yourself in ten years?
Is your vision the same?
Are you both wanting to serve the same target market?
Are your both looking to grow the business with the same idea of services or programs?
3. Have the Hard Talks About Money
Make sure to keep your communication open about money. This is the key to run your business and grow. If you both are not on the same page you need to talk about it. How do you both feel about money? What is your worth? How should you charge for services? Where is there flexibility with pricing and working with clients?
Will you have monthly contracts with your clients, do they pay weekly, or monthly? How will they Pay? Credit Card, Check, PayPal, Stripe, Cash?
Then, once you are both in agreement about how you are going to charge your clients and collect money. Then you need to have the conversation about how do you pay each other. Are you going to have paydays?
At the beginning of our business journey together, we would split the money as soon as someone paid, so if we had a $500 client pay that day we would each make $250. This was fine when it was just us two.
We hired interns early on to help with certain tasks, so then we started having business expenses. We needed to figure out how we were going to pay our interns or contractors. We pay them on the 1st and 15th and then we decided it would be better if we set dates to pay each other. So, we pay each other the 1st and 3rd Friday each month. We adjust if needed.
This put another system/process in place for our business.
4. Decide the Roles
Figuring out the roles and expectations of each other will help things run more smoothly. Now, there are two of you so it is a good idea to split the business responsibilities.
I suggest to sit down and write out a list of every task there is to running your business. Write it down on a daily, weekly, monthly basis. I mentioned these roles before:
– Who was going to manage the money – Accounts receivable and accounts payable
– Bills and expenses – who is in charge of making sure those are paid?
– Sales – are you both bringing in new clients? Do you each have a goal or minimum of new clients you want to bring in each month?
– Marketing for your business – who is doing the blogging, videos, social media, networking, digital marketing, etc.
– Client Interaction – are you both going to have the client interaction or is all communication going through one person? Do you figure out who interacts with them based on who brought them to the business?
– Managing Interns or Contractors- Who is in charge of finding help? How much will you pay them? How will you pay them? What are your expectations or requirements for each intern or contractor?
Once you have your list written down, you can then both go through it and pick the tasks you want to manage. The ones that neither of you is passionate about, see if you can hire those out. Work smarter not harder.
5. Understand Each Other’s Commitment
Core values come into play here. When you understand where your core values are at then you can understand each other’s commitment level for the business. What is each of your commitment to the business, clients and each other?
6. Identify Each Other’s Strengths and Weaknesses
This is why you are even thinking of having a partner because they most likely do something that you don’t. Outline each of your strengths and weaknesses, this is something you may have jotted down during your own self-talk section. What areas in your business do you excel at and where are the areas that you may not pay as much attention or areas that are more weak for you or you are not as passionate about. Each of you needs to do this. You should both have different strengths and weaknesses. If you both have very similar strengths and weaknesses, you might want to reevaluate that partnership. Will you be able to push each other and compliment each other?
7. Compatible Styles
Now, that you both have discussed your core values and outlines each of your strengths and weaknesses, it is time to make sure you are compatible. Where your weaknesses are should be your partners’ strengths, and where their weaknesses are should be your strengths.
Being compatible can go deeper than just running the business.
For example, Partner #1 works 12-14 hours a day, has no kids and is always trying to get new clients to get the business up and running to bring her vision into play. Is very driven and doesn’t like to be told what to do.
Partner #2 has a family and needs to find that work/life balance, has a busy schedule with hobbies or child activities and may work more in the evening than during the day.
This could be a problem for some people, this is where those upspoken expectations come into play. As long as each of you is able to get the work was done and you can communicate during hours that work for each of you, then you are compatible.
You need to have common ground and communicate about schedules and family life. We have found that having a task-driven company works better, there are days where I may only work 3-5 hours a day and then there are days where I am working 12-14 hours a day and same with Caitlin.
We can’t track each others hours and hold that over each other’s heads but have those roles and tasks clearly outlines so you both know what is expected from you each day.
Another thing to talk about with your business partner is their “psychographic” styles. In a nutshell, what is their personality like, values, attitudes, interests and lifestyles?
8. Figure Out How to Grow the Business
Go back to number 2 – What is your vision? If you both have the same or at least a similar end-goal then what are the steps you both need to take to reach that goal? Set monthly and annual goals for the business. Revisit that one-year, three-year, and five-year plans.
9. Have a Plan for Success
You have set your goals which is great and now you need to create your plan. If you both want to make over six figures a year, what does that look like? How many clients or projects do you need to have each year to reach that level of success? What does success look like for each of you? Is it happy clients? Six-figure income? Make sure you are both on the same page.
10.Have an Exit Strategy
The last thing – put an exit strategy in place. This is something that just protects each of you and again outlines those expectations.
If either of you chooses to part-ways, what does that look like? Sometimes things just don’t work out. Maybe one of you got a new opportunity or decides to go in a different direction. Maybe deciding to start a family and chooses not to work at this time.
You need to have a clear outline. Is there a buy-out process? Do you measure how many clients each of you brought to the company? Can you just walk away and let your partner continue?
This is another hard talk to have, but it is important to discuss an exit strategy so you don’t burn bridges with your partner or clients.
We covered a lot on this blog and you may need a little time to really think about if having a business partner is right for you. If you discuss these steps we outlined you both are on your way to success!
Are you ready to grow your freelance business?
We invite you to sign-up for our start and grow a freelance business!
Interested in learning more? Take a look at the following articles:
https://socialspeaknetwork.com/wp-content/uploads/2018/06/Creating-a-Successful-Freelance-Business-with-a-Partner.png315560Amber Irwinhttps://socialspeaknetwork.com/wp-content/uploads/2018/04/SocialSpeak-Logo.pngAmber Irwin2018-06-12 21:55:022018-11-12 23:08:22Creating a Successful Freelance Business with a Partner
“You can cut all the flowers but you cannot keep spring from coming.” – Pablo Neruda
I first wrote this blog in January, waiting for spring and new beginnings to bring fresh light to the loss we endured in December, but alas, a new situation has arisen where I need to share and invite a community of others into my life. When I finished writing this post at the end of March, I couldn’t click publish. Now, it is nearly 3 months later, and I’m finally editing my blog to share with others.
This post will be difficult to write and I assume difficult to read. My goal is not to hold back, but to embrace my mission of creating a community of strong and empowered entrepreneurs. Being authentic and open about my own struggles will hopefully help you do the same as you face your fears and create something for yourself.
I start here with my miscarriage at 10.5 weeks in December, followed by a ruptured ectopic pregnancy 2.5 weeks ago (in March) at 6.5 weeks, and end with a message of love and support that being a mompreneur has provided me.
Part 1: The unexpected loss.
I could see his eyes drop as the ER resident brought the ultrasound across my body one last time. Joe slowly shook his head as he looked me in the eyes. He had seen what we already knew was true: our little baby was gone.
Every year we travel back to the east coast between Thanksgiving and Christmas to take advantage of low ticket prices and fewer travelers during the Holiday season. It’s a time that we can spend with my Joe’s brother’s family, my brother’s family, my parents, and our friends.
As business owners, we always spend a few hours here and there working, but this is a time of relaxation and reconnection with friends and family.
This year was different. Both my sister-in-law and I were pregnant with our second children and due 7 days apart! Our daydreams were filled with visions of the cousins growing up together and reaching the same milestones in sync. Our trip started with pure joy and excitement. MK and her cousin J were all snuggles and did a great job of playing and sharing with each other.
We then announced my pregnancy to my aunt and grandparents who were over the moon that the family brood was growing: from 1 great granddaughter a few years ago to soon-to-be 8 great-grandchildren by mid 2018.
But the next day I saw a little blood. After calling the doctor’s office, I was reassured that perhaps I just had a yeast infection, and it wouldn’t harm the baby. The following morning, however, I started having cramps around 5 am, and my optimism quickly vanished. Waking my husband up, I crawled upstairs to tell my mom we needed to go to the hospital and asked if she and Dad could watch MK until we returned.
Then I had my first set of contractions. Though not as bad as actual labor contractions, I was quickly reminded of how utterly bad I am at natural labor and immediately rushed to the bathroom to throw up and collapse in pain on the floor. Heading back downstairs a few minutes later another contraction came, and I passed what I knew was our little baby.
In the ER at Dartmouth Hitchcock, we were met by a lovely nurse and an ER resident who guided us through the ultrasounds. They took their time not only explaining what had happened but also shared their own personal stories of loss. They explained that it looked like the baby had stopped growing about a week and a half before and reiterated over and over that there was nothing we could have done.
We felt the loss and pain deeply, but were fortunate to be surrounded by family and love. Joe and I cried and held each other in support as we processed everything in waves over the following months.
At one point, shortly after our ER trip, I realized that based on the timeline, the baby had died right after Thanksgiving, when we had told my in-laws that we were expecting. Our little angel had found their to a better place as they were surrounded by love, prayers, and well wishes. This realization that the baby left the world embraced in love has helped me move forward. It helped me overcome the pain I felt that our baby had died, and nobody knew for a week and a half.
Additionally, I found talking about the loss opened doors to deeper connections with the women in my life. People who were once only acquaintances shared their own stories, and I realized I was not alone.
Everyone deals with the pain of a miscarriage differently and on their own time, but being able to have these conversations allowed me to accept our truth and become excited about the growing our family once again.
Unfortunately, the joy we experienced when we next saw the second blue line was short lived.
Part 2: Left in a daze.
This time around, I first thought I was pregnant while at Steamboat for a long weekend and ski trip with friends and family. I kept my excitement at bay until I was certain of a missed period and waited one more day to take a pregnancy test.
Above all else, I truly didn’t want to get too excited. In the 2 months following my miscarriage, each period was a tragic reminder of our loss. I would get my hopes up for a positive pregnancy test only to start my period the following day. This month, I wanted to set aside the stress and give my body time to tell me in its own time.
All stresses at bay, we were ecstatic when the test came back positive. But, with visitors in town and more coming, I pushed off scheduling my first visit with the OBGYN (which I knew wouldn’t happen until 7-8 weeks anyways). I felt great (at least as great as you can feel in early pregnancy ) but was sore, tired, and had mild aches and pains.
However, one thing was new. My cramps, though mild and aligned with a changing body, felt a little too strong for so early in the pregnancy. Additionally, I experienced pain in my ribs just under my left breast. It reminded me of the aches and pains I experienced later in the pregnancy with MK, so I didn’t try to think much of it.
At 5.5 weeks, however, I looked up ectopic pregnancy symptoms and even brought up to my sister-in-law that I was afraid that I had it, but I wasn’t fully convinced. After all, the cramps weren’t consistent with an ectopic pregnancy, but that nagging pain in my ribs – where was it coming from?
My sister-in-law and I chatted about how you can’t scrutinize everything in a pregnancy, because it would cause too much stress.
Especially after a miscarriage, all you want to do is scrutinize each slight feeling…you’re hyper aware all the time. But, God has his plan, and trusting in that needs to be enough.
Then Wednesday night came. At about 12:30am, I popped out of bed thinking I needed to use the restroom and ended up crawling from the bedroom to our bathroom, dry heaving over the toilet, then collapsing in pain, burning up, and nearly blacking out. Just barely able to call for Joe, I managed a drink of water and ate a cracker.
All I could think about was, “Is this what morning sickness and early pregnancy constipation actually feel like?!” My pregnancy with MK was so easy. I only had morning sickness once, so I honestly thought that my fever, chills, and urge to throw up was because I needed a little food to settle my stomach.
After a few minutes I managed to get back to bed and slept until morning.
On Thursday, I had my weekly networking group, but knew I needed to use the restroom before I left (I really thought I was constipated or even impacted). One thing led to another and before I knew it, I was on the kitchen floor crying in the phone to my mom, a retired nurse, about how to relieve myself.
How embarrassing, right?
Joe had gone to the meeting for me to drop off handouts for a presentation I was scheduled to give, while I stayed at home, in pain, crying about not being able to poop! I then called the hospital and asked for a nurse in the women’s clinic to call back about early pregnancy constipation and to schedule my 8 week ultrasound.
Amber (my business partner) and I chatted after Joe returned home, and I even laughed with her about how embarrassing it was to be in so much pain.
Finally my nurse called back and I decided I absolutely couldn’t take the pain anymore. The pain was growing worse by the second, especially that rib pain! Crying on the phone, I exclaimed that I needed to come in and luckily, the nurse listened and squeezed me in for an appointment with their new midwife. Could I be there in 20 minutes? “I’ll be there.”
After hanging up, I called Joe, who was out for a walk with MK and Clover, and said we needed to go to the hospital right now.
He rushed home, we piled in the car, and off we went.
From the facial expressions of the midwife—whom I hadn’t met previously—I swore she thought I was insane. I kept going back to how utterly ridiculous it was to be in so much pain from a lack of bowel movement. Hadn’t I gone just fine the day before? Was the rib pain from gas? Or was it actually referred pain from an ectopic pregnancy?
Apparently, my judgement of her facial expression was totally wrong and the ultrasound tech cut her lunch break short to make sure I could be seen before her busy afternoon. We immediately made the trek upstairs to the OB clinic, but when we arrived, I needed to sit to keep from fainting and was immediately rushed to the closest restroom to throw up.
I knew the ultrasound tech from both prior pregnancies and loved how she talked through everything she saw. I think (technically) the techs are supposed to wait until a doctor reviews the findings, but she helps her patients understand exactly what they are looking at on the screen.
We started the ultrasound and immediately I recognized my uterus looked different. It was dark, meaning there was no embryo, but there also were dark spots as she moved the ultrasound wand around. She began looking for the sac in my right Fallopian tube, but all we found were pockets of blood all the way up to my pancreas.
Turning to the left, we immediately found my baby… along with a ruptured Fallopian tube. She stayed on the embryo for a minute, taking measurements and listening for a heartbeat. I forget now if the my little kidney bean’s heartbeat was able to be measured, but it was the perfect size for a 6.5 week old fetus.
My sweet baby was absolutely perfect, but in the wrong place.
I already knew then that the next steps would be surgery to stop the bleeding, remove my Fallopian tube, and save my life. By the time the doctor arrived at the ultrasound room, I had already heard a call being made to prep an OR room for my arrival.
As my eyes fluttered closed in the OR, I forced myself to focus on an image of Joe holding MK to keep my breath steady.
Long story short, I am forever grateful that I listened to my body, that the nurse listened to me, and that the doctors rushed to action without delay.
Healing after a Ruptured Ectopic Pregnancy
I wasn’t initially going to put this into the post, but there is so little information out there about healing after laparoscopic surgery for an ectopic pregnancy.
We were lucky for a few reasons:
I’m healthy and athletic
MK is a darling
Joe can make his own hours (also a business owner)
Joe’s family is 45 minutes away
My mom was able to fly out, as well
We’ve had a lot of help , which has allowed me to focus on resting and healing. The first 2 days I took my ibuprofen and Vicodin as instructed, but soon grew wary of how I felt on Vicodin and switched to only ibuprofen and acetaminophen here and there.
The biggest challenge was MK. She was at the hospital, though not in any of the exam rooms, but she was VERY worried about my boo boos. We realized after the 2nd night that she needed more one-on-one time with Mommy, and we started watching Sesame Street each afternoon before dinner.
As a family that doesn’t even have a TV in the living room, the screen time was not ideal, but at least it was something we could do together.
About a week after the surgery, my body felt a lot better, so it became a little more difficult to make sure I didn’t overdo anything. I still wasn’t scheduling client meetings, and mentally I could only really hold one thought in my head at a time. I worked some, but not even at 50%.
MK, however, was exhausting. My poor husband… She started crying for hours at night and throwing temper tantrums at every little thing. It took me awhile to get back to a point where I felt like I could help discipline her, but it’s difficult to say “Let’s do X instead” when you can’t then actually pick her up, let alone get up, to change the situation. Again, poor Joe.
Luckily, my mom stayed with us for a week and helped keep our house clean and take MK for walks or to the park to keep her occupied.
Now three months out, the steri strips are gone, the stitches have fallen out, and I’m feeling like myself again.
Emotionally, the pregnancy has caused more fear about the future rather than sadness about the loss. I think this is because we hadn’t been in to the doctor’s office for that exciting first ultrasound yet (combined with how in the back of my head I thought something was wrong).
Above all, I feel a longing for the naivety of my first pregnancy with MK.
Part 3: The Power of Connection.
In times of loss and helplessness, it is easy to get lost in your own thoughts. You can also, however, use your loss as an avenue to open doors and build relationships.
I am overcome by how talking through recent misfortune has allowed me to connect on a deeper level with my business partners, clients, friends, and family.
Everyone has their own story, and allowing myself to start the conversation invited others open up about their own experiences.
As business owners, we need to take this to heart, as well. The world is full of people who want to see you succeed. If you have big dreams, you should talk about them. If you are struggling, find a coach or accountability partner to help you find the way.
As a mompreneur specifically, we are always pulled in so many different directions. It can be lonely even when we are surrounded by others at play times or in meetings with clients. Each waking moment is either devoted to our family or our business. Even instances of relaxation are flooded with thoughts of the next step to reach our goals. It is exhilarating, yet exhausting.
The past few months, however, have truly shown that being a mompreneur, though utterly draining at times, is incredibly rewarding.
Taking a step back since my surgery to heal has allowed me to examine the relationships I’ve built. It has reiterated that though I only work with my small team scattered throughout the country, my business relationships have a far more impactful reach. It is a privilege to be able to engage in conversations with clients about my experiences and have them open up in return. To have them write letters and send flowers (or home cooked meals) weeks later, letting me know they are still thinking about my family.
What comes next?
Time will tell 🙂
Today (3/29), I have the all clear to pick up my little love again, though her feet sit right at my scars. MK has been worried, however, since the hospital, so hopefully a nice hug and kiss will help her recognize mommy’s boo boo is all healed.
Her worrying has caused our usually sweet and silly girl to throw tantrums at every decision and to wake up screaming to be let out of the crib each night (Currently it’s 8pm and MK is exclaiming “All done NAPPING” … “Daddy, Daddy in bedroom, No Crib, Come out bedroom, Daddy out crib, come out bedroom, all done napping…” It might be a long night).
Hopefully, in the next few days her temperament will start coming back to normal. (A huge shout out to my husband for his patience and to the YMCA for their childcare so he can get some work done).
It’s been a tough go of it, but with mommy back, fingers crossed she snaps back to it! We’ve also had family in town for nearly 6 weeks straight, so a normal routine will be a welcome change.
Please feel free to leave a comment with your own story or experience. Sometimes things that are taboo are they best conversations to have.
I’ve been lucky to have a local community of business owners who understand the struggles of getting your hands dirty. Our goal with Social Speak is to create a community of values-driven professionals who wish to build a creative outlet in their lives, establish relationships with other driven moms, and grow their business beyond their wildest dreams.
https://socialspeaknetwork.com/wp-content/uploads/2018/06/mk-ectopic-and-miscarriage.jpg10001500Caitlin McDonaldhttps://socialspeaknetwork.com/wp-content/uploads/2018/04/SocialSpeak-Logo.pngCaitlin McDonald2018-06-07 13:03:162018-06-08 16:32:29Healing After Loss As A Mompreneur
Can someone please tell me where the year has gone? I cannot believe it is already the end of May! School is out in this week, well last week for us, my daughter graduated from Pre-K. Which is SUPER exciting for her, and I have decided to keep her home with me this Summer, rather than sending her to daycare. I am a work from home mom AKA Mompreneur, “I got this, Right?!?!” Oh my, to be honest, I am a little worried. Let me tell you a little back story on myself and my family.
I moved to Florida with my daughter, husband, and dog in October of 2015, when we moved our daughter had just turned three and wasn’t in school yet.
When we lived in Colorado, where we were born and raised, where we had all of our family and friends. They all loved helping me by watching Allisun (my daughter) so it was SUPER easy to get work done.
All I had to do was call my mom, aunt, family friends, in-laws, you name it and I had someone at my house who was excited to watch her!
Which was great!
We knew when we decided to move to Florida on a whim, change of scenery type of deal that we wouldn’t have anyone to watch her right away. My husband had a great Aunt – Aunt Lois who we had just met and fallen in love with. We bought a house within a few miles of her, so she was able to help out as much as she could until she moved last month 🙁
Moving to a new state and city we didn’t know anyone in the town we were moving to. It was the FIRST time in both of our lives we were actually on our own. I have worked for myself for 10 years and have always been able to work with limiting distractions, I had this in my head that my personal life couldn’t get in the way of my work! I have to be a business owner and people couldn’t know what was going on personally.
I know CRAZY!
So we sold our house in Colorado in September 2015 and started our DRIVE, yes DRIVE to Florida, see the red eyes in our picture, wiping the tears away. Off we go! In my head, I am really thinking WHAT THE HELL AM I DOING? AM I MAKING THE RIGHT CHOICE, WHAT IF I HATE IT, WHAT IF I CAN’T MAKE FRIENDS, YADA YADA YADA . . .
When we got to Florida my husband was taking a break from corporate and figuring out what he wanted to do and looking for a lowkey job for a little while, that’s the main reason we moved, slower pace life and be able to spend more time together.
Once again my personal life didn’t interfere with work!
Once he found a new job we found a preschool that we put Allisun in 3 days a week so she went Tuesday through Thursday and that was perfect. It gave me time to schedule calls, meetings and get client work completed.
She started VPK this past year so she was in school every day. Like I said above, she is now a VPK graduate and will be home with ME the WHOLE Summer until she starts Kindergarten.
Now, I know moms all over have dealt with this before if you have had a child in school and has the summer off.
Most parents either put their child in summer camps or find childcare because you have to work. I am stepping out of my comfort zone and keeping her home with me!
She has a couple summer camps scheduled she will be doing throughout the summer and we have some traveling as well. I have a few things planned. I had to step out of my routine and comfort zone, call in help and ask another mompreneur down here if her daughter would be willing to watch Allisun once a week for a few hours so I could get out of the house and still attend my networking meetings and have ME time. I hate asking for help!
I am also a very routine driven mama! I like working certain hours and getting my work done without distractions. That is about to change next week when Allisun is with me.
To prepare myself so she is just not watching TV all day and I can continue to work, I have been doing a TON of research to figure out what I am going to do and how am I going to create a schedule! Allisun is very independent and task is driven as well, so I know having a schedule is important to both of us.
Has anyone else had this issue before?
What did you do to keep the balance during the summer? Here are a few tips I have found and will be implementing into our summer schedule!
Here are 8 Tips to help you get through the Summer:
1. Create a schedule and workspace
I am a person that LOVES to have a schedule, I need to know what I am doing each day, well when you have a young child at home it is important for them to have a schedule as well.
Remember, mamas, you may need to lighten up the schedule or be more flexible since it’s more than just YOU now.
Create a workspace for each of you, if you have been working at the kitchen counter or table that may not be the best place when your kiddo is home.
I know my daughter eats all day long so I need to make sure I have space where I can continue to work and a place where she can play or work with me.
Another thing to think of is, if your office is in a separate room you may need to adjust workspace so you can be involved with your child as well.
2. Get out of the house
I usually work from home ALL day, which I love, I am able to get my work done and stay on top of my house duties like laundry, dishes, vacuuming, which I feel like I do twice a day with our dog!
I actually really enjoy working from home and have been able to put systems in place. Just because I like it, doesn’t mean my daughter is going to like it!
It’s important to get out of the house, go to a library, coffee shop, kids indoor play center, out to lunch even. Find a place that allows your child to be able to play and be a kid, while you can bring your computer and work or take advantage of that play time as a time for you to read or catch up on emails.
I am not saying you have to spend money every time but find fun and unique places outside your house where it’s a win-win situation for you and your child.
One thing that I started to do, actually this week, I put together a mompreneurs networking group. I put a post up on a Facebook group I am apart of and asked who would be interested and I got quite a large response so I went ahead and created an event.
A group where we will meet monthly but can bring the kids. Allisun was in charge of helping people sign in on the computer, give name tags out and their handout. It was great!
I was working, building relationships and Allisun was making friends but also saw what I do and a peek into leadership!
3. Create Lists – We all LOVE lists
This is something I find very helpful to keep me organized for my business, and I just implemented this into our personal lives as well. You may have one list or a few different lists. I have a couple of lists:
One for work which I have created in GoogleSheets so I can list out what I need to get done each day for our client work and our business brand/website.
One for personal “To-Do’s” like things I want to get done around the house, some may call this a honey to do list.
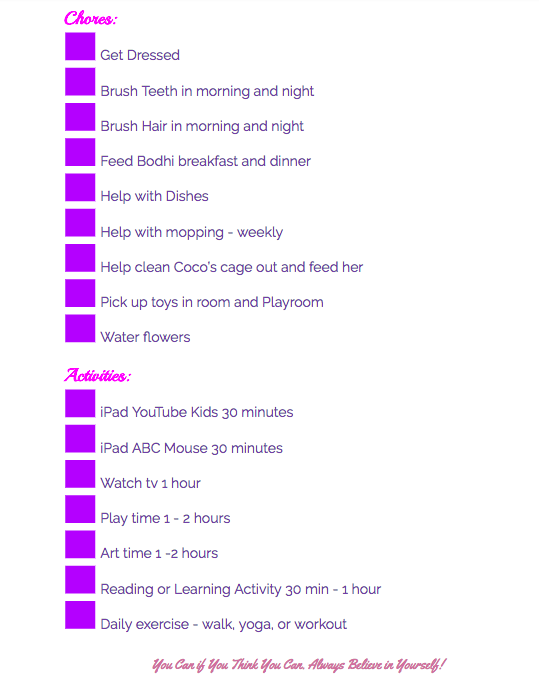
One for Allisun, she has a daily “To-Do” as well. It lists out the things she needs to accomplish each day and the activities she can do within the day. This gives her a great sense of accomplishment and pride in what she can do. It also allows her to create her own schedule throughout the day while I need to work.
Lists help us keep our minds organized!
Lists can come in all different shapes and sizes, you may have sticky notes around the house with reminders or a few tasks on them, you may have a grocery list, house list, notebook that keeps all your lists or even notes on your phone or computer. There is not a right or wrong way to create lists, as long as you do it!
We always have a million things going on and as quickly as thoughts enter our minds I think they leave quicker than they come. Have a note on your phone or voice recorder app that you can talk to and create lists, even use Alexa or GoogleHome while you are at your house.
Just find a way that works for you and your family to create and organize the lists!
4. Set Timers
Timers is a new thought to me, I haven’t really had to use timers before for work or home life because I feel I am a disciplined person and stick to my schedule to get things done.
Well . . . that was until I had a 5 1/2-year-old running around the house!
She is super self-efficient BUT still needs help. She wants my attention. Whether she needs to get a snack and needs help or if she is wanting me to play.
I have quickly learned by setting timers we all get what we want. I have started to have Alexa set timers for bathtime, iPad time, TV time but more importantly MY work time.
Keeping me on track and focused on what I need to do. I tell my daughter I am setting the timer for 1 hour and mommy needs to get a few things done for work and she can either use her 1 hour of TV time or playtime and once that hour is up we can do an activity or go on a walk.
Whatever that is, you need to all agree on it.
If you set 3 timers during the day for an hour each you can get a lot done if you think about it! You may need to use timers more throughout the day depending on the age of your child and situation.
5. Utilize Travel Time
Travel time is HUGE! You are driving an activity, networking meeting, playdate etc. Schedule your quick calls in between that time, you can also use that time to listen to podcasts or even books on audio.
This drive time can be anywhere from 15 minutes to even an hour, you can get a couple calls done and out of the way so when you are at home you can focus on your work and tasks that you need to accomplish and not get distracted with calls.
These calls don’t always have to be business, these can be calls to friends and family as well. For me when I am at home working I want to get stuff done, but sometimes the phone doesn’t stop ringing, it can be my sister, my mom, friends whoever it is I love them BUT I am WORKING! So take advantage of the drive time!
6. Keep a Routine
I know it’s summertime and we are looking forward to staying up later or sleeping in, but as a mompreneur, it’s important to keep that routine for you and your children.
Keep bedtime at certain times and make sure they are still getting up at the right time. I know things come up and change so remember to keep that flexibility, but 80% of the time we want to keep that routine.
Kids do well in life when they have had a routine and you are eliminating the fights about bedtime or homework time when school starts back up. We as moms still need to work, and the children need to respect that.
7. Hire help if needed
This is hard for me personally.
I really don’t like asking for help and haven’t had to do too much since we have moved.
We have a large support group and great friends that always say “If you need help during the day, let me know” . . . . it’s one of those things like do they really mean it?
HA, If you have a good support group of other mompreneurs or family that is willing to help out and watch your little one for a couple hours a week, take advantage of it!
You can still work from home but you are OFF limits, or you can go to a coffee shop or library by yourself and get stuff done. The other option which I am doing is having a babysitter come over once a week for 3-4 hours at $10/hr.
It’s something we needed to add to the monthly budget, but we were already spending $75/week when she was in VPK. I have realized if I stick to my schedule, have a clear “To-Do” list I can get SO many things done in 3 hours per week. I am going to make that my blogging time, client projects, research etc.
The items I need to have FULL focus on and NOT multitasking at.
It’s ok to ask for help! Trust me!
8. Be Flexible and Set Boundaries
At the end of the day, we are all trying to grow our businesses and raise awesome kids, right?
Remember to be flexible with yourself and others, things come up, life happens and sometimes it’s hard for us to allow those things to mess up our schedule.
I know for me I HATE when life gets in the way of my work, I am a workaholic and LOVE to work, but there are times when my daughter is sick and needs me more, or I don’t feel good or something is a little more important than writing my blog.
Give yourself grace when it comes to being a mompreneur.
We can’t be perfect 100% of the time! We are close though! Set boundaries with friends and family if you need to, if they are stopping you from moving forward or getting work done, let them now times and days they can come over or let them know you need their support, and YES this is your job (Blogging, videos, social media, making products, etc.).
We have a tough job here ladies, we are changing the world and taking care of our families. Some days you may need to get up earlier or stay up later, you may miss out on some of your own TV time to finish work, but think of it this way, you are creating your own reality and allowing yourself that flexibility and freedom, well, isn’t that why we are in business for ourselves?
If you are ready this blog and want to create an online business or grow your business, we are creating a weekend event in September where we will be diving deep into what is your passion and how do you create a business around that.
If you have a current business, how do you fall in love again with it and take it to the next level?
Stay tuned and we will be putting out the details before June 8th! Enjoy!
Interested in learning more? Take a look at the following articles:
https://socialspeaknetwork.com/wp-content/uploads/2018/05/Mompreneur-1.png315560Amber Irwinhttps://socialspeaknetwork.com/wp-content/uploads/2018/04/SocialSpeak-Logo.pngAmber Irwin2018-05-22 21:32:182018-07-22 20:50:47Tips for Work From Home Mompreneurs During the Summer
How many blog posts have you read about businesses for moms or stay at home businesses for moms? They all include great lists of businesses you could consider, but let’s be honest, they don’t really share the steps to get started and thrive.
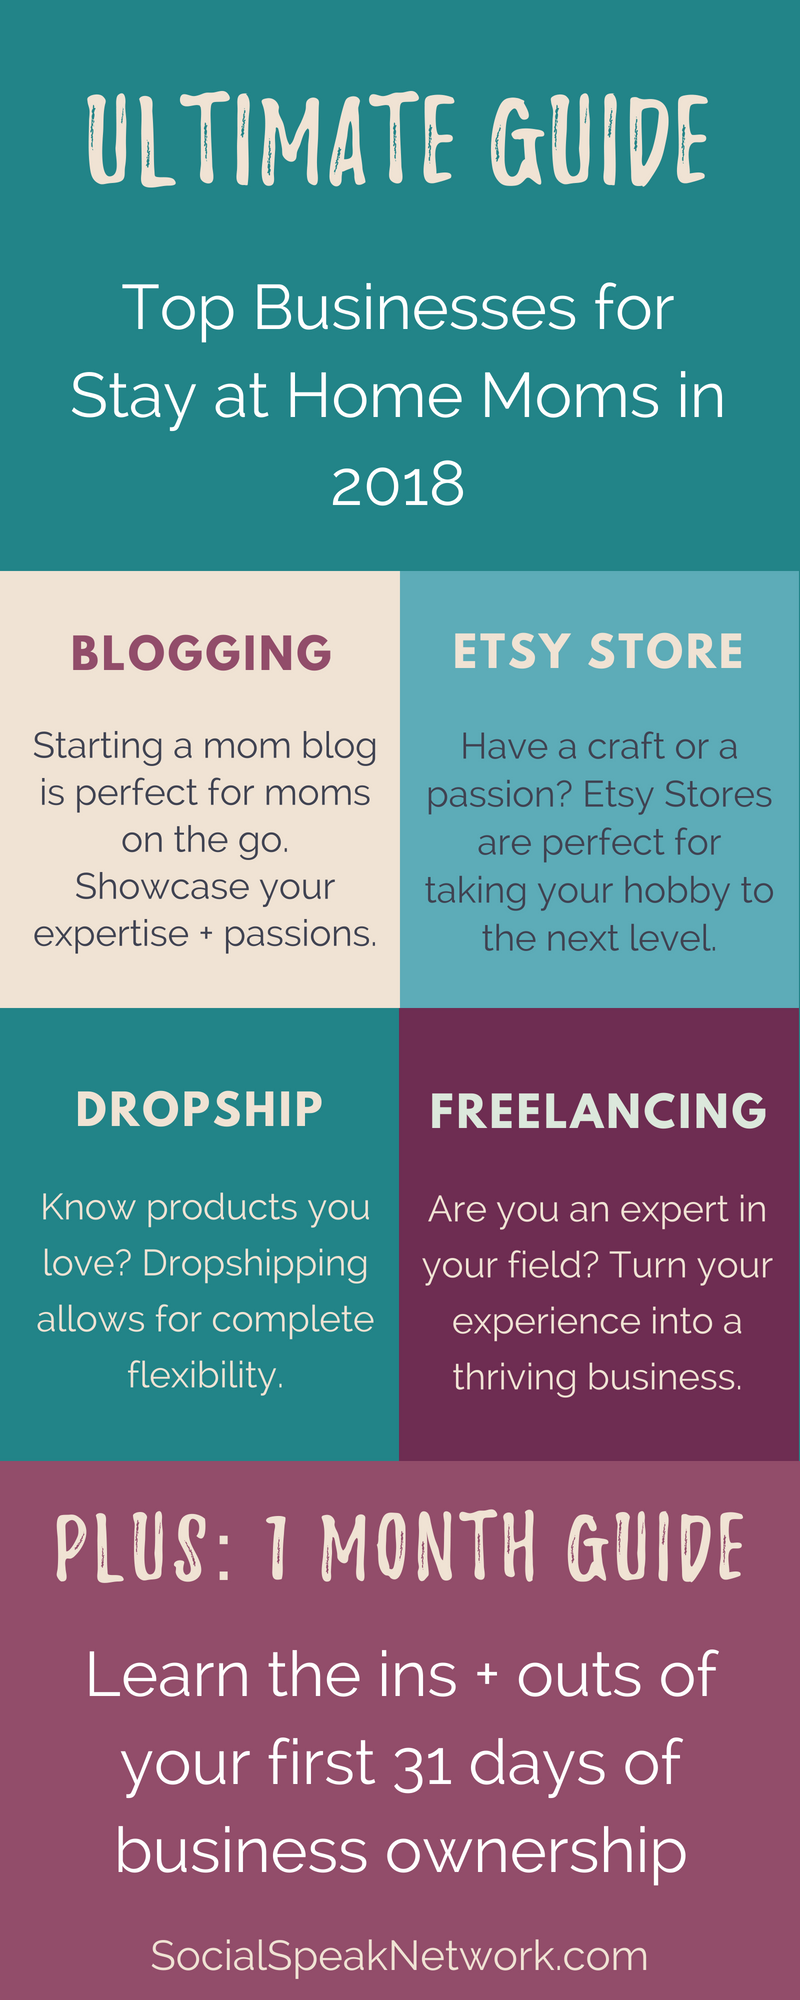
In this blog, I’m specifically looking at a handful of businesses that you can start today as a mom. These businesses include:
My goal isn’t to list off all the businesses you could start as a mom, but to give you the actional advice in this ultimate guide that you can follow to get your business off the ground and running.
Now before I dive in, any business you start should be driven by your passions, expertise, and values.
Why? as a mom, and more specifically, as a mompreneur, you will always face competing priorities. From swim lessons to soccer, homework, meal planning, even corporate jobs, starting a side hustle with the goal to grow it into a thriving business takes time, commitment, and a lot of energy.
Your success will come from wanting to work on your business after a long day or before the day has begun.
Your success will come from knowing your industry or craft like the back of your hand and utilizing tools to help manage those other business processes and technologies.
The mom businesses described below are not hypotheticals. I personally have spent years researching the most effective and efficient ways to start each of these businesses (in addition to an MBA) and have started a mom blog, etsy store, dropship store, and added to my freelancing business all since growing our family.
The guide to mom businesses below covers the exact tips and steps that I recommend to get you off the ground and running towards freedom and flexibility as a mom.
Whether your goal is to build a creative outlet or start the foundation for a business empire, I am so excited to learn about you and your vision. As a mompreneur, you are allowing yourself to create exactly the type of business that fits your needs, interests, and goals.
Take a moment to consider your dreams.
Are you yearning for a creative outlet beyond children’s crafts?
Would you love the flexibility to make your own schedule?
Do you hope to contribute financially to your household?
Can you not go another day without adult interaction?
Are you trying to be the best positive role model for your children?
Moms start on their journey to becoming a mompreneur for a lot of different reasons. I’m here to help provide you with the actionable steps you need to turn your interests into a successful business that can help you fulfill your dreams. From bloggers to Etsy store owners, Amazon dropshippers, freelancers, and more, I’ve worked with individuals who seek to contribute and leave their mark on the world just like you.
With a background in digital marketing (yes, I’ve owned my agency for nearly a decade), my advice focuses on the online aspects of creating, growing, and sustaining your business. My resources aim to help you start strong, scale fast, and sell more while you use your own strengths to create the business of your dreams.
What does it mean to be a Mom Blogger?
Mom bloggers, or really all bloggers, produce content that is published on a website.
Mom Blogging often has the connotation that you need to be writing about parenting tips, home improvement, or recipes, but trust me, there are a LOT more mom blogs out there than just these topics.
Start thinking about your PASSIONS and INTERESTS.
Could you create high quality content every single week or multiple times per week on this topic? Is it something you would grow bored with after a year, or does this interest transcend into all aspects of your life?
To be a Mom Blogger, you need to be diligent about creating high quality content (between 2,000-5,000 words) each week and then sharing this information to gain readers and followers of your blog.
Bloggers typically make money through affiliate commissions, advertisers on their site, and digital products. You also may have the perk of freebies from other folks within your industry.
Is Blogging for You?
Blogging isn’t for everyone. To start a blog and see results fairly quickly you will need to spend about 4 hours per day growing your digital network, creating content, putting together your systems, building an email list and sharing the information you create.
To run a successful blog you can’t sit in a bubble and you should try to view your blog as a way to connect and communicate with others who share your interests.
When you have your systems in place and traffic is coming to your website, you will typically find that running your blog only takes 2 hours per day. From here, your income potential can really skyrocket.
Income Potential
There are many mom bloggers who make $20,000+ each month, but far more who only make a couple hundred dollars per year.
It’s not that these bloggers aren’t working hard, they may be focusing their attention on the wrong avenues or may not be giving their blog the chance to really thrive.
What if you don’t like to write?
That is okay! I’ve worked with a lot of bloggers who start first with video or audio and turn transcripts from these into content for their website.
Starting with video or audio allows you the chance to showcase your expertise and your personality. What better way to grow a blog than have this multimedia on your website.
What to do next as a mom blogger
Brainstorm a list of your interests or passions. Narrow this down to the idea that you would want to write about for years into the future.
Who else is writing about this topic? What are they doing well? What would you improve?
Is there one person in particular who you would like to write for? Who will make up your tribe? Be specific! If you know someone who would be interested in your blog, write down their name.
What are your top 5 values? How can you incorporate these into your Blog’s Brand? What are your brand colors and is there any emotion or feeling you want your blog to elicit?
Create a list of all of the topics you can think of that relate to your blog idea. Think about topics that you can tell stories about from personal experience, topics people likely are going to be searching for on Google, and topics that appear to be getting a lot of traction from blogs on the same or similar topics.
Which other bloggers can you partner with?
Jump into Technology! In order to run a blog, you will need a website and an email account. I won’t go into detail here, but I do have a blog post on this at SocialSpeakNetwork.com.
To jump start your blog, I recommend committing to write a blog every other day for a month. Why? This creates a database of content for your blog that you can then link to and share online.
After the first month, you can slow down to 1 blog per week. Just remember, each blog should be high quality (and at least 1,500 words long).
At the same time you are working on this first set of articles, start reaching out to people you know to see if they would be interested in joining your email list. As a blogger (or any digital business) your Email List is the most important asset to your business.
Wrap up to Blogging as a Stay At Home Mom
Being a Mom Blogger can be incredible rewarding if you are willing to put in the time and energy. The first thing we think of when we hear bloggers is a website with articles on it, but in reality it is about building a community around your passion or interest.
Even if your goal is not to make money from your blog, being a Mom Blogger can be a rewarding creative outlet that connects you with others who share your passions and interest. Could there be anything better?
Starting an ETSY Store for Moms
The next topic for mompreneurs is Etsy! I love Etsy both as a seller and as a consumer.
Etsy is a great avenue for converting your hobbies into a business through selling crafts and designs. Just as with any sales channel, you need to think about whom you are selling to and how you can best position your products to sell to them.
Broadly, Etsy is a platform for crafts (wo)men to sell their handmade goods online. Products include everything from greeting cards to knitted hats, digital downloads, screen printed t-shirts, and antique gifts.
I like Etsy as a mompreneur because it is already a portal that your tribe is using to find unique and handmade products.
You don’t need to build a complete ecommerce website and find ways to get traffic to the site, instead you just need to have your products to sell and optimize your titles and descriptions to gain traction.
Is running an Etsy Shop for you?
In order to run an Etsy store, you need to be able to make something handmade or have a collection of goods that others may want to purchase. If you don’t have a craft/hobby (paper crafts, sewing, graphic design, woodworking, etc) or if you don’t have a collection of goods (teacups, antique bread boxes, etc), Etsy may not be for you. Now there is some wiggle room if you don’t necessarily have something handmade to sell, which I’ll describe below.
If you do have a product(s) already, they running an Etsy shop may be a perfect fit. The marketplace is already built, making your shop easy to get up and running, but the most popular stores have at least 15 different products to sell right off the bat.
You’ll need to make sure you have enough of whatever you want to sell in many different designs and variations in order to build your store quickly.
The workaround to Handmade Goods
Okay, so you might be interested in selling on Etsy, but you don’t really have a craft that you could turn into a viable business. This is where you can have a little fun. Let’s say you are a graphic designer or have some Photoshop experience.
You can create designs and then place this design on t-shirts, mugs, dog bowls, bags, etc, using a print on demand service to actually create the products.
This is how I manage my Etsy Store for Yip Yap Woof.
In fact, I have it set up so beside creating the designs and product descriptions, I don’t touch anything when an order comes in.
My silk-screener gets notified of the order automatically and creates my products to be sent out with my branding to customers.
You can set up similar systems for your Etsy shop, too, by using services like Printful* to create the products.
How to get started with Etsy as a Mom
The next steps for Etsy are fairly straight forward and you can get up and running within a few hours! Of course in order to run an Etsy shop that is sustainable you should create an audience and build your email list, just as with blogging, but the first steps are straight forward.
Just as with creating a mom blog, think first about your target market and brand before you set up your Etsy shop. Who will be your core customers? Who else is selling similar products?
Next you can create your Etsy account and start filling in basic information, hold off on uploading your products for the time being.
Creating your store is easiest if you compile all of your information before you get started. This includes:
Keywords to use in your product descriptions
Your product descriptions (make them fun and personal)
Prices and shipping costs (I often just do flat rate shipping or free shipping with the estimated shipping cost built into the product price)
Pictures (At least 3-5 for each product)
After you have your products created and updated, it’s time to build a community around them. Instagram can be a great place to create your community, showcase your products, and post beautiful images.
If you want to take your store to the next level, don’t hesitate to post the product information on Netxdoor App, Craigslist, and Ebay. Additionally, local fairs, markets, and festivals can help you gain local exposure.
Just as with any type of business, your email list can make the long term stability of your new business much more achievable. Start building your list from day 1!
What ideas do you have for your Etsy shop? Can you see yourself growing a community around your crafts and hobbies?
Next up we’ll be chatting about Dropshipping businesses, which are where you resell products from wholesale accounts, but never need to hold an inventory.
This is the second half of my Yip Yap Woof shop where I resell dog beds on Amazon and Ebay and my suppliers ship the orders directly to the customer for me.
Starting a Dropship Business as a Stay at Home Mom
Stay at home moms often don’t first think of dropshipping as a business solution when they are first getting started.
Why? Even though platforms exist to create your website and easily find products, it can be time consuming to figure out the ins and outs of deciding upon products, branding yourself, and growing your network.
As there Is quite a bit of competition in most industries for drop shipping, it can seem daunting to find a way to stand apart with a limited schedule.
So what can mompreneurs do to help decrease the amount of time needed to grow their online dropship store?
Just as with the other tips and techniques, I recommend first analyzing your passions and interests and formulating a game plan around what types of markets you should approach.
Below I talk about my experience of drop shipping as a mompreneur through first finding a pet product company I could stand behind.
I knew I wanted to help people find the top dog products for their pups, but didn’t exactly know where to get started. At first I listed and tried advertising every product under the sun, but soon found my margins (the amount I made) were WAY too low to:
Cover my advertising costs
Cover my time to actually place the order
Looking back at the drawing board, I realized there were products, specifically dog beds and extremely large dog crates with margins high enough to offer free or reduced shipping and cover extra fees like listing the product on Amazon, for example.
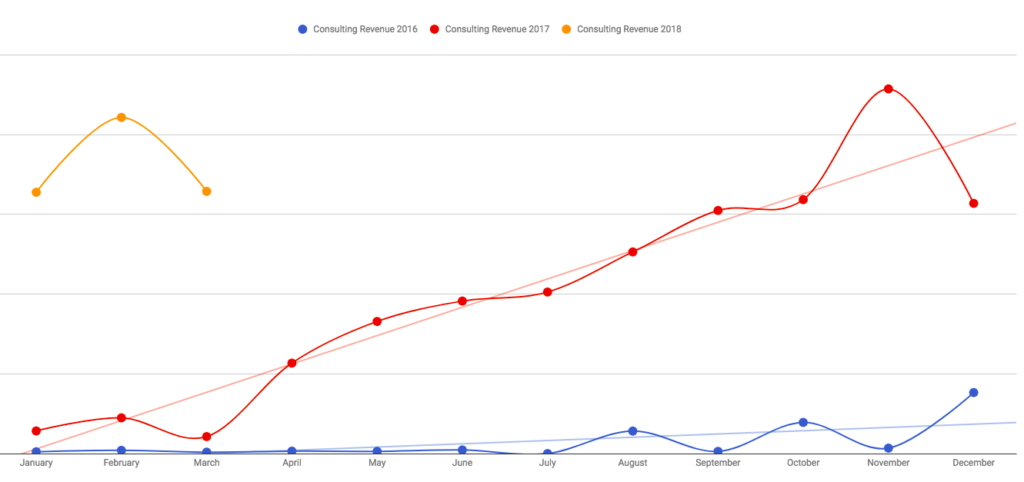
Here is my overview for sales through Amazon for a specific dog bed from 11/20-12/13
(Please note, I’m not trying to say that I’m the poster child for how well through this channel with sales, but it is just a REAL example of a fun side hustle that takes 10-15 minutes every few days)
After Amazon fee’s and the monthly subscription to Amazon, I netted $491.20. Now, this number does go down because I needed to buy the dog beds, ship them, and pay for the company’s dropship fee (their extra fee to pay for sending the package directly to my customer).
Let’s take a look.
Sell for $129, my Cost (including shipping and dropship fee) $83.50. Gross profit: $26.10
Sell for $109, my Cost (including shipping and dropship fee) $73.50. Gross Profit: $19.14
Total $83.55 in my pocket
This is just for one type of dog bed I sell on Amazon and you see how the profit diminishes drastically when all fees are taken into account.
But hey, that’s another $1,000 in my pocket every year for very limited work and not selling to my network. Imagine if you are listing more products, larger margin products, and products where you’ve already built an audience of interested individuals!
In addition to these beds, I do sell a few other high-end dog bed options, as well as some dog food and health and wellness items via Ebay. All of these are drop shipped, so I never need to worry about moving my own inventory.
I must warn you, however, I just needed to purchase my order from another supplier for a product that sold and my profit was a whopping $0.56! Ha. Talk about cutting it close!
In the following video I provide an overview of drop shipping for stay at home moms as an option to gain more flexibility and freedom.
Starting a freelance business as a mom may be one of the most rewarding ways to get back into the business world and feel connected to adults outside of your family.
Yes, you can forge similar relationships through reaching out to digital business partners, but become a freelancer opens so many more doors!
As a mompreneur you will often find yourself alone with your thoughts and second guessing your ability to run a successful endeavor. Being a freelancer, however, allows you to form lasting relationships with your clients.
Do I sound partial to starting a freelance business? Perhaps. But this stems from the joys I’ve found in connecting with my clients as I work with them.
Please note, I find the same to be true for coaches, counselors, service providers, etc, but if your business is 100% online, it can be difficult for a lot of women to forge the same type of relationship because often communication boils down to Facebook posts, commenting, and emailing.
Unless you are committed to thinking about digital networking the same as face to face or networking on the phone, it is difficult to create real relationships with people you’ve never actually spoken to.
With freelancing, you are given an opportunity to turn one-off projects into recurring revenue streams for your business.
AND, working with your clients month after month creates an avenue for you to grow your new relationships in the business world without having to give up time with your children and family.
You can take on as many new clients as you have the capacity for and scale up and down as needed.
Types of Freelance businesses for Mompreneurs
As you think of your passions and interests, think of how you may be able to help other people and businesses with completing tasks that relate to these interests. In the digital world, some common freelance gigs include:
Graphic design
Website management
Branding
Social Media
Email Marketing
Website Development
Copy Writing
Proofreading
Process Management
Etc
How can you structure your fees?
I recommend freelancers try to steer clear of hourly work, but often that’s what it comes down to. As a mom, however, trying to track your time doing freelance gigs while running to sports practices, cleaning dirty diapers, and figuring out preschool options can be quite the challenge.
Rather than setting an hourly price, do what you can to create monthly packages or retainers. In my marketing agency, we collect fees from:
Group Coaching (6 month small group coaching on social media and digital marketing)
Marketing Management (We become your outsourced marketing department with set tasks we agree to complete each month)
Hourly consulting (even I haven’t been able to get away from this after nearly a decade)
How to get started as a Freelancer
Starting your path towards being a successful freelancer can be fairly organic. Some freelancers wish to jump in head first into their new business while others are okay growing their client base at a pace that fits their lifestyle.
As you get started, think about:
How quickly you want to grow
The hours per week you wish to spend freelancing
Your availability for meetings, travel, networking, sales
Current commitments during the working day
Depending on how much time you have available to commit to your new freelancing clients, you may find that a slow growth fits your current commitments.
Knowing this can help you identify the steps you wish to take to get your new mom business up and running and to set your goals appropriately.
Steps to kick your freelancing business into high gear
Now that you know your availability, it’s time to get started! Just as with the other mom businesses you can start, it is paramount you first identify your ideal client.
Create your client avatar: what industry or business do you want to target, what are their fears, how many employees do they have, what revenue do they have, who makes the buying decision?
Build out your service offerings: within your target industry, what services can you offer, what will you charge?
Make a list of personal connections that fit your target market or may know someone who would benefit from your services: think about your connections from your pre-kid career, as well as, family, friends, neighbors, etc.
Think of complementary services that you could build into referral partners. For example, if you are a copy writer, partnering with website development agencies could lead to immediate work for your business.
Create a quick website describing who you are, your services, and providing a glimpse into your expertise.
Reach out to your connections and your potential referral partners to introduce them to your new business.
Join local networking groups to increase your exposure to local business owners.
Sign up for Thumbtack and Nextdoor to browse for folks looking for your services.
Now, you notice I mention only building a quick website at this stage. Contrary to popular belief, though some folks may look at your site, only a handful of referrals actually will.
Your first freelancing clients will most likely be people you know personally.
Additionally, as you talk with prospects and start selling your services you will find that your target market may respond more favorably to one way of describing your services or that the packages you should be offering are slightly different from your initial brainstorm.
You don’t want to spend months making the perfect site when in reality your messaging and offerings are completely off.
As I mentioned before, the best way to grow your new business as a mom is really to dive into something that you are passionate about, an expert in, and that aligns with your values. Without this, it is much more difficult to push through and really experience that freedom and flexibility through business ownership as a mom.
If you are interested in learning more about how your values can shape your business, please take a look at the following posts!
Starting a Dropship Business as a Mom [Transcript]
Today I am going to discuss with you about dropship businesses. What are drop ship businesses? How do they work? How can they fit into your lifestyle?
Basically, drop shipping is when you have an online storefront. When somebody places in order, you then turn to the wholesaler and they actually ship that order out for you. I run a business, Yip Yap Woof, and amongst other things, we sell dog products. One of our top selling products is a dog bed from a company out of Montana that uses organic cotton and it’s made in the USA.
It’s a great dog bed and we get a lot of sales through Amazon for this, as well as, through our website. So how drop shipping works in this case is somebody places an order through Amazon or through our website (or even through eBay). Now we don’t have an inventory, I don’t have a closet in my house just stocked up with dog beds, but I just quickly jump over to the wholesale website, place an order with my own credit card information, and then they charged me a small fee on top of the typical fee for shipping. Then the customer gets the dog bed. It’s packaged in the West Paw Design packaging and everything, but the package slip does have our information on it. I can offer more discounts and promotions for other products that I offer, as well. And so with each of these orders, yes, I’m not making the full $30 or $50 markup that I would have if I did hold my own inventory and do the shipping myself, however I still do get you know between $10 and $20 dollars per order. I can the either reinvest this back into the business or enjoy them a nice lunch out.
How to Start a Dropship Business
Starting a dropship business is actually pretty straightforward there are plenty of websites out there that have whole databases or products. Again, taking dog products, there’s a Pet Store USA and Wholesale Pet USA, as well as a bunch of other stores like this where there is a database of different dog products. It also lists whether or not the company dropships the product or if you just get the wholesale account.
Once you find the products that you’re looking for, you can then list them on Amazon, Ebay, or on your own website. If you’re listing these products on Amazon or Ebay, you will find that there are additional fees that you will incur. Amazon’s fees are actually quite a bit, so that $20 margin or markup that that I would get ends up going down to about five or ten dollars.
You have to pay attention to whether or not you’re actually going to be making money from the product or if it’s all just going away in these fees. It does definitely take some calculations. On Amazon, for example, I won’t sell a product that’s under $100, just because it’s not worth my time and energy to make fifty cents for an order that comes in.
I’d much rather see a thirty dollar kickback rather than just a couple of dollars here and there.
So, setting up that dropship store is quite simple once you have the product that you are going to be selling. You can set it up on Shopify, for example. Shopify is great because it syncs with a lot of these different dropship networks.
If you have an order placed on Shopify, they can actually make it so the order automatically flows through to the wholesale or drop shipping store. This way you don’t even have to touch the order.
You can also make a storefront on WordPress, for example, if you don’t want to have that monthly fee like Shopify. The benefit of Shopify is it’s really easy for you to manage taxes and things like that, but I actually just got rid of my Shopify store and I’m working to just building a more simple blog storefront with WordPress.
The reason is because most of my orders come in through eBay and Amazon rather than through my store itself. I think that that’s just a product of being a newer store, so I haven’t done a lot of work to build up my own audiences.
What I recommend doing is creating a blog for your business where you’re just working to send out valuable content and information. I found the blog to be a great way to gain exposure and also Instagram. Again, I’m just posting pictures of my dog and my daughter. We now have over 1,500 followers on Instagram and so that’s been a great way to get traffic to the Etsy store.
Building up an audience and an email list is should be your number one priority if you are running any type of e-commerce store.
Creating a Dropship Brand
Additionally, you should know who your brand is and you can think of it almost like a real retail store with a storefront. So think about, what’s your brand? What type of customers are you trying to attract? Then post things that these people are interested in and try and grow that network online. This way, when you have the products that you’re going to be selling, you can easily turn them on into it. They already know, like, and trust you.
These individuals have found value from following you, so you can start reaching out to the wholesale companies and organizations.
I always recommend not just listing any old product if you want to make your business more fulfilling. I recommend finding products you have tried and ones where you believe in the company brand of mission. As you’re getting started, try to create a selective group of products that you’ve tested yourself and that you know people are just going to absolutely love. Typically someone is actually searching for these products on Amazon or on eBay, so again, if you’re listed there, you have a better chance of being found.
This is just a quick introduction of what it means to dropship. Dropshipping is definitely very rewarding and easier to set up than businesses where you need to carry an inventory.
Top Three Tips to Starting a Freelancing Business as a Mom [Transcript]
Today we’re going to be talking about creating a freelance business from your passions and your expertise. Now creating a freelance business is a great way to add be creative, have adult interactions, and to find freedom and flexibility.
Until MK was able to walk, she actually came around to every single meeting with me. We were just coffee shop buddies and bounced around here and there. She’d be sleeping most of the time at meetings, but the flexibility that I had with my clients just to bring her along wherever I went was really quite incredible.
At the time, I was even the president of a local networking group and she came to many of the meetings with me. As long as I didn’t act as though I was distracted by her being there, other people followed suit. Owning a freelance business as a mom really is a great way to kind of have the best of both worlds.
MK recently turned 2 so we are finally looking at daycares and preschools that we can potentially have her attend towards the end of the summer. But, keeping her at home until she was 2 was a big goal for us. The flexibility of running a freelance business created the opportunity for this goal to come true.
Now, the BIMS Team is much more than a Freelance business. But freelancing really did create the foundation for all the work and services we provide today.
Different Types of Freelance Businesses for Moms
What types of freelance businesses are there and you can be a freelancer? There are many different types of Freelance businesses you can jump into including:
A graphic designer
A website developer
A freelance copywriter
A social media marketer
There are a lot of different freelancers out there and you might hear some freelancers referring to themselves more as consultants rather than just freelancers.
The big difference here in my mind is who’s doing the work.
Our team provides consulting for a lot of our clients where we are teaching them how to do the marketing themselves, but we have other clients where we are really taking on their voice and managing the marketing on their behalf.
It can be kind of a blurred line whether you call yourself a consultant or a freelancer. Either way, you can go into a lot of different industries.
How to decide on your Freelancing focus
As a mom, you probably have limited time between work (if you are starting freelancing as a side-hustle), children, family, and your own commitments. This makes it incredibly important to make sure you choose freelance projects that you already have the skills to complete.
Think about the areas of expertise or focus that you had in a previous career? Consider your own passions and interests. When you combine these two elements, it won’t even matter to clients that you don’t have a lot of experience working on your own and they will appreciate what your past experience can bring to the table.
If you are worried about lack of experience, that is fine, too. You can even be honest with your first few clients, but position this as a strength because you will be incredibly focused on their business and the work you can do for them.
As a new freelancer, how can you get new clients quickly?
There are a lot of different ways that you can go about getting clients when you are a freelancer. I have three favorite techniques.
Right when you get started, head on over to thumbtack.com. Thumbtack is like Craigslist for freelance jobs. Folks post there from different businesses that need help with X, Y, or Z. You can find local companies or ones that are in other parts of the US.
My husband recently started his own freelance business and I instructed him to go to thumbtack. Sure enough, he quickly was able to reply to a handful of folks requesting exactly his copywriting services. These were job proposals he was sending out the first day of running his own freelance business.
Now my husband had never actually run a copywriting business, and he was the director of software development at his last job, so nothing to do with copywriting, but he was an English major and enjoys writing. On the side he actually had been writing for years for some of our clients, but he never mentioned to his first clients that he was just kicking off his business. He knew he could fulfill his promises.
What about Upwork (formerly Odesk and Elance)
In the past we did utilize Elance for finding projects to bid on, but it is easy to get caught up in pricing and not being able to charge what you are worth.
If you do find yourself on these job sites, I found success submitting bids for Project Based freelancing work, such as creating a marketing plan or a LinkedIn Strategy, and then offering to implement the strategy. We actually are still working with a handful of these businesses 7 years later.
Again, make sure if you are submitting bids you aren’t selling yourself short. I remember one client I got right when I started my freelance business ended up being a $750/mo client, but at $20/hr, I was hardly living the dream.
It’s much easier to manage five freelance accounts with each of them paying $5,000 a month versus 50 accounts with $100 a month.
Attend Networking Events To Grow your Freelance Business and Refine your Messaging
The next place to look for clients is going to networking events to meet local business owners who can benefit from your freelancing services. The strategy typically has a slightly longer turnaround, but is very fruitful and something Amber and I both still do.
Beyond meeting new people and getting that adult interaction as a mompreneur, networking is wonderful because it allows you to refine your message.
When I first started my freelancing business, I thought that I was going to be doing mostly data analytics. In my mind, marketing decisions should be driven by data. I am a math nerd and data analytics geek and trust me, that doesn’t get many other people excited. Some of my favorite clients truly appreciate data, too, but a majority of our clients don’t care about the data behind the scenes.
As I was talking to folks in these networking events, I would just see their eyes glaze over. I realized that people understood they needed someone to help manage their marketing, but would be doing it themselves already if they cared about the solutions.
When you attend networking groups as a freelancer, you will be able to more quickly refine your messaging.
Now networking groups do require you go somewhere in person, so it may not be worthwhile to pay for a babysitter while you attend.
I’d look for groups that meet first thing in the morning (so your significant other can lend a hand before work) or ones that meet later in the day, again, so you can more easily find a helping hand.
These networking events also come in a lot of different forms.
One issue I see over and over is that new freelancers waste too much time attending groups that don’t actually lead to new clients. Don’t just go to the most popular Meetup group or group that meets over happy hour.
I’m an introvert, so I always found myself listening to conversations more than engaging with others in these more open events.
However, I came across BNI about 5 years ago and absolutely LOVE their meetings (and the clients/referrals that come from members).
I’ve since been the president and vice president of the chapter and as a member, you feel like you are actually creating relationships with the folks in your group, who then actually do go out and sell for you.
There are plenty of other more localized groups that follow the same structure as BNI, but BNI is an international organization, so most likely you have a chapter or two (or more) in your area to check out.
Be selective about the networking groups you choose to attend as a freelancing mom.
So, we’ve covered thumbtack, networking groups, and then the third way to grow your freelancing business is through referral partners.
How to use referral partners to get more freelance clients
As you’re going to the networking groups, you will be meeting new partners. You don’t want to just sell to the people in front of you, you want to gain access to their networks. This third piece is taking creating referral partners a step further.
First things first, jump over to LinkedIn and clean up your profile. Then, start researching other professionals and businesses that service your same target market and provide complementary services to your own freelance services.
I had my husband run through this when he was starting his business and within a month he had signed two $5,000 dollar contracts. One of them is still sending clients his way and then the other one actually now is my client and we have my husband do the blog writing.
It all comes down to figuring out who else is servicing your target market.
For my husband, a copywriter, I told him to email social media agencies like mine because I had been sending him business frequently. We also decided on website developers. Now he ended up just emailing the website developers because of the technical side of his background.
After proving himself in an initial blog or writing sample, some of these initial contacts send him any new website build that needs content created.
By creating these relationships with referral partners even if there’s a little bit of overlap in services, there can be short term success landing new freelance clients and provide long-term growth of your freelancing business.
The best thing about tailored and individual email outreach like this is that it takes a whole lot less time than attending 50 networking groups every single week. [Insider Tip: You can also write the emails after your kids go to be and schedule them to send the next morning with the Boomerang App for Gmail).
As long as you’re clear about the expectations with your new referral partners, you shouldn’t have any trouble really diving into those relationships.
So there you have it! The three steps to getting clients as you are starting your freelance business: Use Thumbtack, Join Local Networking Groups, Cold Email Referral Partners
First, immediately respond to those freelance proposal requests on thumbtack or create your profile on Upwork and see what projects are out there.
Secondly, join a local networking group and get to know the business professionals in your area. Again, I recommend finding a group that has structure and that actually shows that it’s passing leads and referrals with each other. I like the structure because I’m an introvert, but you might really thrive if you’re an extrovert with less structure. Still don’t join a group if they aren’t accountable for passing leads.
We see a lot of leads being passed within our group, as do other BNI groups, just as an example.
Lastly, the next item is figuring out who your referral partners could be and reaching out to them.
Now if you notice I’m not focusing on building your website or anything like that.
As you are working through these three steps to starting your freelancing business, you will be learning a lot about the language people are using to describe your specific services.
Just have a home page or landing page to start and then build up more from there.
See how many freelancing clients you can get through the three ways described above and you will be well on your way to a successful freelancing business!
My best advice is to start a business now and give freelancing a shot. Freelancing is incredibly fruitful and it allows for that creative outlet, adult interactions, and again that freedom and flexibility that we all crave as moms.
Thank you so much for tuning in.
Again I’m Caitlin with the Social Speak Network.
Please feel free to subscribe to our channel and head on over to our website. We have a lot of great blogs, videos, and different resources that can help you on your journey to becoming a freelancer.
Interested in learning more? Take a look at these articles:
https://socialspeaknetwork.com/wp-content/uploads/2018/05/Ultimate-guide-for-businesses-for-moms.png7201280Caitlin McDonaldhttps://socialspeaknetwork.com/wp-content/uploads/2018/04/SocialSpeak-Logo.pngCaitlin McDonald2018-05-15 20:58:152018-07-22 21:33:58Mom Business Ideas for 2018 [Ultimate Guide Plus Action Steps for Mompreneurs]
How did you get to the place you are at now? Tell us about your journey.
How did you know that you wanted to do “this” for a living?
Core Values – What are your core values and how can you add them to your products or services? (We have a lot of resources o our website on core values)
What makes you different? How do your products or services stand out from the others?
What do you say when people ask you “What do you do for work?”
Who is your target market? What problem are you solving for them or what pain point are you addressing? This will tie into your WHY!
Notes:
Once you have your story written down, make that your “About Me” page or create a blog post out of it. Also, create a video that shares your story, Add it to Facebook, Pinterest, make a short one for Instagram.
You are creating your Personal Brand with your story
Make sure you are fulfilling your target markets needs, are you solving a problem or fixing a need? By writing your story it will help you fill in the gaps you may be experiencing.
Check out your competition. Both locally and nationwide, look at what they are doing well and look at what they could be improving on and take notes!
Once you have your story complete and you are ready to move into the marketing piece and really being able to speak to your target market, you need to know first what are they searching for? What keywords are best for your business to be blogging about that will reach your target market and attract those perfect customers or clients.
You are on your way to creating SEO-Friendly content for your website and blog! Please sign-up for our FREE training video on performing keyword research to improve the SEO on your website and blog posts.
Interested in learning more? Take a look at the following videos:
https://socialspeaknetwork.com/wp-content/uploads/2018/05/how-to-tell-your-story.png315560Amber Irwinhttps://socialspeaknetwork.com/wp-content/uploads/2018/04/SocialSpeak-Logo.pngAmber Irwin2018-05-11 15:29:492018-07-22 21:49:03How to Tell Your Story
LinkedIn is, what I think one of the most overlooked social media platforms out there. A lot of business owners have a LinkedIn profile that they set up when they were back at their corporate job and maybe have updated it once or twice. Well, I am here to tell you WAKE UP and make sure you have updated your LinkedIn profile! In this blog we will be covering:
What you should include in your personal profile
How to create a company page
How you can add connections and build your network.
What Do I Need To Supply For A Linkedin Profile Page?
Top 9 things that you NEED to have in your profile
1. YOUR Picture
Do NOT use an avatar or cheesy image of yourself, people want to see YOU
You can use a current up-to-date headshot, or an image of yourself with a natural background, not a party or fuzzy image or a selfie. Take your time on this photo!
2. Headline and Header
Think of this as the first impression, this is what people are going to see with your name and picture.
Have your headline be intriguing, eye-grabbing, relevant and clear.
Include your company name and then your title or what you do.
You can now have a customized banner (1400×425), which you can create in Canva. This header should be relevant to who you are and what you do. Have fun with it.
3. Summary (Good for SEO)
Tell your story, what’s your WHY. Keep your summary in the first person.
Personalize your summary.
Your summary should be engaging, relevant and conversational.
In this area, it is great to demonstrate that you are an expert in your field/industry. Add media (Videos, PowerPoints, Presentations, PDFs. etc.)
Remember SEO when you are writing your summary. It is important to include your keywords in this section along with long-tail keyword phrases to have a higher rank within LinkedIn searches but also Google searches. Here are two pieces we did on finding your keywords so you know what you should be writing about. Finding Keywords and How to Use KWFinder.com
As I mentioned before add media to your summary! There is not a limit, I mean you don’t want to add your WHOLE YouTube Channel, but I would say between 2-5 videos, or maybe big presentations you have done, recorded webinars, things that give your audience value. Something they can learn from looking at your LinkedIn profile! AND this helps you stand out from everyone else. 🙂
We have spoken about what’s your WHY, creating that personal brand, your core values, brand message, you want to make sure those come through in your profile. People should be able to read your summary and understand who you are and WHY you do what you do.
Talk to your target market, at the end of your summary have a call-to-action
4. Experience
Start with the most recent position or company and give us details! What is your role, responsibilities, etc.
List the experiences you have had with each position or company
List our accomplishments and challenges you have encountered, what was the outcome?
Remember your target market and speak to them when you are adding your services and details.
You don’t need to list EVERY job you have had from the time you turned 15! Stay relevant list that last few with great detail.
5. Education
Where did you go to school? You can list high school and college
Remember to list your degrees, diplomas, certifications etc.
It’s important to also include dates and locations.
6. Volunteering & Causes
People LOVE to see that you are involved in your community or a certain cause. Cause marketing is HUGE!
List the non-profits you have helped, maybe sit on the board or have organized events for.
What causes do you donate your time, money and energy too?
7. Skills & Endorsements
We get asked this question a lot, should we include the skills and endorsements in our profiles? The answer is YES!
People have recognized you for a skill that you have, acknowledge it.
LinkedIn will have those endorsements show up by the ones people have selected the most. You can always go in and edit or delete these as you find needed.
Think of your keywords when adding your skills, you will notice in the image below, the last skill on the bottom right corner says DOGS, um, I do social media and digital marketing, BUT in my past experience I was a Vet Tech at an Animal Emergency Center, so I may think of deleting that one just because it is not relevant with what I am doing now.
8. Recommendation & Awards
We always encourage our clients to have people give them recommendations on LinkedIn and include them in your profile.
List any awards you have won through work, community, networking.
9. Interests and Groups
As a bonus to your profile included interests you have
Also, include groups you are apart of on LinkedIn
Now, that we have your personal profile taken care of it is time to move into business. You can still post business related topics to your personal profile, but there are so many perks to having a business page on LinkedIn. In the video below I show you how to create that company page, so if you don’t have a company already take a minute to create one and then we will talk about “WHY” you need to have one and all the benefits!
LinkedIn Business Page
You want to make sure you optimize your company page to build brand recognition. We spoke last week about being consistent across the board with your social media and that remains the same with your company page. You want to make sure you have the right size header, logo, etc. Here are the sizes you need to have on your company page:
Company logo – 300 x 300
Cover image – 1536 x 768
Overview tab image – 360 x 120
Hero image – 1128 x 376
Here is an example of H&R Block’s company page, it is consistent with their brand, brand colors, logo, header, overview image, about us and more!
About Us Section
This is the MOST important piece of your company page, you have 2000 characters to use up. Think of your story, WHY your business does what it does, who do you help, speak to your target audience and use your keyword phrases. This is where your audience gets to really know WHO the company is. They are taking a peek inside and understand more of the foundation of your business. What makes your company stand out from the others, how did your company come to fruition, what is your business’s mission and vision, etc? More details the better. You want this section to be eye-grabbing and you want your audience to fall in love with your business, your brand, you want them to want to find out more. . . you want them walking away liking you, building that trust. You do not want them walking away feeling like they were being “sold” or not understanding what your business does.
Also remember in this section you want to add your website, your main office – with this piece most of our clients, including us work from our homes and do not want our address out to the world, I love coffee dates but don’t want people knocking on my door 🙂 You still need to enter your full address, but on the public page it will just say headquarters in CITY, ST not your address. In the video above I show how this process works! Also, you will enter the number of employees you have, the year you were founded, company type and BONUS – Specialties! You can use keywords in this area of specialties or a very clear short statement of what you do.
If you have LinkedIn upgrade package you can also add jobs and life section, we won’t really go into those today, just because most of our readers just use the free version of LinkedIn, just like us! The next thing we want to add as an extension of your company page is:
Add Showcase Pages
Creating a showcase page is adding to your company page, it is an extension. You can highlight a specific product or service your business offers. This allows your brand to come to life a little bit more. Before LinkedIn had a services/products tab, but they do not have that anymore. They now offer the showcase page/ It is an independent page with its own “About Us” section, logo, cover, website, etc. It also will have its own followers and you can post your own updates to this showcase page to show that service or products own personality. These updates you post would only be about this service or product. You can also monitor its own analytics, so you can see how that showcase page is doing.
We created a showcase page just for our small group online coaching: As you can see this is just for our small group coaching and its website url is to that page on our website, then to the right you see that is says “This is a Showcase page by: Social Speak Network” which links back to our company page. This is a great way to talk about your key services or products. I would like 3-5, it adds so much value to your company page.
This is so freaking cool right?!?! Yes, it is! Now that you built your awesome Showcase pages I am sure you are wondering where does it show up and how do people see the connection between your company page and Showcase pages??? Well, it is pretty simple your Showcase pages show up right under (Well after the ads) the About Us section. This is just such a cool way to promote those key services or products. Think of these Showcase pages as website pages, they are meant to stay on your company page and be updated as needed. These are NOT pages to create events or short-term marketing offers or campaigns. These Showcase pages are going to help build trust and relationships with your audience. This is what is looks like:
Great job on getting your personal profile set up, your company page and showcase pages created, now it’s time to feed them! What I mean by this is CONTENT!
Start Posting Valuable Content:
Content stills remains a key component of these pages. If you took the time to create these pages, and make sure they look pretty and match your brans, why wouldn’t you want to do more with them? They need to be thought of the same as you think about your Instagram Business profiles or Facebook Page, you post to those daily or weekly correct? Your LinkedIn profile, Company Page, and Showcase pages should be thought of the same way! WOW, we just added a lot more to your list! Don’t worry you can add your company page and showcase pages to Buffer or Hootsuite, so you can schedule your posts to go out through one of these tools to help save time, but also to be consistent. You may need to upgrade your package with these two tools if you have already used the 3 free social profiles. Each of these is free to post through up to 3 profiles, so you may already have Facebook, Twitter, and your personal LinkedIn profile, you will need to increase your account so you can add more.
What are things you should talk about on each of these pages? I think we need to split these up into three different sections, each area such as your personal profile, company page, and showcase page will have their own personality. You need to treat them as their own entity. Each page audience will be different, they may be similar or you will have people that you are connected with on LinkedIn and YOU and then they follow your company page and maybe one of your showcase pages as well. So, they will NOT want to see the same content on each page. Let’s start with your personal profile first, this is what most people will see, because like all the social media algorithms you will get more engagement with your personal profile than your company pages.
Personal Profile Tips:
Post valuable content, NO political or religious posts
Post Daily
Share your businesses blog posts with clear call-to-action
Share your personal story
Stay away from posts you would put on your personal FB – LinkedIn is a little more professional
Share tips, techniques, tools, videos that align with your business
Talk about your role in your business, your journey, who you have helped, your WHY
Company Page Tips:
Post focused, clean, relevant, and valuable content
Share your blog posts
Talk about your content upgrades with call-to-action
Share your YouTube videos
Curated content – articles, videos, images from other companies that align with your business.
Feature an employee or a person that works with you
Behind the scenes – stories, pictures, videos
Test your audience – post an appropriate funny video or image and see the response, mix up your content to see what your audience is engaging with the most.
Branded images via Canva that have a quote or stat
Events – talk about local events that are going on or events you will be attending
Local – if you are a local business share local news
Speak to your target audience – ask them questions and get feedback
Showcase Page Tips:
This is about that one service or product
Stay focused on the topic at hand
Post maybe 3 times per week – people tht follow your company page or personal profile will already see what your business is doing so posts on your showcase page need to be specific to that service or product. You don’t want to overwhelm your audience.
Videos you have done on that service or product
Client testimonials
Share stories of your struggle, your journey or clients journey and how this service or product has helped them.
Share stats and success stories
As you can see these are all similar but different at the same time.
How to Grow your Profile and Company Page
One of the features I like most about LinkedIn is you can add connections to grow your online community. Before, people would just add anyone and everyone so they built quantity connections, rather than quality. Yeah, it’s great to have a large number of connections but we want to focus on adding the quality connections. A key piece to adding quality connections is to have a little note, an intro when you ask somebody to connect with you if you don’ already know them. You may see LION next to peoples names, this stands for LinkedIn Open Networker, meaning they are open to connecting with everyone, I don’t see this being used too much anymore, which I like. You will get asked to connect with people you don’t know and that is OK, check them out, look at their profile and see who they are. I like to think of LinkedIn is an online networking group.
In this image below you will see that someone asked me to connect with him, I do not know him personally, but he did send a message along with the connection. LinkedIn will also show you “People you may know” similar to Facebook. These people show up based on your profile and mutual connections.
Here are a few ways to be able to connect or invite people to connect with people on LinkedIn:
If you know a specific name of the person you want to connect with, you can search for them and find their profile and then click connect.
You can also upload your email list or contacts from Gmail, yahoo, outlook, etc.
Then as I mentioned above looking at the “People You May Know” section and asking people to connect through there.
NOTE: If people have asked to connect with you and you have pending invites they will appear on the top bar on your LinkedIn account next to “Network”
Again, we highly recommend before you go connection crazy that you craft together a short, simple to the point message of why you want to connect with that person and send it along when you ask to connect, let me show you:
What’s Next?
It is such a great feeling when you have your LinkedIn profile updated to 100% and then when you create your company page, Showcase pages and have started to add connections, but what will make people want to connect with you? CONTENT! Be sure to be consistent as we have spoken about. In our next blog, we will be talking about groups, article and how to prospect on LinkedIn to take your profile to the next level!
If you need some help setting up or company page or creating the right size graphic, please let us know!
Interested in learning more? Take a look at these articles:
How many of you created your business Facebook page well over a year ago? Or have had a Twitter account for more than a couple years? With social media being around for over 10 years, it is important to make sure your profiles are updated with your current brand image and message. It is key to be consistent in the digital marketing world from your website, social media profiles, to your marketing materials. Everything should have your brand colors, brand message, website, and logo.
In this video, we run through each platform on how to check your profiles to make sure they are updated!
Interested in learning more? Take a look at these videos:
By Christina Savage
Owner & Technical Consultant
Christina Savage, LLC
In late summer 2016, I jumped off a metaphorical cliff. I quit my six figure, salaried management job to start my own software consulting business from the ground up.
As a single mom of a 9-year-old son and the sole earner in my household, taking this leap posed a significant risk. Given this fact, you’d think I would’ve created an elaborate business plan, but I didn’t; I just rolled up my sleeves and got started.
But, why?
After years of working in high-pressure software and IT management roles, I was ready for more autonomy and flexibility. I wanted to build something all by myself. Starting a business is, in my mind, a creative process – and I desperately needed to create.
How I got started
In the software world, there’s a saying, “fail fast, fail cheap.” I knew that if I over-thought things, I’d never start. So, I just started getting things done. As an example, I didn’t create a fancy brand; I just used my name as my company name.
Here a few practical steps that will help you start a service-based business:
Buy a domain name
I bought my domain name from GoDaddy, but there are a lot of domain name registrars out there. It’s fast and easy and will typically cost you less than $20.
Name your company and register it with the state
I formed an LLC by registering it with the state, paying the fees, and filling out the required paperwork. Visit your state’s Secretary of State website to find out the process. Depending on your line of work, you may also need a business license.
Set up a mailbox
I bought a P.O. Box at my local post office, but I’ll likely move to a virtual postbox in the future.
Set up a business phone line
I knew that I didn’t want my personal cell phone number posted publicly, so I set up a Google Voice number. It’s free and forwards all calls to my cell phone. If you plan to build a business with more than one person, be sure to look into other VoIP options like Grasshopper or Fluentstream.
Create a logo
I hired my graphic designer friend to create a logo for me. I love it and I have it on everything – my website, my business cards, my invoices—you name it.
Hire a professional photographer
I hired a professional photographer to take headshots and I used them on my website and LinkedIn profile. Professional photography makes a huge difference, especially when you work with people who find you online.
Launch your website
Even though I’m technical and I’ve worked on a lot of websites in the past, I’m not a website designer. I knew that I’d spend too much time banging my head against the wall over my website theme and design if it was too customizable, so I just went the quick and easy route and chose Squarespace. It’s affordable and really easy to use. In the future, I’ll likely move to WordPress because I think it will scale best for me and offer me better SEO, but for now, Squarespace works.
Set up your email
I’ve always been a fan of G Suite because I love the Google platform. I’m a huge proponent of a paid email platform, as opposed to using a personal @gmail.com account. It’s one of the most critical tools in your business. Plus, G Suite makes it easy add and manage users and it offers some of the best collaboration tools on the market. My Google Drive files are well-organized, allowing me to keep my personal and business documents separate, but to also access my documents at any time, from anywhere, and on any device.
Get your financial tools in order
Set up a business bank account. Be sure to keep your expenses separate from your personal expenses. If you decide to move to an S Corp or other type of entity in the future, you’ll need to keep these separate anyway.
It’ll make accounting a lot easier, too.
Set up a cloud-based accounting software. I use FreshBooks and absolutely love it. It’s made for entrepreneurs and small business. It allows me to track my time in real time (I typically charge hourly), quickly generate invoices, and automate payment reminders. It’s also integrated with my bank transactions and credit card gateway. Plus, their support is outstanding. Having FreshBooks allows me to spend only 10 minutes per month on invoicing.
Finally, consider getting business insurance. Many clients may require it.
Start using a CRM
Customer Relationship Management (CRM) software is a central database to track client communication. I consider it the ‘brain’ of my business. Most CRMs integrate with website forms, sales and marketing tools, accounting software, and reporting dashboards. My CRM allows me to track my prospects, organize my projects, build reports, and market to my clients. It’ll also allow me to easily onboard and communicate with future employees.
These initial steps took me about two weeks. It doesn’t take much. Just start!
How I grew (and the emotions that ensued)
Once I set up my systems and processes, I had to figure out how to get clients. I’ve never considered myself a salesperson and I’m not into self-promotion. However, the primary skill that’s contributed most to my career success has been my ability to build and maintain relationships.
I’ve kept in touch with everyone over the years—former coworkers, employers, employees, clients, and vendors. So, when I started my business, I reached out to everyone. I scheduled coffee meetings and a lot of phone calls. This quickly led to a couple of key software partnerships, including my CRM software partner – a referral source that contributed 48 percent of my revenue last year. Other significant projects and clients came from referrals from friends and former clients.
I don’t mean to make this process sound easy. It took a lot of work and even more persistence. There were many days when I literally had no projects. I spent about eight months dipping into savings before my revenue became significant.
I also had a lot of job offers and people trying to get me to come work with them. As someone who’s used to saying ‘yes’ to almost everything, I had to say ‘no’ to a lot of great opportunities and stay focused on my goal of building a business.
What I’ve learned
Once the momentum starts, it keeps going. There will be many days in your journey when you have no idea where your money will come from next month—when your projects wind down and you have few opportunities in the pipeline. It’ll be scary, but you need to keep moving forward. Schedule more coffee meetings, attend a local networking event, reach out to an old colleague, or teach yourself a new skill. If you keep the momentum going, your business will continue to grow.
Structure your day. Even though you may want to sit around in yoga pants all day—and will probably do that most of the time—you need to stay focused. If you work best in the morning, do your most important work before noon. Schedule your meetings, calls, and business development tasks in the afternoon.
Do great work. You have to put your clients first. Make it as easy as possible to work with you. From your contract to the way you accept payment, it needs to be easy. I accept credit card payments from my clients and I wouldn’t dream of passing through the transaction fees. I invoice clients once a month, my time records are clear and detailed, and I give my clients 30 days to pay. Trust is key.
Systematize everything. Even though you may be starting out as a solopreneur, you may bring on employees or consultants in the future. The more clearly-defined systems and documentation you have in place, the easier onboarding and offboarding will be. Even if you just need to hire a consultant, you’ll save yourself so much time and money if they can easily review your documentation and devise solutions for you. Trust me on this.
Say yes. In the beginning you’ll say yes to almost any work that comes your way. As you grow, you’ll need to start learning how to say no and specializing, but the work you do in the beginning will teach you so much. You’ll also get used to facing brand new problems. Every. Single. Day.
You’ll have to tackle projects you’ve never done before. I’m not sure this ever stops. You’ve gotta be confident that you are smart and you’re a problem solver. In the words of Marie Forleo, “everything is ‘figureoutable.’” Don’t shy away from hard things. Focus and figure it out. You’ll get there. I promise.
You’re going to wear #allthehats. I run my business by myself. I’m the business development rep, sales rep, sales engineer, proposal writer, project manager, technical lead, researcher, marketer, visionary, customer service rep, tester, bookkeeper, and accounting department. I even did my own taxes the first year. Because I worked for small, lean businesses for years, I had experience in all of these areas. If you don’t feel comfortable doing these tasks, delegate or outsource them so you can focus on the highest and best use of your time.
Stick to your vision. As I previously mentioned, I received many job offers and invitations to discuss employee-type roles. It’s flattering and sometimes tempting, but I’m proud of what I’ve built—there’s no salary that could pull me away from doing my own thing.
Track your progress. For me, tracking my revenue is an easy metric to monitor. It took me 8 months to start making consistent and sufficient revenue. I gave myself many pep talks and I had to look at my consulting revenue chart every single month to prove to myself that my revenue was trending up. These trends showed me that I actually had a viable business and that I wasn’t blindly following a dream. Supportive friends and family are also key!
Where I am now
More than a year-and-a-half in, I’ve got 28 clients in 12 states and three countries. I’ve provided consulting on CRM, Enterprise Resource Planning (ERP), call center, and help desk software. I’ve written enterprise software manuals and marketing collateral, and I’ve managed a few big projects. And now, I’m starting to narrow my focus to the services I enjoy the most.
I’m starting to consider re-branding and doing some marketing campaigns. To date, I haven’t done any marketing besides partnering with a few software providers.
I also started working with a CPA to reduce my tax liability and I put myself on payroll (yikes!). Finally, I’m focusing on larger, longer-term projects and building a recurring revenue model.
My current areas of focus are intended to help my business grow and reduce the chance that I’ll burn out over time. Next year, I may be focused on completely different objectives. It’s critical to be able to pivot and scale as your business grows.
“A year from now you may wish you had started today” – Karen Lamb
If you’re eager to start your own business, just start with the steps outlined in the “How I got started” section. Take one step forward every day. You may be surprised where you’ll be a year from now. Good luck!
Any questions? Comments? Get in touch! I’d love to hear from you.
Interested in learning more? Take a look at these articles:
https://socialspeaknetwork.com/wp-content/uploads/2018/04/christinasavagelogo.png254864Caitlin McDonaldhttps://socialspeaknetwork.com/wp-content/uploads/2018/04/SocialSpeak-Logo.pngCaitlin McDonald2018-04-27 20:55:532018-07-22 22:01:20Christina Savage: How to Jump off a Metaphorical Cliff and Land on your Feet (Guest Blog)
https://socialspeaknetwork.com/wp-content/uploads/2018/04/SEO-and-blogging.png7201280Caitlin McDonaldhttps://socialspeaknetwork.com/wp-content/uploads/2018/04/SocialSpeak-Logo.pngCaitlin McDonald2018-04-26 20:21:162018-04-26 20:28:46Search Engine Optimization, Keyword Research, and Blogging for your Business [April Overview]
Are you SUPER excited that you just got done writing a 2500+ blog post? If you are anything like me that is a HUGE accomplishment! It can take a lot of time to compile a long blog post, but it is well worth it! Bravo! When I started blogging I didn’t realize how important blogs actually were, what they were doing for our business. Blogging was something I always passed along to Caitlin because in my eyes she is an amazing writer. But this year I have taken on the task of writing blogs as well and getting to that 2500+ word count can be tough sometimes.
in this blog today I want to talk about how to share your blog post from your website to the world. We cover a lot of different ways you can share your blog.
When you write a blog post it serves multiple purposes:
Social Media Content
Sales/Lead Page
Pinterest Search Content
Customer Resource
Email Marketing Content
Backlinks
Bookmarking
SEO
So, how do you get your blog from your website to all these sources? It is quite easy. In just a few clicks you can have your blog off into the internet world for everyone to see! Are you ready for that?
Writing a blog post can be a scary thing, you are putting yourself out there, providing valuable information that other people are reading and consuming. It’s one thing to just write blogs and have them on your site and it’s another thing to really start promoting your blogs and driving that traffic back to your site. For a long time, we would write blogs each and every week, have them posted to our website and then just push the link out to Facebook, Twitter, LinkedIn. Well, that is one way of doing it, but it’s not going to get you the traffic you are wanting. Let’s talk about ways to promote or social share your blog.
Tip #1: Social Sharing
Once you have your blog post it is important to get it out to social media, but remember not every social media platform is the same. You need to adjust the content for each platform.
Facebook – You can share your blog on there and have the first paragraph of the blog and then link, you also want to share the blog post to your business page, groups and depending on the blog you may want to share from your business page over to your personal profile for friends and family to see.
Twitter – With only 280 characters to use for your tweet, you need to be creative when sharing on Twitter. Sometimes you will need to use #Hashtags within the content if you can’t fit them at the bottom. You want to make sure you get your link and at least 5 #Hashtags in your twee. Short, Simple and to the point! What are they going to learn, what’s in it for them on your blog?
Pinterest – Now, I am going against the grain here, Pinterest really should be categorized under “Search Engine”, Pinterest isn’t really a social media platform, it is a search engine, a place people go to find information. People usually think of it as social media so that’s where I am going to talk about it. Surprisingly we get a lot of website traffic each month from our Pinterest account and we have only had our Social Speak account for almost 6 months! Which is great for us, we can see that it is working. The key when sharing your blog post is creating an image within your blog that is the correct size for Pinterest. You can see how Caitlin has a large image in the middle of this blog here, I will also add one to this blog below. Having the correct image sizes for each platform is important and you can do that in Canva.
Instagram – Here is where it gets a little tricky with sharing blogs on Instagram since you can’t have links in your content area until you reach 10,000 followers. We are not there yet but on our way! So, this is what I usually recommend, when our blogs use to be 300 words we would place the whole blog on our Instagram account with image and then say check out more blogs on our website, link in bio. Now, that our blogs are much longer, it’s too much content to put on Instagram, what we do is highlight with points what your blog is about, what benefits they would get out of it and then say check out our blog (Link in bio) for more details on TOPIC OF BLOG HERE. Remember to use hashtags, we say to use anywhere from 3-10 within your content area and then up to 30 as a comment after your post. That is more of a personal preference.
LinkedIn – Least but not last LinkedIn our forgotten gem! LinkedIn is AWESOME for group postings. We always share our blogs to our personal profiles but then we take it a step further are share our blogs to 3-5 groups per week. We handpick these groups so we know what each groups target market is. We turn the title of the blog into a question, for example, the blog we have been highlighting we turned the blog title from “6 Reasons You NEED to be Using Instagram Stories for Business” to “Have You Tried Using Instagram Stories for Your Business?. This helps increase the discussion within that group.
Tip #2 – Bookmarking Your Blog
Now, that you have shared it on social media to your networks it’s time to blast it out to the rest of the world. Bookmarking is a great way to get your blog out to people that you are not connected with online already. What is Bookmarking? It includes different websites that you can enter your own website, blog, videos etc too. People all over can then easily search for different topics and services and your website, blog or video would appear. People have all different sorts of ways they like to collect their information online. Here are a few of the bookmarking sites we recommend.
StumbleUpon – This is a site that people can go to and search all different topics and interests. StumbleUpon is a discovery and advertisement engine that pushes recommends of web content to its users. You can sign up with StumbleUpon through Facebook or your Google account and start posting!
Delicious – This is a site is used for storing, sharing and discovery. You can follow different trends and topics with this site. Here is a LifeHack Article that shares multiple ways to use Delicious
Digg – This is one of the top bookmarking sites out there right now. The way Digg is set up is more of an online magazine, I like the layout of this bookmarking site better than some of the other. There are millions of users each month so you have the opportunity to get your blogs out to millions through Digg and drive traffic back to your website. You will need to register your website and yourself on Digg in order to post.
Reddit – This site is really all about creating an online community to share stories, links, images and more. This is a hot platform to market your website, be consistent with sharing your blog posts here, this also acts as a social media platform because you are like, comment and share.
Last one is https://medium.com/about Medium – “Medium taps into the brains of the world’s most insightful writers, thinkers, and storytellers to bring you the smartest takes on topics that matter. So whatever your interest, you can always find fresh thinking and unique perspectives.”
BONUS TIP:
We found this tool, that we use for a lot of our larger clients who we are blogging for, we are all about working smarter not harder. There are a ton of bookmarking sites and just that one task can take an hour each week, who has an extra hour laying around? Not me! There is a tool called OnlyWire this automatically pulls your most recent blog posts and puts them to over 10 different sites, including Tumblr, Reddit, Medium, InstaPaper, LiveJournal, Folked, FeedSpot, Blogger Slashdot etc. Some of these sites I haven’t even heard of HA! It can also post to your social media, but I do not recommend that. Take advantage of this tool for the bookmarking sites. I think it costs $59.99 a year! It does drive traffic to your website with all these backlinks.
Tip # 3 – Email Marketing
There is that magical list you have been growing for years now that you need to start reaching out to more, right? Your email list is GOLD if you use it correctly. Each blog you post can be a resource for your email list. You can create a plan for your blogs, maybe 5 steps to SOMETHING and each step was a blog. You can then share this blog series to your email list, add a custom video for this particular email. Or you can have one email be the first blog and video then set up your automated camping for your the rest of the blog series. Be sure to give some exclusive content for that email, you don’t JUST want it to be your blog. Keep your readers engaged and give them TONS OF VALUE. We wrote a blog post awhile back “Best Practices to Engage Your Email List” that is a good place to start on how to create a great email campaign.
How can you add value to your newsletter and promote your blog at the same time?
Set up an interview with someone that has succeeded with what you are talking about. For example, let’s say we write a blog on how we use Pinterest to grow our business by 65%, we have our blog that outlines and tells our story, but what if we did an exclusive video interview with another business owner that had similar success with Pinterest that JUST our email list would see? What 5 benefits would your list walk away with?
Feature a Guest Blogger you can ask a guest blogger that has a similar interest or insights to your topic you are covering and ask them to write a short blog/article for your newsletter or email campaign. This would be someone who is like-minded and like-hearted to you, someone who shares the same target market, someone maybe you could partner with or you would feel comfortable sharing with your list.
Exclusive Offers this is another way you can promote your blogs in your email campaigns and newsletter, giving your audience value is KEY! Offering them something such as a free download, free video series, free consultation to talk them through a process, help them solve a problem.
Tip #4 Quora –
Let’s show the world that you are an expert in your field! Once you create your account you pick the topics you are interested in learning about and then you pick the topics you know most about. People use Quora to ask questions, this is where you can chime in, you can look for those questions in your expertise and answer them, link back to one of your blog posts. At the top of the screen you can see Home and Answer, click on ‘answer’ and based on those topics you put in place that you were an expert in, you can answer these questions. This is a great way to reach your target market by solving a problem for them.
Wrap-up
You can clearly see there are many places to share your blog content for FREE, oh yeah! Besides the OnlyWire app all of these outlets I spoke of today are all FREE! Who doesn’t love FREE? Create a system for sharing your blog post. We write a blog each week along with a video and that blog post gets posted to our site on Tuesday’s and then from there I pull out my list (or this blog) and go through each platform. I am not going to make you print out this whole blog post, so I made a quick cheat sheet for you. You can download below. Hope this helps!
https://socialspeaknetwork.com/wp-content/uploads/2018/04/How-to-Promote-Your-Blog-Post.png315560Amber Irwinhttps://socialspeaknetwork.com/wp-content/uploads/2018/04/SocialSpeak-Logo.pngAmber Irwin2018-04-24 08:00:292018-07-22 22:06:50How to Promote Your Blog Post


 How to know if Partnership is Right for You


 In times of loss and helplessness, it is easy to get lost in your own thoughts. You can also, however, use your loss as an avenue to open doors and build relationships.