John is a technical SEO expert who’s deeply engaged in the local and national SEO community. With over 15 years of web management experience, John has led digital strategy for many enterprise healthcare companies such as Epic Health Services, Aveanna Healthcare, Cornerstone Healthcare Group, and more!
Founded in 2009, Cardinal Digital Marketing has been ranked the #1 fastest growing agency in the Southeast (The Agency 100). In addition, they have been consecutively named on the Inc. 5000 list of fastest growing privately-held US companies in 2014 and 2015. The agency has also been a multi-year recipient of the Atlanta Business Chronicle’s Pacesetter Awards as well as selected as one of the 101 Best and Brightest Companies to Work For®.
Cardinal keeps pace with rapidly shifting trends in Digital Marketing, and develops engagement strategies that are not defined by a platform or a category, but leverage the best marketing vehicle to solve every unique challenge. They approach every situation with the client’s customer in mind and measure success not by increased traffic or impressions, but instead higher client profits.
Services offered include Search Engine Optimization, Pay Per Click Advertising, Social Media Management, Web Design & Development, Mobile Marketing, Online Reputation Management, Web Analytics, and more. What are your specialties?
In this interview we focused on SEO and search marketing for health and wellness businesses. We covered:
The difference between SEO and Search Marketing and how this differs from other types of digital marketing.
Current trends are you seeing for wellness practices with SEO marketing in 2019.
Tactics that were expected to perform well or had a lot of hype, but failed to take hold in 2018.
The top 3 things that a wellness center should be doing online to see a return from their SEM efforts.
The top strategy that should be followed, but often marketing teams get it wrong.
Marketing strategies your team is currently testing that you don’t think many other agencies are implementing for their clients.
Please be sure to subscribe to the Social Speak Podcast for more interviews with experts in digital marketing for health and wellness businesses.
Podcast Transcript:
Hello my name is Caitlin McDonald, and welcome to the most recent episode of the Social Speak podcast. I am so excited, today we are joined by SEO expert John McAlpin. Now, John works for Cardinal Digital Marketing. Founded in 2009, Cardinal digital marketing has been ranked number one of fastest growing agencies in the South East. In addition, they have consecutively been named on the Inc 5000 list of fastest growing privately held companies in 2014 and 2015.
Cardinal keeps pace with the rapidly shifting trends in digital marketing and develops engagement strategies that are not defined by a platform or a category, but leverage the best marketing vehicle to solve every unique challenge. They approach every situation with the client’s customer in mind, and measure success not by increased traffic or impressions, but instead, higher client profits. Services offered include search engine optimization, pay-per-click advertising, social media marketing, mobile marketing, online reputation management, web analytics and more.
Our guest, John is a technical SEO expert, who’s deeply engaged in the local and national SEO community. With over 15 years of web management experience John has led digital strategy for many enterprise healthcare companies such as Epic Health Services, Cornerstone Healthcare Group, and more so let’s give a warm welcome to John.
Caitlin: Welcome John, we’re so excited to have you on the show today.
To kick things off. Tell us a little bit about your background in digital marketing.
John: Sure, it actually started way back when I was 11. I started building websites when I was 11. I found it interesting and saw my dad doing it So, I found W3 schools and started teaching myself how to do all that. But at a professional portion of my career I started in the corporate side, mostly in a tech field, international e-commerce, and then I moved into healthcare and fell in love immediately. I was doing full digital strategy for a healthcare company, and then from there, I transitioned to a agency life and never looked back really. I love agency life. It’s nice to get a little mix of everything.
C: Yes, it definitely is. There’s always a new project to be working on … So John a key aspect of Cardinal digital focuses on SEO and search marketing. Can you describe how this differs from other types of digital marketing?
J: Sure, on it’s own this is a really interesting topic. A lot of people get confused about the actual true definition of SEM. I even heard people consider Social media as a part of SEM and so I think it’s really important to know the difference. Search engine marketing is any type of marketing that has to deal with a search engine. Specifically people refer to it with paid search, like PPC or CPC however you want to refer it to, or SEO. And so that’s essentially search engine marketing. While things like social media channels, have a search box that’s different than a search engine. It is important to note. And so search marketing really is just another form of inbound marketing and what’s unique about it compared to other things, is you’re catching both people during the discovery phase, where there’s no intent to purchase, and during the intent to purchase phase.
C: Great, great thank you for diving into that. So what current trends are you seeing for wellness practices with the SEO and SEM in 2019?
J: What people are in healthcare are starting to do is find alternative ways for people to book appointments. Traditionally it starts with a call then developed. Now we’ve got great technology to book appointments on the website, but now it’s gonna find alternative way to give people more options, to book appointments.
Something that we’re doing is Google My business is actually having features to help integrate their platforms truly need to visit your website, to book an appointment, you can even text or even other direct links. There are some other third-party industry sites like if they’re a directory that we can book appointment straight from there. For example, in the restaurant space Yelp, you can order straight from Yelp. And so, the future is hoping to get voice functionality working out. So all you’re a home assistant, such as Alexa, to help book appointments, that’s a future hope. I don’t know if you were gonna get there, in 2019, but it’s definitely in pain that see a lot of people going towards.
C: That’s pretty incredible. So I’d just be able to say “Alexa, schedule my appointment with this center,” and to be able to do it.
J: Right. I predicted to see a specific company, not a healthcare company, but a technology company developing an application. There’s a lot of partners with it, who are trying to work together to develop this type of technology, so I see it being… You signed up with a partner and they will add you to their list, of preferred vendors, and then you would be able to use their system. That’s the place I see this going.
C: That is incredible, that’s wonderful. Now, in a previous podcast episode, and this isn’t something that we talked about previously, but in a previous podcast episode one of our guest Abby was talking about how interactive websites is actually really helping out with SEO because people have more time on site. A lot of health care centers, direct people off-site to do the scheduling and booking. Is it better to have the scheduling tool actually embedded on your website, rather than directing someone off-site?
J: So, that’s an interesting topic because there’s a couple of things that you wanna think about here. Not just your SEO interactivity, but also how you track conversion. A lot and people who have booking on their site or using an Iframe, which means that your analytics may not be able to track.
And so, really it gets to the point where Google is aimed more to the user experience and that’s where people get that time-on-site type of metric, and technically it’s better to have people to book on your site versus off because it’s less steps to take an action, but in a perfect world we be able to develop software to have booking on our site, and have our own proprietary thing. But, not everyone has those kind of resources. And so it is really however you can get the job done. An Iframe will work. Just be careful about what you’re tracking. As marketers, it is hard for us, so we don’t always have the ability to track it. Cardinal specifically does a good job of working with a whole lot of vendors to make sure that we can get the information that you need, but a lot of agencies don’t have that reach or those resources so be careful.
C: Alright, so let’s jump to the next question, are there any tactics that were expected for well or had a lot of hype, but failed to really take hold in 2018?
J: Voice. I think, voice is gonna be a big one. It’s not the future. It’s now. Some data scientists are predicting that 50% of all searches, are gonna be voice by next year. And I think this is a little confusing because people are getting confused between Voice Search and Voice Assistance.
Asking for the weather, asking certain time or something like that. It’s just those are voice assistance not voice search. And so right now we don’t really have a good way to track search. Also, it is important to note that your Search Console data, a lot of these queries can be voice and Google won’t be telling you which are voice.
I’m sure they will, but they’re not telling you right now. It’s also important to know that as far as asking questions that come from your website, all answers are first position featured snippets. They wanted to be voice focus on getting those featured snippets ranking high. And it’s important to know that feature snippets can appear anywhere in the search and only 30% are in position one.
C: Is there any way to be able to do research about how voice searches and the phrases and terminology that people are using and search differ from me typing into a search engine for something?
J: So as far as tracking or as far as optimizing?
C: As far as optimizing.
J: Sure it’s really just answering commonly add questions that you can relate to your business. Anyone can really get a question answered, but that doesn’t really lead to a conversion or help your branding at all.
So if you really wanted to optimize for voice, currently, before the future hits, it’s really answer the questions as quickly as you can. One of two sentences, the question needs to be answered. A lot of people will try to think about word count, not word quality. So they add all of these filler words. Work to really answered the question directly, in a first two sentences. The rest of that page can be or filler content.
Yeah, and those first two sentences, then you can work your brand name and according to Dr. So and So, at whatever your business name, is, the flu can be treated if caught earlier.
That was a the brand recall there. They can go and search that later or if they just are searching that question online at all, on the paper knows your name at the features on it. Oh, the that’s who I heard that from. And they can follow group.
C: I assume that that’s going to be one of the answers to this next question, but what are the top three things that a wellness center should be doing online to see a return from their SEM efforts?
J: Actually, it’s not one of the three in a lot of the…
There a more important foundational things that people need to worry about. A as far as voice, yes. One of the things I focus on Q+ A answer format. Include all of your services include all of your conditions on separate pages and have a way to inter-link them, Focus on your internal in-between them, so that they can relate and people can learn more information.
One of the first things they need to do is focus on having clean citations and for people that don’t know is a caption. That’s just your directory listing thing about Google My Business, Yelp. And then also think about your industry-specific citations.
Rate My doctor and things like that.
These directories have a huge impact on voice search and how business appear – having a consistent citations in.
So there’s a lot of tools that help it is or you can do it manually, but a lot more work, but you can pay more to have is, will do it for us if a lot of out there for it so I think the biggest factor that wellness centers and we really need to focus on is the user experience.
You can do SEO to a crap site. But if it doesn’t convert and people are turned off by it, they can’t navigate through it, it doesn’t mean anything that is so important.
Yeah, you can put a Band-Aid on it. But it’s not going lead to the results that you need in the end. And I feel as though Google with its algorithm, says, “Well it’s ranking site’s higher that have that positive user experience. People are staying on the site longer, they’re going directly to it.”
C: And then, let’s see, what is the top strategy that should be followed but often marketing teams at these health and wellness centers get wrong or other agencies, just get wrong?
J: So SEO, technical SEO, that’s the first thing I noticed that it’s wrong, but really the biggest missed opportunity is having a holistic digital marketing strategy and having your teams to silo doing their own things, not so picking on the same goals or focus or when teams are working on different ways to achieve different tactics towards the same goal.
Specifically, they need to be blending to the technical side of SEO, PPC, social media and their content. Repurpose your content for different channels.
C: That’s great, that’s great. You work for Cardinal digital, which is a full service agency and one of the top-ranked inbound marketing agencies in the US. Tell us about your company and your services, because you do really merge all of those different silos together for work with your clients.
J: As a strategy partner, we use the term partner, because it really is a relationship that we try to build, we try to build long-term collaborative relationships with national enterprise healthcare companies, because not one company is the same as the other, and everyone deserves a customize strategy. There’s no recycled formula for everyone … See what works best for everyone. We also have a really strong paid media team, and extremely simple track or record merging all of our tactics that blended to re-All full welcome out strategy.
C: Are there any marketing strategies that your team is currently testing that you don’t think many other agencies are implementing for their clients?
J: Sure almost doing a lot of the same one-off tactics and traditional SEO things, and payments paid media, but one of the things that we do is that I’ve seen that I have not seen other agencies really focus on is develop cascading edge tracking software.
We’re trying to use every tool the book to make sure that we can unlock the most insights so we can do the best action because really we put the data in the hands of our clients.
This is what we’re seeing our recommendation and this is how we collaborate with our clients, so, but they are fully aware of every step and they can make the best position possible because we give them the best information possible, and that to be anything from, not just keyword tracking, but also heatmap tracking it seems… How users are actually interacting on their site, so we can have the full holistic US experience.
C: Definitely, definitely, that’s great. And then, John, is there anything that I should have asked but I didn’t?
J: Yes, a lot of questions, I don’t know. I think you have a great job…
C: Awesome, well thank you so much for joining us, has been such a pleasure learning about your experience, your take on SEO and SEM and some of what Cardinal Digital is doing for their clients. So thank you again for joining us today.
J: Thanks so much for having me.
C: Wow, thank you, thank you, thank you to John for joining us today. He shared such wonderful information and it’s no wonder Cardinal digital is such a top-ranked agency with talent like John.
We spoke today about optimizing your directory listings, including both services and conditions pages on your website, as well as how to increase your exposure for voice search by having an FAQ section on your website. All of these are simple tips that you’ll be able to implement on your wellness website to help out with SEO and SEM.
Thank you again for tuning in, thank you to our guest, John for joining us today, and I will see you on the next episode of The Social speak podcast.
https://socialspeaknetwork.com/wp-content/uploads/2019/03/Social-Speak-Podcast-John-McAlpin.png312820Caitlin McDonaldhttps://socialspeaknetwork.com/wp-content/uploads/2018/04/SocialSpeak-Logo.pngCaitlin McDonald2019-03-13 09:43:112019-03-04 20:57:50Search Engine Marketing vs Digital Marketing - Interview with John McAlpin of Cardinal Digital
This week we have the privilege of speaking with Abby Thompson from Salted Stone, a Diamond Tier Partner with Hubspot. Salted Stone is a global agency with an award-winning team. They provide end-to-end solutions for clients focusing on strategic marketing programs, tactical support, and project engagements.
In our podcast, Abby and I took a deep dive into some of the key concerns for health and wellness centers when tackling Inbound Marketing.
In this episode, Abby provides insight into:
Current trends she is seeing for wellness practices with inbound marketing in 2019.
Tactics that were expected to perform well or had a lot of hype, but failed to take hold in 2018.
The top 3 things that a wellness center should be doing online to see a return from their digital marketing efforts.
What is the top strategy that should be followed, but often marketing teams get it wrong.
Inbound strategies Salted Stone is currently testing that you don’t think many other agencies are implementing for their clients.
Please subscribe to Social Speak Podcast for more interviews with experts in digital marketing for the health and wellness industry.
Before jumping into the transcript of the Podcast, I wanted to highlight eight key takeaways that you can implement in the digital marketing strategy for your wellness center.
8 Ways to Master Inbound Marketing in 2019 for your Wellness Center
Takeaway 1: Inbound marketing is a comprehensive journey. It is about creating opportunities for your target market to find you and interact with your brand in a way that encourages them to take action.
Takeaway 2:Current trends in Health and Wellness for Inbound Marketing in 2019 include building authenticity into how you position yourself online. For example, wellness brands are moving away from partnering with Influencers that alienate their target market and working more with people who welcomes and builds trust.
Takeaway 3: Not all technology trends played out in 2018. Salted Stone expected AI to be much more advanced for content creation, but it still is failing to create content that seems authentic to the brand. Additionally, be on the look out for more advanced functionality for Chat Bots in 2019.
Takeaway 4: Wellness centers should focus their digital marketing efforts on creating Interactive Content. Interactive content increases time on site, prospect engagement, and ultimately helps to build trust with your brand. Examples include: quizzes, calculators, dynamic landing pages, product or service walk-through videos, and more. In general, clinics with interactive content at the center of their digital strategy see a higher ROI than those who don’t emphasize interactive content.
Takeaway 5: Encourage user reviews and value the transparency and authenticity of both positive and negative reviews. Don’t hesitate to incentivize patients to leave reviews about their experience with your practice.
Takeaway 6: Track the correct KPI’s, such as your customer lifetime value to your customer acquisition cost ratio. Vanity or glamour metrics, such as the number of Likes or Shares a post receives, won’t move the needle when it comes to best marketing your practice online.
Takeaway 7: Marketing is not a one-size-fits all proposition. A health clinic in NY may find that different marketing tactics work to book appointments than a wellness center in OH. You need to dig deep and understand your ideal patient.
Takeaway 8: Don’t think you need to be everywhere online. Talk to and interview customers and prospects to find out where they spend their time. Then, focus your Inbound Marketing efforts on growing these channels. Be strategic about where you market yourself and what tools you use.
So, with that covered let’s jump into the Podcast to hear from Inbound Marketing specialist, Abby Thompson.
Inbound Marketing Tips Interview Transcript
Caitlin: Hello and welcome to the newest episode of The Social speak Network podcast. I’m Caitlin McDonald, and today I am joined by Abby Thompson. Abby is the Director of Marketing at Salted Stone, a global agency with an award-winning team of humans, and dogs, where she spends her days spearheading lead generation and strategic initiatives. Abby is a Boston native with a passion for mission-driven business development, branding, and technology. So please, let’s give a warm hello as we welcome Abby, to the podcast.
Abby we are so excited to have you on today, first to kick things off, can you tell us a little bit about your background in digital marketing?
Abby: Yes, absolutely, thank you so much for having me on. I’m excited to be here.
Prior to joining the team at Salted Stone, I was working with a sustainable and renewable energy education company based in Portland, Oregon. We offered online courses for engineers and professionals who wanted to learn more about solar and wind energy and sustainable building. I was responsible for assisting with editorial campaigns on our blog, social media marketing, sourcing, managing experts, building courses with them, and answering questions from prospective students, as well. I got a chance to handle initiatives that followed all ends of the buyer journey.
I created Inbound content for marketing purposes, and also used chatbots to qualify leads and even sell to site visitors, worked with the instructors to build a new courses, and then sold and cross-promoted to them.
It touched on marketing, sales and customer success, as well. After I left that company, I joined the team at Salted Stone about two years ago. I started as an intern and then I worked in our PR and earned media department and now I lead marketing specifically for the agency. I’m a little bit less client-facing now, and I’m really in charge of lead generation and strategic initiatives over here for our agency.
C: Awesome, I love it. So you’ve really been able to have your hands in all different aspects of digital marketing, and now you’re really just marketing the business, which is great.
A: I’ve got to work on the business and in the business which is really cool.
The Difference between Content Marketing, Digital Marketing, and Inbound Marketing
C: Salted Stone focuses on Inbound Marketing, can you describe how this differs from content marketing or digital marketing? There are so many catch phrases out there. What are they?
A: There are so many buzz words. From a high level, Inbound is a technique that really turns the old-school concept of pitching, advertising, and finding and courting leads or buyers on its head. So where in the past, you were always making cold calls, buying leads lists, trying to push your message with an outbound approach, now you’re creating opportunities for folks to find you and interact with your brand in a way that encourages them to ultimately take an action. So, of course, content marketing, content creation, and dissemination of the content that you create are a part of Inbound Marketing.
Certainly a tenant of Inbound is to write or design really helpful guides, blogs, e-books that folks will find and enjoy. And in that process, of course, they’ll get to know the product or solution that you offer, but Inbound is about a lot more than that, really. It’s ultimately about optimizing every domain you have on the web to move people closer to the point of sale, or to renew, or to evangelize your brand and come back again and tell others to come back again.
Whereas digital marketing itself, might be an umbrella in which a lot of these actions, fall, Inbound is really about creating a comprehensive journey. So say someone finds you on the internet because you have a great website that’s keyword optimized with good domain authority.
And maybe they’d spend some time clicking around, chat with someone on a live or scripted bot, look at the resources you might have to offer, download something, maybe they get enrolled in an email marketing nurture workflow and eventually, hopefully, you become your buyer. It’s really it’s a bigger picture, long-term mode of thinking for brands rather than just focusing on SEO for example, or a lot of folks, they just say, “Oh you know what, I’m going to blog…” It’s really much more comprehensive than that.
Flywheel Approach to Marketing from Hubspot
The folks over at HubSpot, who coined the term, they call it now the Fly Wheel way of thinking. Basically the customer is at the middle and then around the customer is sales, marketing and customer success alignment. So you’re making sure that from the point of time where they’re finding them on the internet to when they decide that they want to spend their money with you, you’re really making sure that they’re happy, that they love your product, still that you’re being consistent in your messaging, as soon as they become a client, and just making sure you’re investing in equal measure in all parts of that journey for them. That’s really what Inbound is about it.
Current Inbound Marketing Trends for Wellness Practices in 2019
C: Now, as you know we focused a lot with health care and health and wellness what current trends are you seeing for wellness practices with Inbound Marketing in 2019?
A: Yeah, absolutely, I think we undeniably live in the age of an elite and often unrelatable influencer or social media star, and I think prior to now, many brands have made the assumption that the star power of a person endorsing your product or your service is enough to persuade buyers. But the truth is most wellness or fitness influencers don’t really live life like your buyer does.
And I think you are sending a message with a little bit of dissonance there. And I think marketers have now really caught on that. It sends a sort of phony and unattainable message to have people who don’t live anything like your buyer promoting your product, or… So now I’m basically saying wherein companies embrace this idea, and really tailor they’re Inbound initiatives around fitting their initiatives into the lifestyle of the whole market. Not just that one demographic that can live like those influencers. And to me, that just makes business sense it. Why make your club, the club that only a few people feel they can connect to or join. Why not eliminate those sort of alienating messages and images and open your brand up to folks who want to spend money with you.
Because so many people in the past, if you’re just using sort of elite Influence or marketing, many people probably felt that they weren’t welcomed, or desired customers of your brand.
C: I love that, it’s creating a much more authentic presence for your business.
A: That’s right, And there’s so much to be set of course for using powerful influencers as sort of like an aspirational sort of token. I think that’s powerful still, of course, and there’s so many influencers that are fantastic and very real about their lives and everything, but I think I’m seeing a lot of wellness brands really understand that maybe it can be influencer with a little bit of user-generated content sprinkled in then showing real people using your product or your service ultimately, I think the best word of mouth, comes from your friend on Facebook, who’s probably not Kendall Jenner, with all due respect. I think the authenticity carries. I think people know it, and they recognize it, and they appreciate it.
Marketing Tactics that had Hype in 2018 but Failed to Take Hold
C: A great insight, thank you Abby.
What tactics that were expected to perform well or had a lot of hype around them but failed to take hold in 2018?
A: Beyond what I mentioned before, one that we’ve seen and it isn’t necessarily specific to the world of wellness or fitness, but really, it got a launch through marketing is the role of artificial intelligence in content creation, specifically.
The Role of Artificial Intelligence in Content Creation Still isn’t where it needs to be in 2019.
So I know at the onset of 2018 we were seeing all these new tools and software is being rolled out and we were expecting folks to be using more of those machine learning services that for example would turn out keyword packed blog posts or write ad copy for you.
It seems like the technology really is isn’t fully there yet, where the whole AI component, just isn’t quite sophisticated enough to write like a human and in many cases, it’s really quite expensive still.
So that’s something we figured we’d be coming up against a lot and contending with a lot and it just hasn’t taken all the way I think many people expect that it would.
C: Oh very interesting. A recent to study did just come out by co-schedule saying +67% or more of marketing directors felt like they didn’t have the technology that they needed in order to really have a robust content marketing strategy. [Actual Fact: Marketers who use automation tools say time is the biggest barrier to advanced marketing while those who don’t automate say that budget is their biggest barrier. (Openprise)]
It’s interesting that you’re talking about the AI and content creation and how it really doesn’t seem like it’s lived up to the hype. So it’s probably not the right product that the audience or the market is looking for.
A: Yeah, it’s true and we’ve seen a few examples and it’s almost the technology in some instances, when it’s applied incorrectly can create sort of no offense intended, but remarkably bad blog posts where you can tell that no human had any part in the creation of it, because it’s just a string of words that doesn’t really make a lot of sense when put together. I have faith that I’ll get there, it’s just it hasn’t taken off the way folks thought it would in 2018.
That goes back to that authentic presence too, do you want to just have a blog post out there or do you want to actually capture your voice, and your brand and draw people into your story?
C: Were there any other tactics that you were expecting to perform well last year and just didn’t live up to the hype?
Obviously, there’s still a lot to learn about, and this actually kind of still falls under the AI cannon, but there’s a lot for us to learn still about chat bots and about live chat and the things that it’s capable of. I certainly wouldn’t say that it didn’t perform or didn’t live up to the hype, but there certainly is a lot more to learn in terms of using chat bots to lead qualify and things like that. I expected that a lot of the products and tools would be a little bit more sophisticated at this point. And they still many of them still have a lot of components to be built out.
The Top Three Things a Wellness Center should be doing online to see a return from their Digital Marketing Efforts
C: Yes, absolutely a great point there. So let’s jump on to the next question, what are the top three things that a wellness center should be doing online to see a return from their digital marketing efforts?
A: Yes, great question. The first is in our opinion and what we’ve seen work for our agency and for our clients is just use interactive content.
Use Interactive Content on your website and in your marketing to see a return from your digital efforts
Offer quizzes, calculators, dynamic landing pages, blog posts with clickable interactive elements, products walk through. These have just proven to result in infinitely higher engagement. We’re seeing better conversion rates, and in some cases, they allow marketers to close more deals. Our statistics around adding interactive components to sales proposals and how that has increased the likelihood of people closing. These interactive component pieces also encourage folks to stay on your website or your page longer, and ultimately that’s beneficial for many reasons. They’re more likely to consume the information, they are likely to want to spend money on your product or service, but ultimately, time on page gets factored into how high up on a search engine results page you’re going to sit.
If folks are spending time, using a quiz or a calculator, clicking around, really enjoying that user experience, it is also going to factor into how you rank on Google or Bing, or any of those search engines.
Interactive Experiences creates an exceptional ROI for your healthcare center
So invest in interactive experiences from marketing to sales to success, it’s just an exceptional ROI because there are so many tools out there now that really enable users to make this type of content without breaking the bank.
We’re agency partners with a couple of really great tools that have enabled us to make this kind of content and do it quickly, but still make it beautiful and effective and genuinely helpful and interesting for folks who come to the site.
C: It’s almost as though five years ago or so, everyone was all about social media in order to have a conversation and to communicate with your prospects online. Now, it’s really about having a conversation with every single thing that you do online, whether it’s a calculator or questionnaire…
A: And let people have the power. I mean the cool thing about interactive content is that it enables the user to decide what they want. Blog posts and e-books have a very important place and they’re not to be overlooked but ultimately when people read them, the brand that they’re reading it through is talking at them.
There really is an opportunity for them to abandon that and just decide they’re going to do something else, but if you’re offering something like an interactive product walk through, and that’s if you have the software or if you have a physical product to great for both that’ll kind of enable folks to at their own leisure figure out what it is that they want to be learning more about.
And it also, on the back end, if you have great reporting set up, it really tells you where your visitors are spending the most of their time as well. So we’ve rolled out interactive components for software companies, or for physical products, and it’s enabled us to really see “Oh Wow. People are interested in the hardware” or people are interested in something we might not have even necessarily known would be a point of differentiation.
C: Yes, the power of data.
A: Yes, for sure!
C: Data driving every decision. So even if you have a strategy and a plan set up, the data may point in a completely different direction.
A: That’s right and you can’t fight the data.
C: We talked about the use of the interactive content. Are there any other efforts that wellness centers should really be focusing on?
Encourage User Reviews on Yelp, Amazon, G2 Crowd, and Google to Build Trust and Authority
A: The second thing I would say is to make sure that you’re encouraging user reviews on sites like Yelp, Amazon, G2 Crowd, Captara, Google and make sure you’re demonstrating those reviews in your marketing collateral. There’s remarkable power in social proof, what we call social proof. And we believe that consumers today really should look at user reviews, as a trustworthy source of insight. As marketers, we know that a lot of the content that we’re reading on the Internet has been funded or branded by a company looking to sell a service so it’s really important that consumers, today, take a look at what actual users are saying.
So we’ve been crafting review strategies on behalf of our clients, and for our own purposes for a while, and as long as we’re asking for honest feedback, and showcasing all truthful testimonials, even the ones that don’t really make you look like the best brand in the world.
Those bad reviews will happen, of course, we’re all people, but as long as you’re asking for that honest feedback, there’s no reason not to incentivize reviews as well. You can show them off on paid ads, and emails, on your web pages. People trust people, way more or then they trust brands and if authenticity is kind of the unintended theme of the day, there’s really no more authentic route to go than to just give people the choice, and the opportunity, to talk about your brand from a real-world perspective.
Make sure you track the correct KPI’s (Key Performance Indicators) to truly understand success in digital marketing
And then the final one is really to make sure that you’re tracking the right key profit indicators, KPIS, or Key Performance Indicators. We found that it’s so easy to pay close attention to what we would consider more like glamour metrics like engagement on a social post or identifying which of your email campaigns garnered the most clicks, but ultimately some of the more technical metrics will help you glean a solid picture of the return on your investment and really figure out where to invest that money going forward.
One of the ones we’ve been paying closer attention to now is looking at your customer lifetime value to your customer acquisition cost ratio. Which is kind of a mouthful, but it’s really important because it measures the relationship between the lifetime value of a customer, how much they’ll spend with you over time, and the cost of acquiring that customer. It’s pretty easy to determine with just a little bit of math. You just divide the average lifetime value in dollars by the average cost it took to get most customers through the door.
C: This is so powerful. Let’s take a step back for a second. So let’s say you are a marketing director at the healthcare group down the street.
A: Yeah, this seems like something very difficult to transact.
C: And for me, I love data, so I’m all were just jumping in. What tools should these health centers use?
Most health care centers do have some sort of custom or software where they are able to see and how many times somebody comes in the average cost of their visit, so that’s really adding that up over the whole life cycle of the patient that’s coming in. That would be the customer lifetime value correct?
Customer Lifetime Value to Customer Acquisition Cost Ratio = Average Lifetime Value of Patients / Average Cost to Get New Patient Booked
A: Yes, exactly. So that is going to be, whether it’s a service or a product, it’s really going to be throughout the lifetime of your customer. And that usually obviously, I mean life time with your brand, not the entirety of their life, but that value that they’re going to add in the entire time that they choose to work with you.
If you sell the products to see and how many times they’ve bought that product, if you tell a service, that’s how many times they’ve renewed or upgraded, it’s really just the amount of time that an individual is going to spend with your brand over the course of the time that they work with you.
C: And then in that acquisition cost is something that say they came through a paid advertisement, right?
A: And then there was a, the depending on the length of the selling cycle because of course it… It’s drastically different if you’re “B2B or “B2C it’s drastically different if you’re a software versus a service. That’s really going to vary quite a bit, but figuring out how you acquired that customer. We do this often by persona, we won’t look at an individual that it would be hyper-granular and a little bit difficult to make the patients so we’ll do it by persona. I will take a look at how much a certain group of people have made our clients and then we’ll pay attention to how much it caused to bring those people on.
And if it’s an instance where we know that a huge group of folks came through, say Instagram advertisements, we can break down the cost that we allocated towards Instagram ads, and compare that to the customer lifetime value by just dividing those two numbers.
C: You don’t need to have a person-A, person-B, person-C really, you’re looking at your practice as a whole, just to get a sense of what that percentage breakdown looks like in the ratio looks like there.
A: Exactly… And so we, for a real world example, we at Salted Stone, were a HubSpot Diamond Tier Partner, so we get a lot of leads and a lot of interest coming through the HubSpot partner directory. So if you know that a certain segment of our leads come through there and they spend X amount of money per year with us or over the course of their lifetime with us, we could take a look at what it cost us to have that directory listing at HubSpot, and to keep it maintained, and we can figure out that ratio. That to us has lead to some incredibly important business decisions. I mean, in a situation like this, it’s “Okay. We know that we have a lot of money coming in through that great partner directory. How do we make sure that we’re still adding value there? How do we make sure that we’re allocating our funds to keep that active?” So it’s really, it’s helped us inform some of the bigger decisions we’ve ever made.
Salted Stone as your Trusted Inbound Marketing Agency Partner
C: Yeah, that’s great. Now tell us a little bit more specifically about what you do as a Diamond Tier Partner with HubSpot. Tell us about your services and your company.
A: Yeah, absolutely. So I’ll give you the higher level picture of Salted Stone first and I’ll talk a little about our involvement with HubSpot, as well.
So we’ve been around for over a decade now, we’ve got to all over the globe, we have FAO teams in Australia, in the United States and in the Philippines, and hopefully within the coming year we’ll actually be spreading out even more. So that’s kind of exciting. We call ourselves, a lot of people ask what it means to be a full service digital agency, and we call ourselves that because ultimately we really do everything for our clients and we do it all in-house. So if you need a website, a marketing video, a custom CRM integration, I mean a direct mail campaign sale systems, even training for your business development, everything from logos to booths decor for a conference. You can come to us and we’ll take care of it all with the team that really gets to know the context of your industry and is deeply familiar with your goals, and that’s the benefit, really. I’ve also working with teams that keep everything in-house, is that they can share that information with each other.
For example, if we have a designer creating an infographic, for you that designer has been working with the account manager and the people who are focusing on your brand voice and the folks who help you identify what your new fonts are going to look like. I mean everything, we keep it all within the team, and that’s led us some really, really cool brand experiences for folks. Additionally, we scale our services up and down in terms of that scope size, so we can either be your fully embedded strategic partner where we’re basically your marketing agency of record or we can just produce a one-off deliverable for you.
So that’s a very long-winded just about Salted Stone, and we’ve been a Diamond Tier Partner, I want to say for about three years now. But we’ve been involved with the Hubspot ecosystem for closer to six or seven. Basically our CEO when we started off, we were just a Search Engine Optimization agency, we were doing a lot of work, but just making sure, websites were getting in on that early algorithm for Google and ranking highly, and then, we like everybody else, noticed the shift where folks for getting pretty tired of constantly being advertised too, and wanted to instead learn more and make decisions for themselves. That really empowered consumer mindset took hold at Salted Stone, for sure. So we decided to invest in Inbound and invest in HubSpot as a tool that we use and that we deploy for clients. And it’s been a really, really fantastic partnership. They just have an exceptional team, and exceptional product, and it’s been amazing working with them.
We certainly work with companies outside of HubSpot, as well, part of Salesforce, Marketo, really whatever folks need we’ll take care of it. So we’ve talked a lot about Inbound in this episode, and HubSpot is the parent of Inbound it’s where it all came from. So we’re really so thrilled to be connected with that with that organization.
Unknown Inbound Strategies that can put your Practice on the Map
C: Wonderful… And as a business, as a whole, are there any Inbound strategies that your team is currently testing but you don’t think other agencies are really implementing for their clients?
A: Yeah, a good question, and I actually, I talked to our strategist, all the time now that I’m not as client-facing as I used to be I talked to our strategies all the time, about some of the more outside the box initiatives, or things that they’re doing that they’re really excited about that’s working for their clients, and what always emerges is really one central theme and that’s Salted Stone works from where our clients’ businesses are at, from a maturity perspective, to move forward.
A lot of agencies take a sort of one-size-fits-all approach to strategy.
When you do that, you’re really not immersing yourself enough in the context of what needs to happen next in order for a company to grow. So we’ve worked with some B2B companies to combine what would be considered kind of more analog modern call center tactics with hyper-personalized, email workflows or retargeting.
We’ve done direct mail campaigns, we’ve been crafting strategic event or activation campaigns that use micro-influencers, so thought leaders of specific to spread a message. And those are folks would say, 20,000 followers, not 6 million followers, so we’re constantly gathering context, we’re constantly meeting companies where they’re at in their development and trying to set all these really realistic, but often still really aggressive goals instead of just making it a sort of canned approach to marketing and that’s not at all to put down those agencies that are taking that approach because of course, in many instances, is absolutely going to work. But I just… One thing that our team is really, really good at is making sure our clients understand where they’re at, and we do that through ways that I think sometimes surprise them a little. We do really comprehensive stakeholder and customer interviews, we talked to thought leaders and influencers in the industry sort of independent of our clients, we make sure that we paint a really complete picture of exactly where they’re at and make those steps really tangible for how they can be moving forward in a way that’s smart. That way they’re allocating budget towards things that have staying power towards growth that is sustainable and scalable, and I think that that’s one the… A lot, I see a lot of agencies not do quite quite as much, and maybe that’s less so a differentiator and it’s just me being very proud about the fact that it’s worked really.
I think it’s so important. I didn’t really understand where customers are now, and where they want go, understand their unique customer set. It is something I feel like a lot of agencies talk about, but don’t necessarily do.
I think often, even happens with sort of in-house marketing teams, as well. Where it’s kind of viewed as a nice-to-have, and not a need-to-have to keep refreshing your understanding of where you’re at in the market and who you’re selling to, and what they want. So I, I think there’s this idea in marketing that your key selling points are fixed and your buyers are always going to be looking for the same thing and your differentiator is always going to be the one that resonates, but that’s simply not the case. And you have to be constantly asking for feedback, for reviews, for honest discussion about who you are in the market, and ways you can be better reaching people and meeting their needs and I think… And taking that bespoke approach to work with our clients has just been better in the long run as well for a relationship with them too, because it garners trust when you’re able to just be honest and say “Here’s where you’re at, here’s what we suggest, let’s work together to make your goals or reality.”
C: Absolutely, that’s a breath of fresh air that you do that. Thank you to everybody in the industry.
A: Oh no, thank you, thank you so much.
The key marketing strategy most wellness centers get wrong
C: I meant to ask this earlier, actually. What is the top strategy besides not doing these customer reviews frequently enough, but what some… One strategy that should be followed by a Wellness Center, but often marketing teams just get it wrong or decide that it’s not a priority when it should be.
A: Yes, absolutely. So I would say the sort of top strategy that I see happening a lot, we do get a lot of clients who are very concerned with and rightfully so, because they’ve been showed messaging that indicates they should be, but they’ve been very concerned with making sure that they’re on every platform, all the time. That they’re pushing out content, that they are absolutely churning, they are investing in the newest technology, they’re on every feasible social media network, and that’s a message that we understandably take in and think we need to apply to our business, because all of these social networks, all of these tools, they’re trying to sell to us.
Of course, you’re going to believe that if your Pinterest profile and your YouTube account and your everything is not immediately up-to-date, you’re going to believe that you’re going to fall behind. But the truth is taking time to genuinely identify the channels that your leads are coming in by, or that your ideal audience is hanging out around that is so important and it leads to much better decisions for how to use your bandwidth and how to use your budget.
It’s easy to fall prey to the idea that if you are a software company, you have to be doing webinars.
It’s easy to open the idea that you need to be advertising on LinkedIn, but that might not necessarily be how folks are going to find you and how they want to interact with you.
I would say that a one-top strategy is just making sure you know your customer and you’re constantly updating your customer.
But be strategic about the way that you invest your money and your time and do it all feel like you need to be everywhere across the internet.
Don’t try to be everywhere online – choose those channels that already engage your target market and fully invest in nurturing relationships there
There are many markets where it doesn’t really make sense to keep an active Pinterest profiles, and there’s many markets where it makes sense to not run advertisements everywhere.
Just be strategic, how I have a really strong vendor evaluation in place as well. We certainly do in-house here, but we just have a checklist of things that If we’re deciding to work with a vendor, either for ourselves or to use with our clients, we’ll go through rounds of phone calls, demos, we’ll bring in different members of our teams, we’ll have comprehensive checklist to make sure that this investment we’re making is one that’s intelligent, scalable, and going to work for everybody. It’s so easy now to find all of these companies that claim to really be a the solution that’s going to get you a head, when the truth is if everyone saying, that it certainly can all be true. So, be strategic and don’t feel like you have to be everywhere.
It’s something that we see brands do a lot and while it often doesn’t necessarily hurt to have platforms everywhere, it’s just a lot of time and often a lot of resources and a lot of money that you could be directing towards something that brings in way more value and get you in front of the right people.
C: Yes, absolutely, and something just to tie on to that as well. If you do decide that Instagram or YouTube or LinkedIn, is going to be the place where you’re going to reach your customers stick to it, don’t just… It works, the strategy for two weeks or a month or even three months. Stick to it and pay attention to the data.
A: And hear people out, always trying to make sure that a lot of our e-commerce clients, and a lot of our B2C brands, we always make sure that, say if they are running a Facebook, is it integrated with marketplace is an integrative with shop.
If they’re running ads, are they doing it in a smart way? Are they constantly responding to messages from a customer support perspective? If folks have questions about a product or they need to return something, is that omni-channel operation set up correctly? Because if you’re going to be investing in something, social media marketing is just a great example because there’s so many things you can do, is it now if you go at any… So, if you are an ecommerce brand and you’re going to be investing in something like Instagram or Facebook, just to make sure you are truly doing it right, you’re listening to customers, you are constantly running searches for your brand name, and any sort of sentiment, run sentiment analysis, use listening tools just pick your avenues and make sure that you have made them as robust and sustainable as possible.
C: Great, great well… Abby, I am just blown away by the answers that you gave. Thank you for being so transparent about what your team is doing for clients as well as what clients should be doing for themselves with their own in-house marketing teams.
Is there anything that I should have asked but I didn’t?
A: No, this is perfect. I think it’s all really comprehensive grouping of questions, and it’s made me think so much about our business in a way that’s really cool. It’s been really fun to step back and think through how we do things here. So thank you so much for having me. This has been really great.
C: Wonderful, well we really appreciate you coming on the show, as a guest, and I will be sure to add the link to Salted Stone to the description as well, so listeners, if you want to go check out Salted Stone, I do urge you to. They are a great, great agency and as you know they take care of their clients.
Thank you again to Abby for joining the show from Salted Stone. We talked about a lot of really important topics for your healthcare practice, and your marketing team to follow. Really it is all about creating an authentic presence and tailoring your Marketing Strategies, directly towards the consumer and directly towards your ideal target market persona.
One of the things I loved, is tracking the correct KPI’s – What is that customer lifetime value? This is something in your tracking software, you’ll be able to pull that.
Just take even the number of clients that come in over the course of a year, and divide that by your profit or your revenue for the year, then take a look at all of your marketing expenses. This is just such a simple way to find that ratio between the customer lifetime value and the acquisition cost.
Go out there, make sure you’re focusing on a strategy that makes sense for your unique clients, your unique target market, and don’t try to do everything. Focus on what’s going to really make a difference and have an impact for your business.
So, thank you again to Abby and I will see next time on the Social Speak Podcast.
https://socialspeaknetwork.com/wp-content/uploads/2019/03/Copy-of-Social-Speak-Podcast.png312820Caitlin McDonaldhttps://socialspeaknetwork.com/wp-content/uploads/2018/04/SocialSpeak-Logo.pngCaitlin McDonald2019-03-06 12:15:132019-03-04 21:17:09Inbound Marketing in 2019 - Interview with Abby Thompson Marketing Director at Salted Stone
With all the tools out there it can be difficult to know which content marketing strategy tool you and your marketing team should be utilizing to make sure everybody is moving in the same direction.
In this blog we take a look at the most prominent content marketing calendar apps that are available for many different sized businesses. For small businesses, including those with just one marketing manager, you can get away with organizing your ideas in a Word document or a Google sheet.
However, once you have multiple people working towards that same goal of making sure your business is found and sharing the correct message in your marketing strategy, it is important to consider upgrading to a scheduling and management interface that allows everybody to clearly see where their piece of the pie fits in with the larger content strategy.
To keep you from signing up for each of these tools, I’ve taken a look at:
What type of organization it is best for
The main features
How you can implement it easily into your team
The price point.
Many of the applications discussed including Monday.com, HubSpot, CoSchedule, and MeetEdgar have a variety of price points. Again, in our experience, if it is just you, typically you can get away with organizing your ideas on a spreadsheet.
So, let’s dive into there popular content management platforms.
CoSchedule Technology for Digital Marketing Management
The first application that we are going to discuss is CoSchedule. CoSchedule creates One calendar that allows everybody to be on the same page, it allows everybody to communicate in one place.
Additionally, with the more advanced plans of CoSchedule, you can organize everything from event planning through to email marketing, social media, and blogging. CoSchedule is incredible tool for large teams and complex marketing organization. One of my favorite aspects of CoSchedule is the ability to create ongoing follow-up social media links to blog posts in one or two clicks.
CoSchedule for Solopreneurs
For solopreneurs, CoSchedule is a little More expensive than other options. Solo plans do start at $0 to $20 per month, with most individuals looking at the $40 per month option – typically a spreadsheet along with one of the less expensive tools will do the trick.
Where CoSchedule really shines is with in-house marketing teams looking to manage full-scale campaigns.
The professional plan starts at $400 per month, and allows workflows approval flows multiple calendars and comes with a dedicated account manager. From a project management standpoint, this plan reduces the need for multiple individuals providing guidance on any given combination of marketing strategies.
HubSpot for Content Marketing Management
Many of us are very familiar with HubSpot. HubSpot has a combination of three tools and complete inbound marketing management resources. HubSpot places the emphasis on collecting inbound leads from your social media and digital marketing content. Though there are numerous tools that you can use to create the same systems and processes, HubSpot’s value proposition is that everything is in one place.
HubSpot for Larger Teams
Our favorite plan within HubSpot, is again there professional plan. Though the Enterprise option has much more advanced settings such as predictive lead scoring, it is a much higher investment. With the professional plan at $800/month, you have access to SEO and content strategy, social media, calls to action and landing pages.
Additionally, there is a/b testing marketing automation, smart content, and the ability to add teams.
The workflows are easy to set up, and create very systematized automation within your marketing and strategy. This tool, HubSpot, is a great option for businesses that have a marketing team, and want to make sure that every aspect of their marketing is working together. Again, HubSpot places inbound leads at the forefront of all of their software.
Next up, is Monday.com.
Monday.com to Organize your Content
Monday allows you to customize your workflow and dealt out strategies to multiple different teams. Monday is a great project management tool, however we found it a little difficult to manage a Content strategy and editorial calendar. The use of Gandt charts seems like a great idea, but it made projects difficult to understand exactly what steps needed to be completed and if we were on track. Many of our processes tend to be one or two steps, so again it seemed like a little too much for social media management.
Monday for Project Management
With plans starting at $25 per month, and unlimited boards, Monday is a great opportunity to integrate into your workflow if you need to do more project management rather than content creation and syndication. Because there is no central calendar, it can be difficult at times to see how each of the boards really work together.
Another positive for Monday, is the time tracking capabilities, so each member of your team can have a clear understanding of the time spent on each task. This allows you to easily understand if some aspect of marketing is taking much longer than others.
Additionally, Monday.com could be used for larger marketing promotions, however, most businesses need a tool that also works for day-to-day management.
The next tool we will take a look at is Edgar.
Edgar for Content Marketing Organization
Edgar is a great option for businesses looking for a simple tool to manage their social media posting. Typically, we recommend you create a database of content. The content strategy video below, provides tips for places we recommend Gathering content ideas. Once you have all of the content, click go and Edgar will talk into action.
MeetEdgar for Small Business Social Media Management
We recommend small businesses and solopreneurs look at Edgar as an option for their social media management. One issue with this, is that it does not allow you to clearly see the complete marketing strategy picture.
Each aspect of your digital marketing content calendar and content strategy still exists in its own space. Meet Edgar is a great tool for teams to use that do not have very complex marketing promotions in place. If you are one person team it can be an excellent resource for you.
Because I mentioned meet Edgar, I also should mention that for social media management, we utilize at such as Tailwind, Later App, Buffer, and HootSuite. I won’t go into it because he’s here, because they are more for just social media management.
Our blog on Social Media Content Strategy shares additional information regarding how to use each of these tools and where they fit into your social media marketing management strategy.
Create Clear Goals for What you want to accomplish with a content marketing technology
Before settling on a tool and diving into figuring out the setup and on-boarding your team, make sure you are clear about the goals you hope to achieve through using the software. Remember, choosing a tool to help keep track of marketing campaigns and content creation still requires that you understand what topics you plan to discuss and having your team actually write the content.
We have other blogs and videos that cover how to identify key topics to include in your content marketing editorial calendar, as well as a structure to follow for creating your editorial calendar. We often recommend starting with a word doc or spreadsheet rather than immediately hoping into the software you choose. Again, this helps to make sure your team is all on the same page as you move forward with your inbound marketing strategy.
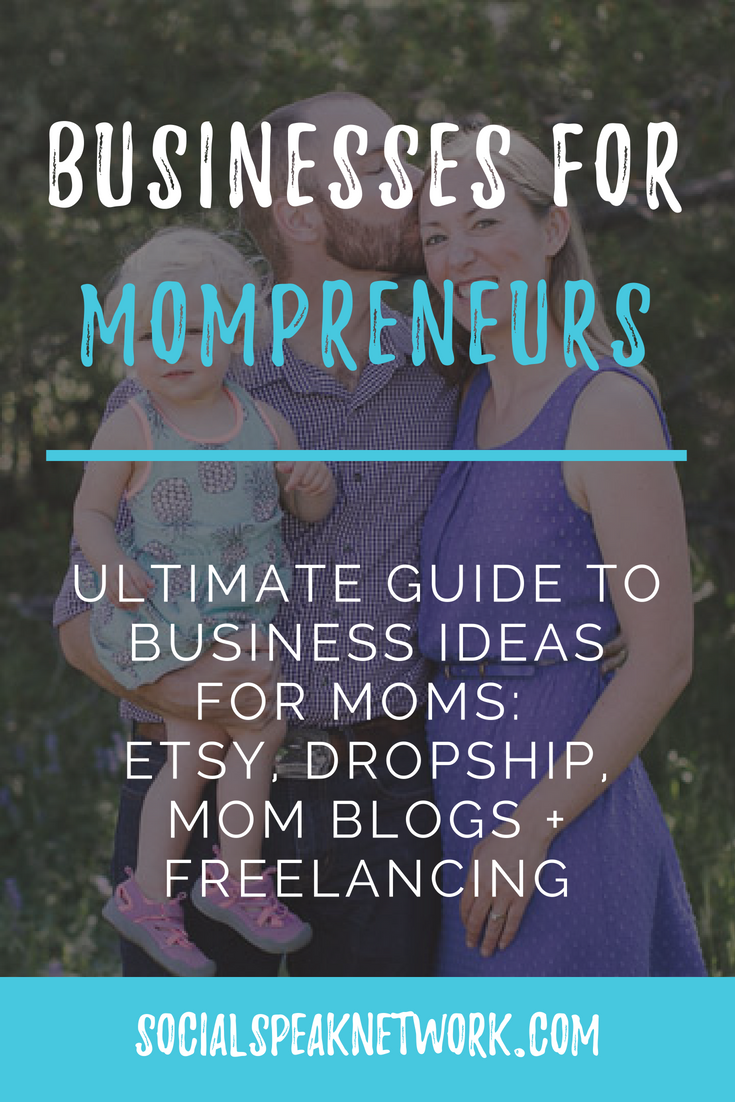
How many blog posts have you read about businesses for moms or stay at home businesses for moms? They all include great lists of businesses you could consider, but let’s be honest, they don’t really share the steps to get started and thrive.
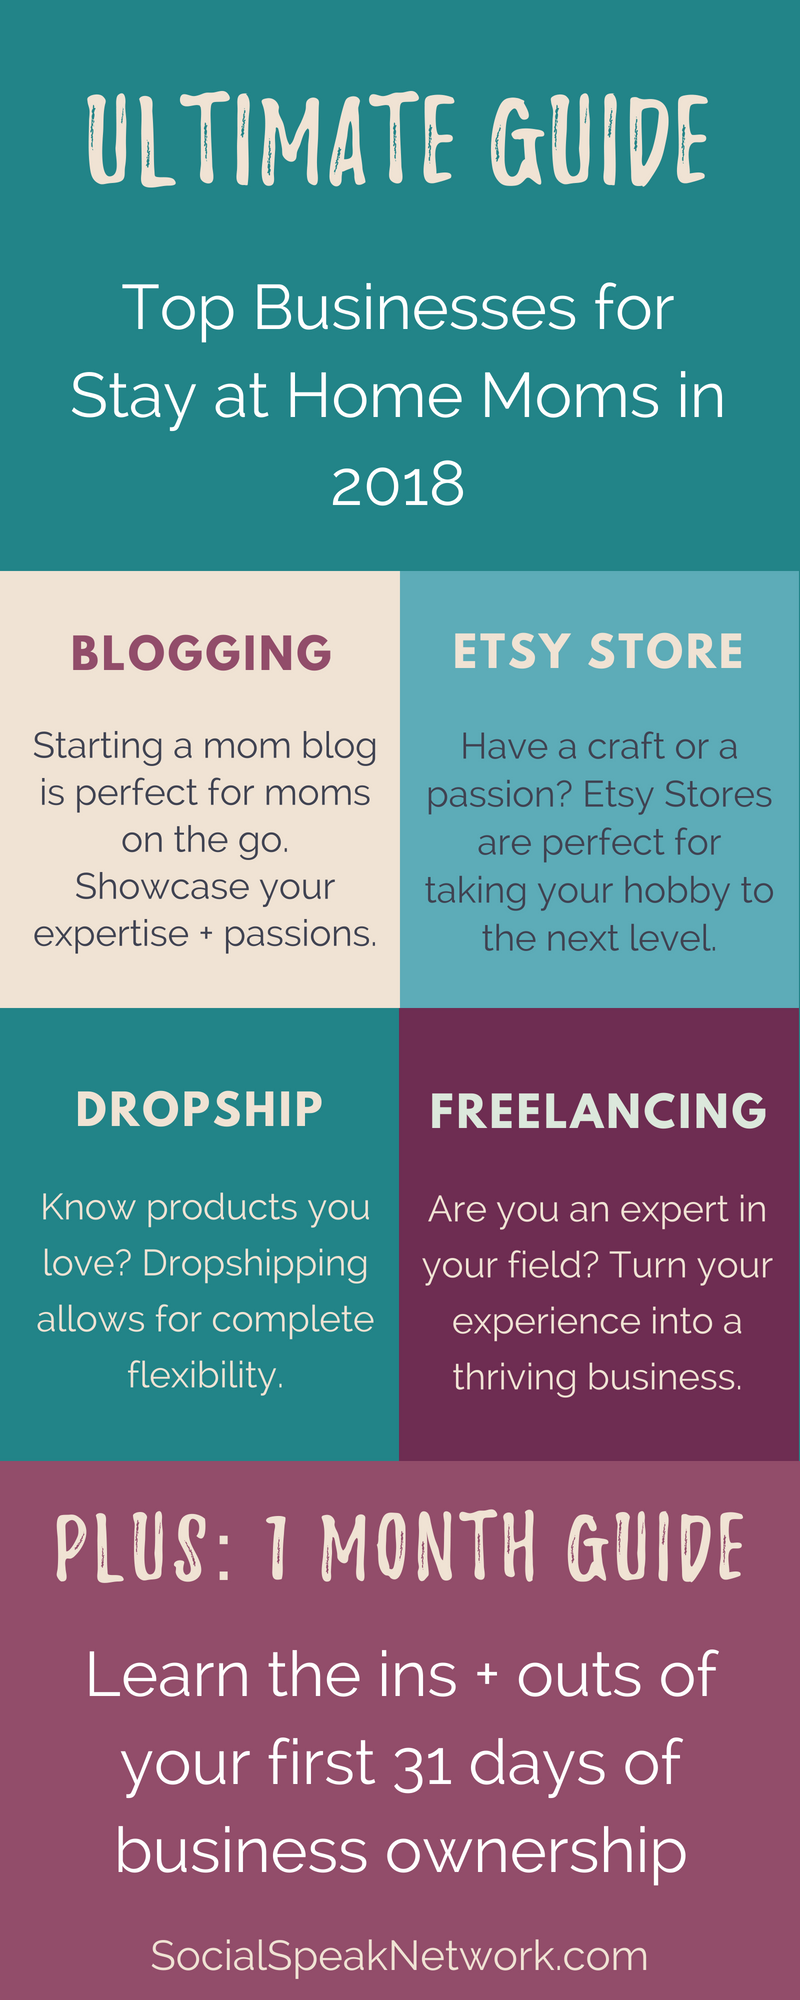
In this blog, I’m specifically looking at a handful of businesses that you can start today as a mom. These businesses include:
My goal isn’t to list off all the businesses you could start as a mom, but to give you the actional advice in this ultimate guide that you can follow to get your business off the ground and running.
Now before I dive in, any business you start should be driven by your passions, expertise, and values.
Why? as a mom, and more specifically, as a mompreneur, you will always face competing priorities. From swim lessons to soccer, homework, meal planning, even corporate jobs, starting a side hustle with the goal to grow it into a thriving business takes time, commitment, and a lot of energy.
Your success will come from wanting to work on your business after a long day or before the day has begun.
Your success will come from knowing your industry or craft like the back of your hand and utilizing tools to help manage those other business processes and technologies.
The mom businesses described below are not hypotheticals. I personally have spent years researching the most effective and efficient ways to start each of these businesses (in addition to an MBA) and have started a mom blog, etsy store, dropship store, and added to my freelancing business all since growing our family.
The guide to mom businesses below covers the exact tips and steps that I recommend to get you off the ground and running towards freedom and flexibility as a mom.
Whether your goal is to build a creative outlet or start the foundation for a business empire, I am so excited to learn about you and your vision. As a mompreneur, you are allowing yourself to create exactly the type of business that fits your needs, interests, and goals.
Take a moment to consider your dreams.
Are you yearning for a creative outlet beyond children’s crafts?
Would you love the flexibility to make your own schedule?
Do you hope to contribute financially to your household?
Can you not go another day without adult interaction?
Are you trying to be the best positive role model for your children?
Moms start on their journey to becoming a mompreneur for a lot of different reasons. I’m here to help provide you with the actionable steps you need to turn your interests into a successful business that can help you fulfill your dreams. From bloggers to Etsy store owners, Amazon dropshippers, freelancers, and more, I’ve worked with individuals who seek to contribute and leave their mark on the world just like you.
With a background in digital marketing (yes, I’ve owned my agency for nearly a decade), my advice focuses on the online aspects of creating, growing, and sustaining your business. My resources aim to help you start strong, scale fast, and sell more while you use your own strengths to create the business of your dreams.
What does it mean to be a Mom Blogger?
Mom bloggers, or really all bloggers, produce content that is published on a website.
Mom Blogging often has the connotation that you need to be writing about parenting tips, home improvement, or recipes, but trust me, there are a LOT more mom blogs out there than just these topics.
Start thinking about your PASSIONS and INTERESTS.
Could you create high quality content every single week or multiple times per week on this topic? Is it something you would grow bored with after a year, or does this interest transcend into all aspects of your life?
To be a Mom Blogger, you need to be diligent about creating high quality content (between 2,000-5,000 words) each week and then sharing this information to gain readers and followers of your blog.
Bloggers typically make money through affiliate commissions, advertisers on their site, and digital products. You also may have the perk of freebies from other folks within your industry.
Is Blogging for You?
Blogging isn’t for everyone. To start a blog and see results fairly quickly you will need to spend about 4 hours per day growing your digital network, creating content, putting together your systems, building an email list and sharing the information you create.
To run a successful blog you can’t sit in a bubble and you should try to view your blog as a way to connect and communicate with others who share your interests.
When you have your systems in place and traffic is coming to your website, you will typically find that running your blog only takes 2 hours per day. From here, your income potential can really skyrocket.
Income Potential
There are many mom bloggers who make $20,000+ each month, but far more who only make a couple hundred dollars per year.
It’s not that these bloggers aren’t working hard, they may be focusing their attention on the wrong avenues or may not be giving their blog the chance to really thrive.
What if you don’t like to write?
That is okay! I’ve worked with a lot of bloggers who start first with video or audio and turn transcripts from these into content for their website.
Starting with video or audio allows you the chance to showcase your expertise and your personality. What better way to grow a blog than have this multimedia on your website.
What to do next as a mom blogger
Brainstorm a list of your interests or passions. Narrow this down to the idea that you would want to write about for years into the future.
Who else is writing about this topic? What are they doing well? What would you improve?
Is there one person in particular who you would like to write for? Who will make up your tribe? Be specific! If you know someone who would be interested in your blog, write down their name.
What are your top 5 values? How can you incorporate these into your Blog’s Brand? What are your brand colors and is there any emotion or feeling you want your blog to elicit?
Create a list of all of the topics you can think of that relate to your blog idea. Think about topics that you can tell stories about from personal experience, topics people likely are going to be searching for on Google, and topics that appear to be getting a lot of traction from blogs on the same or similar topics.
Which other bloggers can you partner with?
Jump into Technology! In order to run a blog, you will need a website and an email account. I won’t go into detail here, but I do have a blog post on this at SocialSpeakNetwork.com.
To jump start your blog, I recommend committing to write a blog every other day for a month. Why? This creates a database of content for your blog that you can then link to and share online.
After the first month, you can slow down to 1 blog per week. Just remember, each blog should be high quality (and at least 1,500 words long).
At the same time you are working on this first set of articles, start reaching out to people you know to see if they would be interested in joining your email list. As a blogger (or any digital business) your Email List is the most important asset to your business.
Wrap up to Blogging as a Stay At Home Mom
Being a Mom Blogger can be incredible rewarding if you are willing to put in the time and energy. The first thing we think of when we hear bloggers is a website with articles on it, but in reality it is about building a community around your passion or interest.
Even if your goal is not to make money from your blog, being a Mom Blogger can be a rewarding creative outlet that connects you with others who share your passions and interest. Could there be anything better?
Starting an ETSY Store for Moms
The next topic for mompreneurs is Etsy! I love Etsy both as a seller and as a consumer.
Etsy is a great avenue for converting your hobbies into a business through selling crafts and designs. Just as with any sales channel, you need to think about whom you are selling to and how you can best position your products to sell to them.
Broadly, Etsy is a platform for crafts (wo)men to sell their handmade goods online. Products include everything from greeting cards to knitted hats, digital downloads, screen printed t-shirts, and antique gifts.
I like Etsy as a mompreneur because it is already a portal that your tribe is using to find unique and handmade products.
You don’t need to build a complete ecommerce website and find ways to get traffic to the site, instead you just need to have your products to sell and optimize your titles and descriptions to gain traction.
Is running an Etsy Shop for you?
In order to run an Etsy store, you need to be able to make something handmade or have a collection of goods that others may want to purchase. If you don’t have a craft/hobby (paper crafts, sewing, graphic design, woodworking, etc) or if you don’t have a collection of goods (teacups, antique bread boxes, etc), Etsy may not be for you. Now there is some wiggle room if you don’t necessarily have something handmade to sell, which I’ll describe below.
If you do have a product(s) already, they running an Etsy shop may be a perfect fit. The marketplace is already built, making your shop easy to get up and running, but the most popular stores have at least 15 different products to sell right off the bat.
You’ll need to make sure you have enough of whatever you want to sell in many different designs and variations in order to build your store quickly.
The workaround to Handmade Goods
Okay, so you might be interested in selling on Etsy, but you don’t really have a craft that you could turn into a viable business. This is where you can have a little fun. Let’s say you are a graphic designer or have some Photoshop experience.
You can create designs and then place this design on t-shirts, mugs, dog bowls, bags, etc, using a print on demand service to actually create the products.
This is how I manage my Etsy Store for Yip Yap Woof.
In fact, I have it set up so beside creating the designs and product descriptions, I don’t touch anything when an order comes in.
My silk-screener gets notified of the order automatically and creates my products to be sent out with my branding to customers.
You can set up similar systems for your Etsy shop, too, by using services like Printful* to create the products.
How to get started with Etsy as a Mom
The next steps for Etsy are fairly straight forward and you can get up and running within a few hours! Of course in order to run an Etsy shop that is sustainable you should create an audience and build your email list, just as with blogging, but the first steps are straight forward.
Just as with creating a mom blog, think first about your target market and brand before you set up your Etsy shop. Who will be your core customers? Who else is selling similar products?
Next you can create your Etsy account and start filling in basic information, hold off on uploading your products for the time being.
Creating your store is easiest if you compile all of your information before you get started. This includes:
Keywords to use in your product descriptions
Your product descriptions (make them fun and personal)
Prices and shipping costs (I often just do flat rate shipping or free shipping with the estimated shipping cost built into the product price)
Pictures (At least 3-5 for each product)
After you have your products created and updated, it’s time to build a community around them. Instagram can be a great place to create your community, showcase your products, and post beautiful images.
If you want to take your store to the next level, don’t hesitate to post the product information on Netxdoor App, Craigslist, and Ebay. Additionally, local fairs, markets, and festivals can help you gain local exposure.
Just as with any type of business, your email list can make the long term stability of your new business much more achievable. Start building your list from day 1!
What ideas do you have for your Etsy shop? Can you see yourself growing a community around your crafts and hobbies?
Next up we’ll be chatting about Dropshipping businesses, which are where you resell products from wholesale accounts, but never need to hold an inventory.
This is the second half of my Yip Yap Woof shop where I resell dog beds on Amazon and Ebay and my suppliers ship the orders directly to the customer for me.
Starting a Dropship Business as a Stay at Home Mom
Stay at home moms often don’t first think of dropshipping as a business solution when they are first getting started.
Why? Even though platforms exist to create your website and easily find products, it can be time consuming to figure out the ins and outs of deciding upon products, branding yourself, and growing your network.
As there Is quite a bit of competition in most industries for drop shipping, it can seem daunting to find a way to stand apart with a limited schedule.
So what can mompreneurs do to help decrease the amount of time needed to grow their online dropship store?
Just as with the other tips and techniques, I recommend first analyzing your passions and interests and formulating a game plan around what types of markets you should approach.
Below I talk about my experience of drop shipping as a mompreneur through first finding a pet product company I could stand behind.
I knew I wanted to help people find the top dog products for their pups, but didn’t exactly know where to get started. At first I listed and tried advertising every product under the sun, but soon found my margins (the amount I made) were WAY too low to:
Cover my advertising costs
Cover my time to actually place the order
Looking back at the drawing board, I realized there were products, specifically dog beds and extremely large dog crates with margins high enough to offer free or reduced shipping and cover extra fees like listing the product on Amazon, for example.
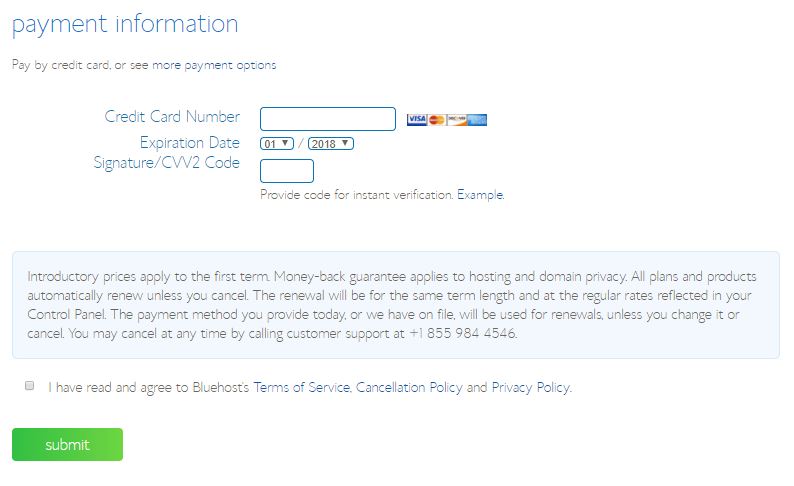
Here is my overview for sales through Amazon for a specific dog bed from 11/20-12/13
(Please note, I’m not trying to say that I’m the poster child for how well through this channel with sales, but it is just a REAL example of a fun side hustle that takes 10-15 minutes every few days)
After Amazon fee’s and the monthly subscription to Amazon, I netted $491.20. Now, this number does go down because I needed to buy the dog beds, ship them, and pay for the company’s dropship fee (their extra fee to pay for sending the package directly to my customer).
Let’s take a look.
Sell for $129, my Cost (including shipping and dropship fee) $83.50. Gross profit: $26.10
Sell for $109, my Cost (including shipping and dropship fee) $73.50. Gross Profit: $19.14
Total $83.55 in my pocket
This is just for one type of dog bed I sell on Amazon and you see how the profit diminishes drastically when all fees are taken into account.
But hey, that’s another $1,000 in my pocket every year for very limited work and not selling to my network. Imagine if you are listing more products, larger margin products, and products where you’ve already built an audience of interested individuals!
In addition to these beds, I do sell a few other high-end dog bed options, as well as some dog food and health and wellness items via Ebay. All of these are drop shipped, so I never need to worry about moving my own inventory.
I must warn you, however, I just needed to purchase my order from another supplier for a product that sold and my profit was a whopping $0.56! Ha. Talk about cutting it close!
In the following video I provide an overview of drop shipping for stay at home moms as an option to gain more flexibility and freedom.
Starting a freelance business as a mom may be one of the most rewarding ways to get back into the business world and feel connected to adults outside of your family.
Yes, you can forge similar relationships through reaching out to digital business partners, but become a freelancer opens so many more doors!
As a mompreneur you will often find yourself alone with your thoughts and second guessing your ability to run a successful endeavor. Being a freelancer, however, allows you to form lasting relationships with your clients.
Do I sound partial to starting a freelance business? Perhaps. But this stems from the joys I’ve found in connecting with my clients as I work with them.
Please note, I find the same to be true for coaches, counselors, service providers, etc, but if your business is 100% online, it can be difficult for a lot of women to forge the same type of relationship because often communication boils down to Facebook posts, commenting, and emailing.
Unless you are committed to thinking about digital networking the same as face to face or networking on the phone, it is difficult to create real relationships with people you’ve never actually spoken to.
With freelancing, you are given an opportunity to turn one-off projects into recurring revenue streams for your business.
AND, working with your clients month after month creates an avenue for you to grow your new relationships in the business world without having to give up time with your children and family.
You can take on as many new clients as you have the capacity for and scale up and down as needed.
Types of Freelance businesses for Mompreneurs
As you think of your passions and interests, think of how you may be able to help other people and businesses with completing tasks that relate to these interests. In the digital world, some common freelance gigs include:
Graphic design
Website management
Branding
Social Media
Email Marketing
Website Development
Copy Writing
Proofreading
Process Management
Etc
How can you structure your fees?
I recommend freelancers try to steer clear of hourly work, but often that’s what it comes down to. As a mom, however, trying to track your time doing freelance gigs while running to sports practices, cleaning dirty diapers, and figuring out preschool options can be quite the challenge.
Rather than setting an hourly price, do what you can to create monthly packages or retainers. In my marketing agency, we collect fees from:
Group Coaching (6 month small group coaching on social media and digital marketing)
Marketing Management (We become your outsourced marketing department with set tasks we agree to complete each month)
Hourly consulting (even I haven’t been able to get away from this after nearly a decade)
How to get started as a Freelancer
Starting your path towards being a successful freelancer can be fairly organic. Some freelancers wish to jump in head first into their new business while others are okay growing their client base at a pace that fits their lifestyle.
As you get started, think about:
How quickly you want to grow
The hours per week you wish to spend freelancing
Your availability for meetings, travel, networking, sales
Current commitments during the working day
Depending on how much time you have available to commit to your new freelancing clients, you may find that a slow growth fits your current commitments.
Knowing this can help you identify the steps you wish to take to get your new mom business up and running and to set your goals appropriately.
Steps to kick your freelancing business into high gear
Now that you know your availability, it’s time to get started! Just as with the other mom businesses you can start, it is paramount you first identify your ideal client.
Create your client avatar: what industry or business do you want to target, what are their fears, how many employees do they have, what revenue do they have, who makes the buying decision?
Build out your service offerings: within your target industry, what services can you offer, what will you charge?
Make a list of personal connections that fit your target market or may know someone who would benefit from your services: think about your connections from your pre-kid career, as well as, family, friends, neighbors, etc.
Think of complementary services that you could build into referral partners. For example, if you are a copy writer, partnering with website development agencies could lead to immediate work for your business.
Create a quick website describing who you are, your services, and providing a glimpse into your expertise.
Reach out to your connections and your potential referral partners to introduce them to your new business.
Join local networking groups to increase your exposure to local business owners.
Sign up for Thumbtack and Nextdoor to browse for folks looking for your services.
Now, you notice I mention only building a quick website at this stage. Contrary to popular belief, though some folks may look at your site, only a handful of referrals actually will.
Your first freelancing clients will most likely be people you know personally.
Additionally, as you talk with prospects and start selling your services you will find that your target market may respond more favorably to one way of describing your services or that the packages you should be offering are slightly different from your initial brainstorm.
You don’t want to spend months making the perfect site when in reality your messaging and offerings are completely off.
As I mentioned before, the best way to grow your new business as a mom is really to dive into something that you are passionate about, an expert in, and that aligns with your values. Without this, it is much more difficult to push through and really experience that freedom and flexibility through business ownership as a mom.
If you are interested in learning more about how your values can shape your business, please take a look at the following posts!
Starting a Dropship Business as a Mom [Transcript]
Today I am going to discuss with you about dropship businesses. What are drop ship businesses? How do they work? How can they fit into your lifestyle?
Basically, drop shipping is when you have an online storefront. When somebody places in order, you then turn to the wholesaler and they actually ship that order out for you. I run a business, Yip Yap Woof, and amongst other things, we sell dog products. One of our top selling products is a dog bed from a company out of Montana that uses organic cotton and it’s made in the USA.
It’s a great dog bed and we get a lot of sales through Amazon for this, as well as, through our website. So how drop shipping works in this case is somebody places an order through Amazon or through our website (or even through eBay). Now we don’t have an inventory, I don’t have a closet in my house just stocked up with dog beds, but I just quickly jump over to the wholesale website, place an order with my own credit card information, and then they charged me a small fee on top of the typical fee for shipping. Then the customer gets the dog bed. It’s packaged in the West Paw Design packaging and everything, but the package slip does have our information on it. I can offer more discounts and promotions for other products that I offer, as well. And so with each of these orders, yes, I’m not making the full $30 or $50 markup that I would have if I did hold my own inventory and do the shipping myself, however I still do get you know between $10 and $20 dollars per order. I can the either reinvest this back into the business or enjoy them a nice lunch out.
How to Start a Dropship Business
Starting a dropship business is actually pretty straightforward there are plenty of websites out there that have whole databases or products. Again, taking dog products, there’s a Pet Store USA and Wholesale Pet USA, as well as a bunch of other stores like this where there is a database of different dog products. It also lists whether or not the company dropships the product or if you just get the wholesale account.
Once you find the products that you’re looking for, you can then list them on Amazon, Ebay, or on your own website. If you’re listing these products on Amazon or Ebay, you will find that there are additional fees that you will incur. Amazon’s fees are actually quite a bit, so that $20 margin or markup that that I would get ends up going down to about five or ten dollars.
You have to pay attention to whether or not you’re actually going to be making money from the product or if it’s all just going away in these fees. It does definitely take some calculations. On Amazon, for example, I won’t sell a product that’s under $100, just because it’s not worth my time and energy to make fifty cents for an order that comes in.
I’d much rather see a thirty dollar kickback rather than just a couple of dollars here and there.
So, setting up that dropship store is quite simple once you have the product that you are going to be selling. You can set it up on Shopify, for example. Shopify is great because it syncs with a lot of these different dropship networks.
If you have an order placed on Shopify, they can actually make it so the order automatically flows through to the wholesale or drop shipping store. This way you don’t even have to touch the order.
You can also make a storefront on WordPress, for example, if you don’t want to have that monthly fee like Shopify. The benefit of Shopify is it’s really easy for you to manage taxes and things like that, but I actually just got rid of my Shopify store and I’m working to just building a more simple blog storefront with WordPress.
The reason is because most of my orders come in through eBay and Amazon rather than through my store itself. I think that that’s just a product of being a newer store, so I haven’t done a lot of work to build up my own audiences.
What I recommend doing is creating a blog for your business where you’re just working to send out valuable content and information. I found the blog to be a great way to gain exposure and also Instagram. Again, I’m just posting pictures of my dog and my daughter. We now have over 1,500 followers on Instagram and so that’s been a great way to get traffic to the Etsy store.
Building up an audience and an email list is should be your number one priority if you are running any type of e-commerce store.
Creating a Dropship Brand
Additionally, you should know who your brand is and you can think of it almost like a real retail store with a storefront. So think about, what’s your brand? What type of customers are you trying to attract? Then post things that these people are interested in and try and grow that network online. This way, when you have the products that you’re going to be selling, you can easily turn them on into it. They already know, like, and trust you.
These individuals have found value from following you, so you can start reaching out to the wholesale companies and organizations.
I always recommend not just listing any old product if you want to make your business more fulfilling. I recommend finding products you have tried and ones where you believe in the company brand of mission. As you’re getting started, try to create a selective group of products that you’ve tested yourself and that you know people are just going to absolutely love. Typically someone is actually searching for these products on Amazon or on eBay, so again, if you’re listed there, you have a better chance of being found.
This is just a quick introduction of what it means to dropship. Dropshipping is definitely very rewarding and easier to set up than businesses where you need to carry an inventory.
Top Three Tips to Starting a Freelancing Business as a Mom [Transcript]
Today we’re going to be talking about creating a freelance business from your passions and your expertise. Now creating a freelance business is a great way to add be creative, have adult interactions, and to find freedom and flexibility.
Until MK was able to walk, she actually came around to every single meeting with me. We were just coffee shop buddies and bounced around here and there. She’d be sleeping most of the time at meetings, but the flexibility that I had with my clients just to bring her along wherever I went was really quite incredible.
At the time, I was even the president of a local networking group and she came to many of the meetings with me. As long as I didn’t act as though I was distracted by her being there, other people followed suit. Owning a freelance business as a mom really is a great way to kind of have the best of both worlds.
MK recently turned 2 so we are finally looking at daycares and preschools that we can potentially have her attend towards the end of the summer. But, keeping her at home until she was 2 was a big goal for us. The flexibility of running a freelance business created the opportunity for this goal to come true.
Now, the BIMS Team is much more than a Freelance business. But freelancing really did create the foundation for all the work and services we provide today.
Different Types of Freelance Businesses for Moms
What types of freelance businesses are there and you can be a freelancer? There are many different types of Freelance businesses you can jump into including:
A graphic designer
A website developer
A freelance copywriter
A social media marketer
There are a lot of different freelancers out there and you might hear some freelancers referring to themselves more as consultants rather than just freelancers.
The big difference here in my mind is who’s doing the work.
Our team provides consulting for a lot of our clients where we are teaching them how to do the marketing themselves, but we have other clients where we are really taking on their voice and managing the marketing on their behalf.
It can be kind of a blurred line whether you call yourself a consultant or a freelancer. Either way, you can go into a lot of different industries.
How to decide on your Freelancing focus
As a mom, you probably have limited time between work (if you are starting freelancing as a side-hustle), children, family, and your own commitments. This makes it incredibly important to make sure you choose freelance projects that you already have the skills to complete.
Think about the areas of expertise or focus that you had in a previous career? Consider your own passions and interests. When you combine these two elements, it won’t even matter to clients that you don’t have a lot of experience working on your own and they will appreciate what your past experience can bring to the table.
If you are worried about lack of experience, that is fine, too. You can even be honest with your first few clients, but position this as a strength because you will be incredibly focused on their business and the work you can do for them.
As a new freelancer, how can you get new clients quickly?
There are a lot of different ways that you can go about getting clients when you are a freelancer. I have three favorite techniques.
Right when you get started, head on over to thumbtack.com. Thumbtack is like Craigslist for freelance jobs. Folks post there from different businesses that need help with X, Y, or Z. You can find local companies or ones that are in other parts of the US.
My husband recently started his own freelance business and I instructed him to go to thumbtack. Sure enough, he quickly was able to reply to a handful of folks requesting exactly his copywriting services. These were job proposals he was sending out the first day of running his own freelance business.
Now my husband had never actually run a copywriting business, and he was the director of software development at his last job, so nothing to do with copywriting, but he was an English major and enjoys writing. On the side he actually had been writing for years for some of our clients, but he never mentioned to his first clients that he was just kicking off his business. He knew he could fulfill his promises.
What about Upwork (formerly Odesk and Elance)
In the past we did utilize Elance for finding projects to bid on, but it is easy to get caught up in pricing and not being able to charge what you are worth.
If you do find yourself on these job sites, I found success submitting bids for Project Based freelancing work, such as creating a marketing plan or a LinkedIn Strategy, and then offering to implement the strategy. We actually are still working with a handful of these businesses 7 years later.
Again, make sure if you are submitting bids you aren’t selling yourself short. I remember one client I got right when I started my freelance business ended up being a $750/mo client, but at $20/hr, I was hardly living the dream.
It’s much easier to manage five freelance accounts with each of them paying $5,000 a month versus 50 accounts with $100 a month.
Attend Networking Events To Grow your Freelance Business and Refine your Messaging
The next place to look for clients is going to networking events to meet local business owners who can benefit from your freelancing services. The strategy typically has a slightly longer turnaround, but is very fruitful and something Amber and I both still do.
Beyond meeting new people and getting that adult interaction as a mompreneur, networking is wonderful because it allows you to refine your message.
When I first started my freelancing business, I thought that I was going to be doing mostly data analytics. In my mind, marketing decisions should be driven by data. I am a math nerd and data analytics geek and trust me, that doesn’t get many other people excited. Some of my favorite clients truly appreciate data, too, but a majority of our clients don’t care about the data behind the scenes.
As I was talking to folks in these networking events, I would just see their eyes glaze over. I realized that people understood they needed someone to help manage their marketing, but would be doing it themselves already if they cared about the solutions.
When you attend networking groups as a freelancer, you will be able to more quickly refine your messaging.
Now networking groups do require you go somewhere in person, so it may not be worthwhile to pay for a babysitter while you attend.
I’d look for groups that meet first thing in the morning (so your significant other can lend a hand before work) or ones that meet later in the day, again, so you can more easily find a helping hand.
These networking events also come in a lot of different forms.
One issue I see over and over is that new freelancers waste too much time attending groups that don’t actually lead to new clients. Don’t just go to the most popular Meetup group or group that meets over happy hour.
I’m an introvert, so I always found myself listening to conversations more than engaging with others in these more open events.
However, I came across BNI about 5 years ago and absolutely LOVE their meetings (and the clients/referrals that come from members).
I’ve since been the president and vice president of the chapter and as a member, you feel like you are actually creating relationships with the folks in your group, who then actually do go out and sell for you.
There are plenty of other more localized groups that follow the same structure as BNI, but BNI is an international organization, so most likely you have a chapter or two (or more) in your area to check out.
Be selective about the networking groups you choose to attend as a freelancing mom.
So, we’ve covered thumbtack, networking groups, and then the third way to grow your freelancing business is through referral partners.
How to use referral partners to get more freelance clients
As you’re going to the networking groups, you will be meeting new partners. You don’t want to just sell to the people in front of you, you want to gain access to their networks. This third piece is taking creating referral partners a step further.
First things first, jump over to LinkedIn and clean up your profile. Then, start researching other professionals and businesses that service your same target market and provide complementary services to your own freelance services.
I had my husband run through this when he was starting his business and within a month he had signed two $5,000 dollar contracts. One of them is still sending clients his way and then the other one actually now is my client and we have my husband do the blog writing.
It all comes down to figuring out who else is servicing your target market.
For my husband, a copywriter, I told him to email social media agencies like mine because I had been sending him business frequently. We also decided on website developers. Now he ended up just emailing the website developers because of the technical side of his background.
After proving himself in an initial blog or writing sample, some of these initial contacts send him any new website build that needs content created.
By creating these relationships with referral partners even if there’s a little bit of overlap in services, there can be short term success landing new freelance clients and provide long-term growth of your freelancing business.
The best thing about tailored and individual email outreach like this is that it takes a whole lot less time than attending 50 networking groups every single week. [Insider Tip: You can also write the emails after your kids go to be and schedule them to send the next morning with the Boomerang App for Gmail).
As long as you’re clear about the expectations with your new referral partners, you shouldn’t have any trouble really diving into those relationships.
So there you have it! The three steps to getting clients as you are starting your freelance business: Use Thumbtack, Join Local Networking Groups, Cold Email Referral Partners
First, immediately respond to those freelance proposal requests on thumbtack or create your profile on Upwork and see what projects are out there.
Secondly, join a local networking group and get to know the business professionals in your area. Again, I recommend finding a group that has structure and that actually shows that it’s passing leads and referrals with each other. I like the structure because I’m an introvert, but you might really thrive if you’re an extrovert with less structure. Still don’t join a group if they aren’t accountable for passing leads.
We see a lot of leads being passed within our group, as do other BNI groups, just as an example.
Lastly, the next item is figuring out who your referral partners could be and reaching out to them.
Now if you notice I’m not focusing on building your website or anything like that.
As you are working through these three steps to starting your freelancing business, you will be learning a lot about the language people are using to describe your specific services.
Just have a home page or landing page to start and then build up more from there.
See how many freelancing clients you can get through the three ways described above and you will be well on your way to a successful freelancing business!
My best advice is to start a business now and give freelancing a shot. Freelancing is incredibly fruitful and it allows for that creative outlet, adult interactions, and again that freedom and flexibility that we all crave as moms.
Thank you so much for tuning in.
Again I’m Caitlin with the Social Speak Network.
Please feel free to subscribe to our channel and head on over to our website. We have a lot of great blogs, videos, and different resources that can help you on your journey to becoming a freelancer.
Interested in learning more? Take a look at these articles:
https://socialspeaknetwork.com/wp-content/uploads/2018/05/Ultimate-guide-for-businesses-for-moms.png7201280Caitlin McDonaldhttps://socialspeaknetwork.com/wp-content/uploads/2018/04/SocialSpeak-Logo.pngCaitlin McDonald2018-05-15 20:58:152018-07-22 21:33:58Mom Business Ideas for 2018 [Ultimate Guide Plus Action Steps for Mompreneurs]
In 2018 there are hundreds of different hosts you can turn to for your wordpress website. Some are more difficult to create than others, but we’ve decided after working with many of these hosting companies that Bluehost is the solution you should consider for your small business website in 2018.
This post covers the steps to easily set up your website and hosting on Bluehost.
What is hosting and why does hosting matter?
You can think of hosting as the house for your website files. It is what ensures your site is seen by visitors. Choosing your hosting company wisely can reduce potential headaches as some hosting companies provide more:
Customer Service
Easy to adjust memory limits
Backups
Minimal downtime.
After years of working with many different website hosts, we have experienced the best service with Bluehost for small business websites.
Why Bluehost for your WordPress Website?
Bluehost makes each step in your website journey easy. Without hidden fees, you know exactly what to budget and the support is incredible both with chat and phone service. Some additional features we love about Bluehost include:
Free SSL Certificate for the main domain in the account
Free email that you can set up with a variety of services (or just link it to your gmail account with Imap or POP3).
One click install of WordPress files
Easy to schedule backups
FTP access (which GoDaddy WordPress hosting, for example, does not allow)
Only costs $3.95 per month when you sign up for a 36 month hosting plan.
Setting up your Hosting account on Bluehost for WordPress is simple. In fact, you can get everything all set up 5 minutes for only $3.95 per month!
How to set up your Bluehost Hosting Account for Only $3.95 per month
Click the Green Button that says “get started now” at Bluehost.com.
You will be redirected to a page where you can select your hosting level. For most small businesses, the Basic Level at $3.95/mo will work to fit all of your needs.
I selected the Basic option.
Step 2: Choose your Free Domain
I love how Bluehost allows you to select your free dom
ain, use an existing domain, or even, choose to select a domain in the future. For many hosting companies, you need to select a new domain immediately or else you lose the credit, but with Bluehost, they understand that you may not have found the perfect domain yet.
If you have already purchased a domain at Network Solutions or GoDaddy, for example, you can tryp your domain name into the “i have a domain name field” and Bluehost will set you up with a temporary domain as your build your website until the domain name has been transferred.
Again, this is super user friendly for website redesigns and if you are just getting started. PLUS, there is no additional fee from Bluehost to transfer a domain into the account.
One downside of using Bluehost to find your domain is that it doesn’t offer selections for similar domains from this page like GoDaddy does with it’s domain selection service. I would recommend checking that your desired domain is available on GoDaddy before trying to purchase it on Bluehost.
Step 3: Purchase your hosting
The first part here is to enter your contact and business details on Bluehost
This includes adding your name, email, business name, address, and phone number into the fields listed.
When you enter your contact information, you can also use Google Single Sign-On if you prefer.
The second part of purchasing your hosting from Bluehost is to review your purchase information
In this part of the page your can select or deselect different add-ons. I honestly unselect all of these except the Domain Privacy Protection. This selection hides your personal/business details from being available online. Especially if your business is located at a home office, this is important to protect your privacy.
As for SiteLock security in your BlueHost account, I’ve found that if you keep your website files up to date, you don’t really need this. Should you get malware installed on your website, go ahead and add it later. If you are worried about site security and not knowing what to do if malware does appear on the site, please keep SiteLock checked.
The same is true for Codeguard.
Lastly, you will enter in your credit card details
Now click “submit” – pretty straightforward, right?
Now, here is actually a tip. You can get hosting on Bluehost for your WordPress website for as low as $2.65/mo!
What!!?!? That’s less than $100 for three years of hosting!
Now this doesn’t always work, but if you keep the window open without clicking submit for your credit card information, a new popup will appear with your exclusive discount offer.
Sometimes you don’t need to even enter in any details and the popup will appear with the Bluehost offer for hosting for $2.65/mo.
Again, the trick is to be patient! Don’t click submit right away 🙂
Step 4: Installing WordPress
Guess what, the first prompt you see when you purchase the wordpress hosting is to Install WordPress!
Before you get to building your website, be sure to have a clear understanding of your brand, values, and unique selling proposition (what sets you apart from your competition). To help with this process, we’ve created the Your Business Your Brand Workbook that guides you through your target market, finding brand fonts, colors, and writing the content for your product and services pages. It is the go-to guide for getting your business off the ground.
https://socialspeaknetwork.com/wp-content/uploads/2018/04/Bluehost-how-to-set-up-hosting-home-page.jpg6061003Caitlin McDonaldhttps://socialspeaknetwork.com/wp-content/uploads/2018/04/SocialSpeak-Logo.pngCaitlin McDonald2018-04-12 21:47:122018-07-22 22:34:40How to Set up your Wordpress Website on Bluehost [Ultimate Guide for 2018]
This video goes through how to update your PHP settings if you are experiencing problems on your WordPress website.
Recently WordPress made a TON of changes due to security threats and outdated code, which in return caused theme developers to update their code. These updates caused a few issues and this video addresses one of them: old PHP versions aren’t compatible anymore with the new code.
In this video, you will see where in GoDaddy to update the PHP Version (for CPanel accounts). BUT, I go a step further and walk through how to update your PHP settings after you upgrade your PHP version.
This is helpful information if you:
Aren’t able to upload images, PDFs, or files to your WordPress Website
Are experiencing time-out issues
Are receiving notifications about your Memory Limits being reached.
If you’ve read help documents that say to adjust your php.ini files or .htaccess file to increase the file-upload-size or memory-limit.
Before you make any changes to your PHP version or settings (or before you update your wordpress/theme files) please make sure to do a backup of your site and database.
We recently created a few new WordPress websites and saw over and over that either our theme files were too big to be uploaded or the media library would display a HTTP error when we tried to upload images. It turned out that these new WordPress installs had maximum file upload settings set to 2M compared to our preference of 256M.
So what do you do?
Oftentimes articles regarding not being able to load a file or image to WordPress just straight into logging into FTP and updating the php.ini file or .htaccess file. You may see something for example like:
Try increasing the following values in php.ini, for example:
But often this doesn’t seem to do anything. Or you try adding the additional code to your .htaccess file and your site breaks. There is an easier way!
Step 1:
When you log into your hosting account on GoDaddy, proceed to the CPanel.
Step 2:
Then scroll down to the Software section and click Select PHP version.
Step 3:
This will open a new window displaying your current PHP version (heads up, if you are experiencing theme errors after a recent WordPress and Theme update, check out the PHP settings and upgrade to 7.1+. Often old PHP versions are not compatible).
Step 4:
On the right side of the screen, you will see a link that says “Switch to PHP Options”
Step 5:
From here you can adjust the:
max_execution_time
memory_limit
post_max_size
upload_max_filesize
Click Save and TADA!
No need to log in through FTP and figure out where the php.ini or .htaccess files are. If you still are unable to upload media to your media library, there may be an issue with file permissions. Or you may want to reinstall the WordPress and Theme files just to make sure they are loaded properly.
Interested in learning more? Take a look at these articles:
https://socialspeaknetwork.com/wp-content/uploads/2018/04/PHP-Settings-for-GoDaddy-Wordpress.png7201280Caitlin McDonaldhttps://socialspeaknetwork.com/wp-content/uploads/2018/04/SocialSpeak-Logo.pngCaitlin McDonald2018-04-06 18:09:382018-07-22 22:54:48Increase the Max File Upload for your Wordpress Website Hosted on GoDaddy
Social media presents a unique opportunity for anyone to develop a personal or business reputation to build their careers, boost sales and increase relationships. The key is to leverage the tools of the Social Media to effectively build your online reputation. You need to understand what your goals and intentions are in order to be successful.
Here are 10 ways you can be successful in this journey, so you can achieve your short and long term goals rather than waste time:
1. Be aware.Continually listen to conversations happening across the Web related to your career or business and learn from the content you read, listen to, or view online. Social media success depends as much on listening as it does on publishing.
2. Be focused.Define your niche and focus the majority of your social media participation on conversations and content related to that area of focus. A focused brand is more powerful than a broad brand. Always lead with your strengths on the social media and be consistent in your content and conversations in order to successfully build your online reputation.
3. Be authentic.Your social media participation is useless if your content and conversations read like corporate rhetoric or a promotional brochure. Instead, be real and be human. Imagine you’re speaking with your audience in person rather than online and adjust your content and tone to match your target audience’s needs and expectations for you based on your brand promise. This is where videos can be a great tool for people to really know who you are.
4. Be trustworthy.Honesty is an essential part of building your online reputation using the tools of the social media. Transparency isn’t just a buzz word, it’s a strategic imperative, which should apply to your social media participation as well as all other aspects of your career or business.
5. Be meaningful.The content you publish on social media must be useful and meaningful to your target audience or there is no reason for them to read it or start a dialogue with you about it. Furthermore, if your content doesn’t add value to your audience’s lives, they won’t talk about it and share it with their own audiences.
6. Be “non-self-promotional.”No one will want to read your content or interact with you on the social media if your content and conversations read like a marketing pitch. Follow the 90-10 rule of marketing and spend 90% or more of your time in social media activities that are not self-promotional and only 10% or less on activities that are self-promotional. When you do want to directly try to get more exposure to build your online reputation, you can do so without annoying other people.
7. Be accessible and responsive.An important part of building your online reputation via social media participation is understanding that it’s not all about you. Instead, you need to spend a great deal of time acknowledging other people on the social media in order to build a relationship with them. In other words, they need to understand that you care about them, too. You need to respond to questions, comments on your blog, tweets, and so on.
8. Be reciprocating.You can’t expect people to reach out to you and share your content on the social media and not return the favor. If someone engages with you on your blog, Twitter, Facebook or another social media destination, then you can’t ignore that person — just as you wouldn’t ignore someone in a face-to-face situation. For example, you also need to leave comments on other people’s blogs, share their content on Twitter and Facebook, and more. You can’t operate in a silo on the social media and expect to be successful.
9. Be uncontrolling.The thought of giving up control and letting your content, conversations and name spread across the Web can be frightening. However, without the sharing of content and interactive dialogue that happens on social media, your online reputation cannot develop. You have to be willing to give up control and let people share and talk about you and your content in order for your online reputation to grow. Don’t worry about negative buzz about you, your brand, or your business. There is always a way to react to negativity on the social media.
10. Be involved.Don’t spend all of your time in one place. While quality is more important than quantity when it comes to building an authentic reputation online, you do need to spread your wings and be social. Focus on other avenues such as a blog, YouTube, Google Buzz, Backlinks, and much more. You need to use all aspects of Internet Marketing in order to see return.
One of the most important parts of being active in the social media world is taking responsibility for your Facebook, Twitter, and any other internet marketing outlets you have. When we put our posts out and we like other peoples posts that is a good start to taking responsibility. When we send out Newsletters or email marketing campaigns we want other people to read them right?
Well it is a two sided road; I mean we all have to put in our efforts to read other peoples stuff as well. My tip for that is picking your inner circle of people and people you have made a power partner and start by reading their newsletters and/or emails. The same thing goes with our social media posts. We want people reading our post, tweets, events, questions etc. also emailing us wanting to work with us or learn more about what we do. We have to do that with others. The one thing I always say about social media is it brings people, communities, and companies together all over the world.
So how do we do that? It is easy . . . we put together a weekly schedule and then we implement it into our routine just like checking emails, and making calls.
Monday- Using www.Hootsuite.com schedule your posts to go out onto your Facebook personal page, Facebook business page, Twitter, LinkedIn, Foursquare, and Ping.fm. Using my post before this one to help first create your strategy so you know what you need to post on your social media profiles and when. (Schedule an hour and a half to start)
Tuesday- Login to Facebook and add 10 people into your business list, research these people. Find people that have common interest or maybe looking for your services and put them into the business list you created. Then get onto Twitter or Twellow and search for your Keywords or location. You can search for people using keywords or type in keywords people would use to find YOU and add 50 people. (Schedule about 45 min to start, once you get the hang of it you can probably get it done in 30 min)
Wednesday– Spend some time on LinkedIn checking emails and finding people you may know and ask them to connect with you. (Schedule 45 min)
Thursday- Login to Facebook and add 10 people into your business list, research these people. Find people that have common interest or maybe looking for your services and put them into the business list you created. Then get onto Twitter or Twellow and search for your Keywords or location. You can search for people using keywords or type in keywords people would use to find YOU and add 50 people. (Schedule about 45 min to start, once you get the hang of it you can probably get it done in 30 min)
Friday – Repeat what you have done Monday, Tuesday, and Wednesday. We are going to add another step into today, Once you are done adding people on Facebook and Twitter you want to go back to Facebook and go to your page, under your logo you will find a tab that says “Suggest to Friends” Click on that and then click the drop down tab to your list you made once that list pulls up on the top right hand side it will say “Select All” hit that and then send invitations. What this is doing is asking all the people you have been adding as friends to become a fan of your page!
Now this is what I do and share with people you are more than welcome to move it around however it works for you. Please let me know if you have any questions or suggestions of things that have helped you. I look forward to hearing from you.
Caitlin McDonaldhttps://socialspeaknetwork.com/wp-content/uploads/2018/04/SocialSpeak-Logo.pngCaitlin McDonald2017-05-14 10:48:422018-04-07 20:59:04Putting Together a Social Media Schedule
We are so excited to launch our second course, which launches June 9: Website in a Weekend!
This course is geared toward the do-it-yourself-er who is tech savvy, but just doesn’t know how to stylize and create a WordPress Website. We’ll be starting with the basics of purchasing hosting and installing WordPress and the Enfold theme, followed by selecting brand colors and fonts. At this point, I’ll bring your through creating captivating pages, inserting forms, and best practices for your website content.
The Website in a Weekend course includes self-paced lectures, handouts, tutorials, and step by step guides.
Over the course of June 23, 24, 25, I will be working with a select group of solopreneurs, marketing teams, business owners, bloggers, and those with brilliant ideas to create their dream websites. Prior to the weekend, I will host a free welcome webinar (registration below) to help you decide if you are a candidate for the Website in a Weekend course. I simplify the entire website design process, but still require individuals to be motivate and have some knowledge of technology.
For this weekend you will have access to me via the Members Only Facebook Group where I will be answering questions live. There is also the option for additional support that we can add on should you need it beyond this intensive weekend.
What’s Included in Website in a Weekend?
Module 1: Setting the Stage
Before you even start building your website, you need to think about your website and business as a whole. Here you will be guided through:
Defining your business
Researching your competitors
Thinking big
Module 2: Branding your Business
Without brand standards, your entire presence can feel disjoint. This is an integral piece to any marketing and can transform your website from blah to a true masterpiece. We will provide a:
Values tool to gain clarity on your person (and business) values
Font pairing workbook to select your core business fonts
Colors overview and step by step how to choose the colors that define your business
Overview of images and and overall feeling of your brand
Module 3: Your Website Content
We aren’t quite at setting up your website yet! Before you even create that first page of your site, it works best to know what pages you need and already have the content for those pages. Here you will:
Use a workbook to select the must-have pages on your site
Begin writing the content for these pages
Understand effective calls to action on your pages
You will also receive templates to write:
Your About Page
Services Pages
Product Pages
Module 4: Website Layout and Wireframe
Finally, let’s think about your website design. Here we will work through:
Identifying the elements of other websites that you are drawn to
Constructing your page hierarchy (which pages are parent pages vs subpages)
Building a wireframe (or visual layout of your website)
Module 5: Let’s Get to Building
As long as you have a guide and think only one step at a time, the technical side of building your site can actually be a breeze! You’ve already completed the tough stuff. Now we just need to work through putting the elements together. In this module we:
Purchase hosting and your domain if you haven’t already
Install Worpress and upload the Enfold theme (for $75, I am happy to complete this step for you)
Follow our Step by Step guide to checking your WordPress settings from hosting through to final design
Complete an overview of widgets on your site
Have access to numerous templates for page designs
Access to a guide to use additional elements in the Enfold theme
Why Enfold?
We love the Enfold theme and have found it customizes to really any design you desire without needing to add additional plugins or touch the code. From photographers to business consultants, technology companies and chiropracters, this theme does it all!
Module 6: Plugins
Though Enfold does it all, we have a list of plugins that we recommend for all websites to increase the search engine optimization, optimize your lead funnel, and more. This module
Walks you through the concept of a Plugin
Gives access to the top plugins we use for clients
Module 7: Forms, Freebies, and Subscribers
Congratulations! You have a beautiful, branded website to which you are empowered to make changes! A website is an ever-morphing project that can continue to grow as you write blog posts, expand your services, and create resources for prospects. The last piece of the puzzle is to set your business up for success using forms, freebies, and subscribers. Here you will:
Understand why freebies on your site are more than just giving information away for free
Receive step-by-step information on how to create and embed forms on your site using MailChimp
A sneak peak into Convert Kit for those looking to take their subscriber list to a new level
Templates for creating your own EBooks, Infographics, and more!
Once you complete the Website in a Weekend course, you will continue to have complete access to all the lectures, resources, handouts, and tools. Additionally, you will keep your membership to the Website in a Weekend Facebook Group for additional support from my team and other businesses that have been through the process of designing and building their website!
Next Steps? Join the Free Welcome Webinar on:
June 17, 2017 at 8 am Mountain Time (10 am ET)
On June 17th at 9 AM Mountain Time, join us for a Free Webinar to get started on your website design project. This course is designed for a specific group of people who are motivated and technically savvy enough to build their own website with guidance and over site from a WordPress website specialist. It is for the individual who has the goal of showing off their new site by July 4.
In this Free Webinar, you will have a clear sense of if the Website in a Weekend course is for you. You will also receive the first handouts for:
Beginning to organize your content
Brainstorming website design elements that you can’t live without
and more.
I know you are a busy professional, and taking time away from your business, family, and life two weekends in a row is a lot to ask! Because of this, even in the free June 17 webinar, I’ll be providing an in depth overview of exactly what you need to get started on a website design project.
Reserve your Seat Today
Enter your name and email address below to reserve your seat for the Website in a Weekend Welcome Webinar on June 17 at 8 am Mountain Time (10 am ET).
Success! I can't wait to 'meet' you at the Website in a Weekend Welcome Webinar.
Check your email leading up to June 17 for your webinar access information.
WordPress in a Weekend Pricing
Register for June 23, 24, 25 Launch
Lifetime access to all course materials including:
Lectures
Handouts
Step-by-step guides
Tutorials
Member only Facebook Group
Ability to build your site in 3 days
Only $397
Or 2 Payments of $198.50
Additional Support with Course
Lifetime access to all course materials with additional add-on support:
Two 30 minute personal phone calls to work through your individual questions
One hour website development to tackle technical troubles including inserting layout elements, uploading theme, changing formatting and CSS.
Caitlin McDonaldhttps://socialspeaknetwork.com/wp-content/uploads/2018/04/SocialSpeak-Logo.pngCaitlin McDonald2017-05-13 12:19:132018-05-18 20:04:18Website in a Weekend [New Course]
Optimizing your website properly is crucial to improving your site’s rank in search engines, as well as driving more potential customers to it.
Are you satisfied with your website’s performance? If not, then we urge to you to try these tips for optimizing your website.
Title tags matter
Title tags play an important role in optimizing your site. A title tag tells both the visitors and search engines what the page is all about.
A title that is highly relevant to the page it refers to will provide better usability and optimization for your search engine ranking. People won’t stay on your site if there’s no relevance and you’ll lose ranking in the end. The title tag should also be unique.
Select common-sense keywords
A search engine’s job is to refer users to websites and contents that are relevant to what they are looking for. If you run a chocolate chip cookie business and you want your website on the first page of Google, then you need to write blogs that are related to this topic. Use keywords like chocolate chips, chocolate, sweets, baked goods and desserts. When incorporating keywords into your content, make sure they sound natural to the reader.
Write great content
Dedicate some time to write content that are useful and engaging for humans. As Google’s algorithm become increasingly complex and intelligent, it is no longer sufficient to create content, stuff it with keywords and publish them to your site. If you want to your content to rank in search engines, you need to provide visitors with relevant and well-written content. Remember, content still reigns as the king in the world of search engine optimization.
Continuous testing and measuring
The process of optimization is not a one-time process. It requires tuning, maintenance, as well as constant testing and measuring. Something as simple as testing the layout of your landing page, the wording of your call-to-action or the images you’re using can do wonders for your click-through rates.
Caitlin McDonaldhttps://socialspeaknetwork.com/wp-content/uploads/2018/04/SocialSpeak-Logo.pngCaitlin McDonald2017-05-12 09:11:072018-04-07 20:46:25Simple Tips to Optimize Your Website